
Steps to Configure Vendor Code (navdeep)
Use this flow when your courier integration resolves pickup/drop/return vendor code from Clickpost (e.g Delhivery). The steps are the same for every carrier account that shows Vendor Code under Set up.
Step 1 — Open Vendor Code
- Go to Carrier Integrations and open your courier account (for example Delhivery or Xpressbees B2C SPS).
- In the left Set up menu, click Vendor Code.
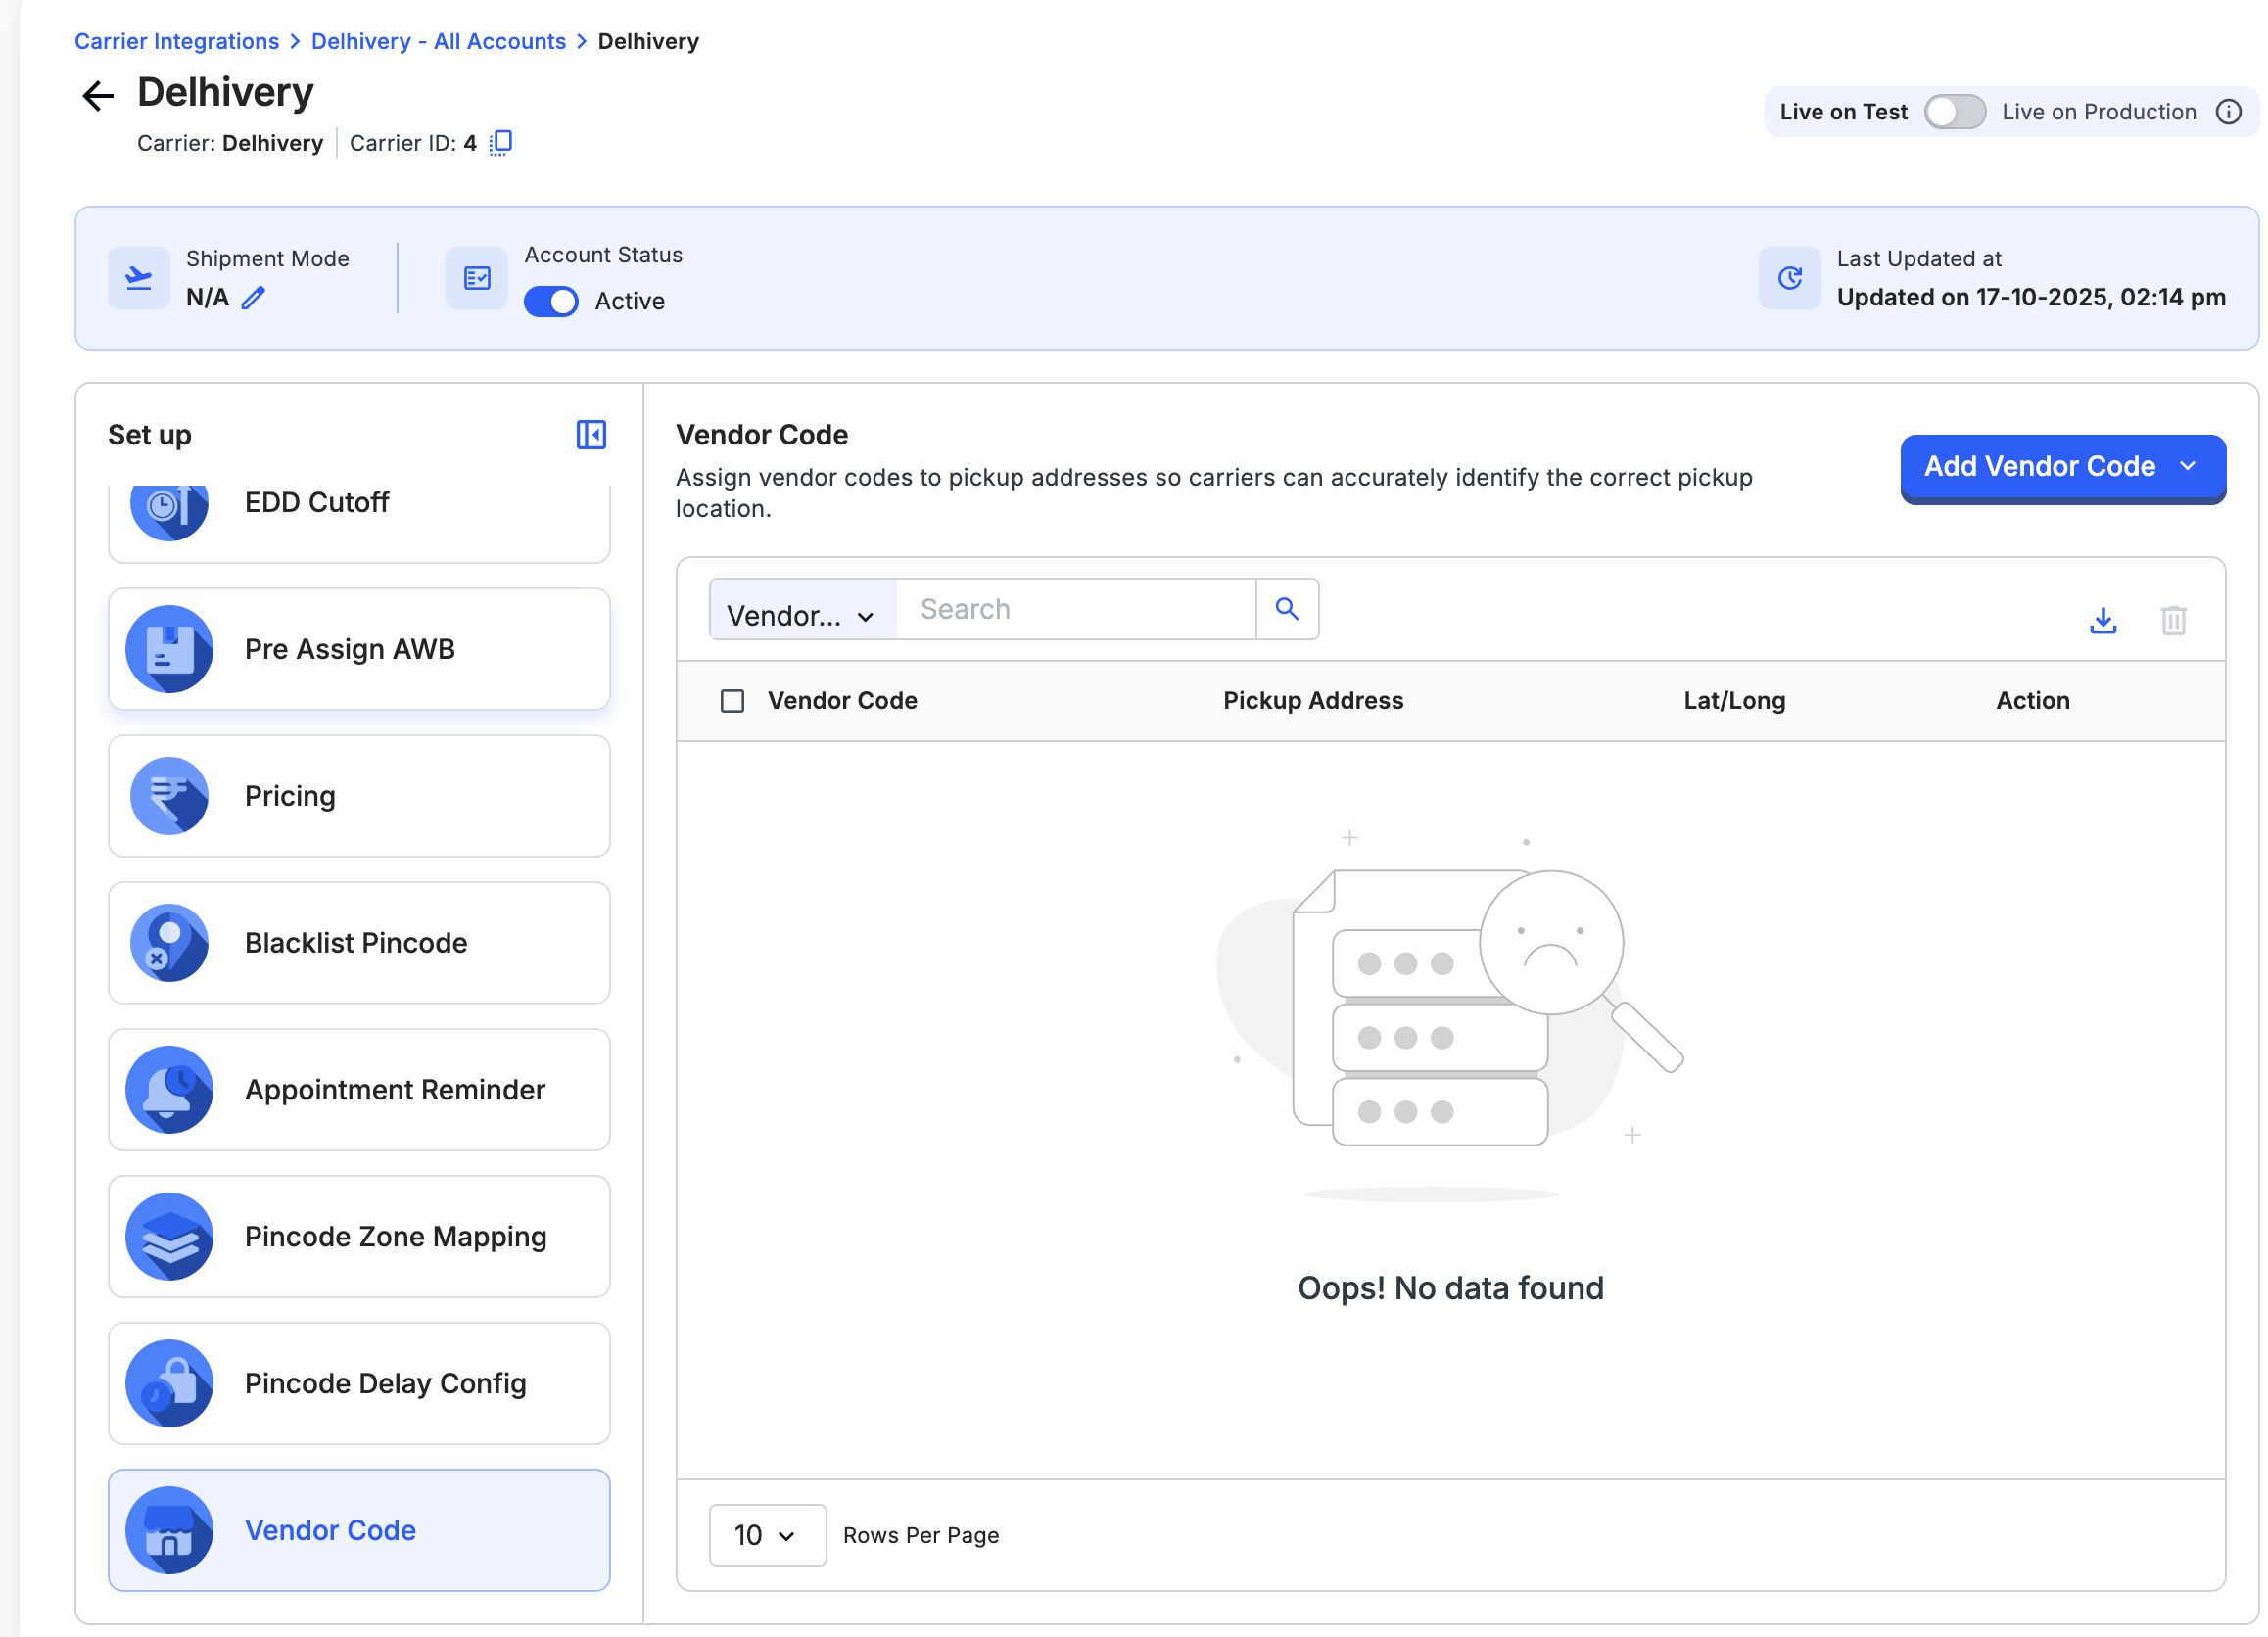
Step 2 — Add a vendor code row
- Click Add Vendor Code.
- Fill every field so it matches the pickup/drop/return address you send on create-order : same vendor code (from the courier or your agreed code), address line, city, state, pincode, and country. Do not use a shortened or alternate spelling if orders use the full address.
- Click Submit.
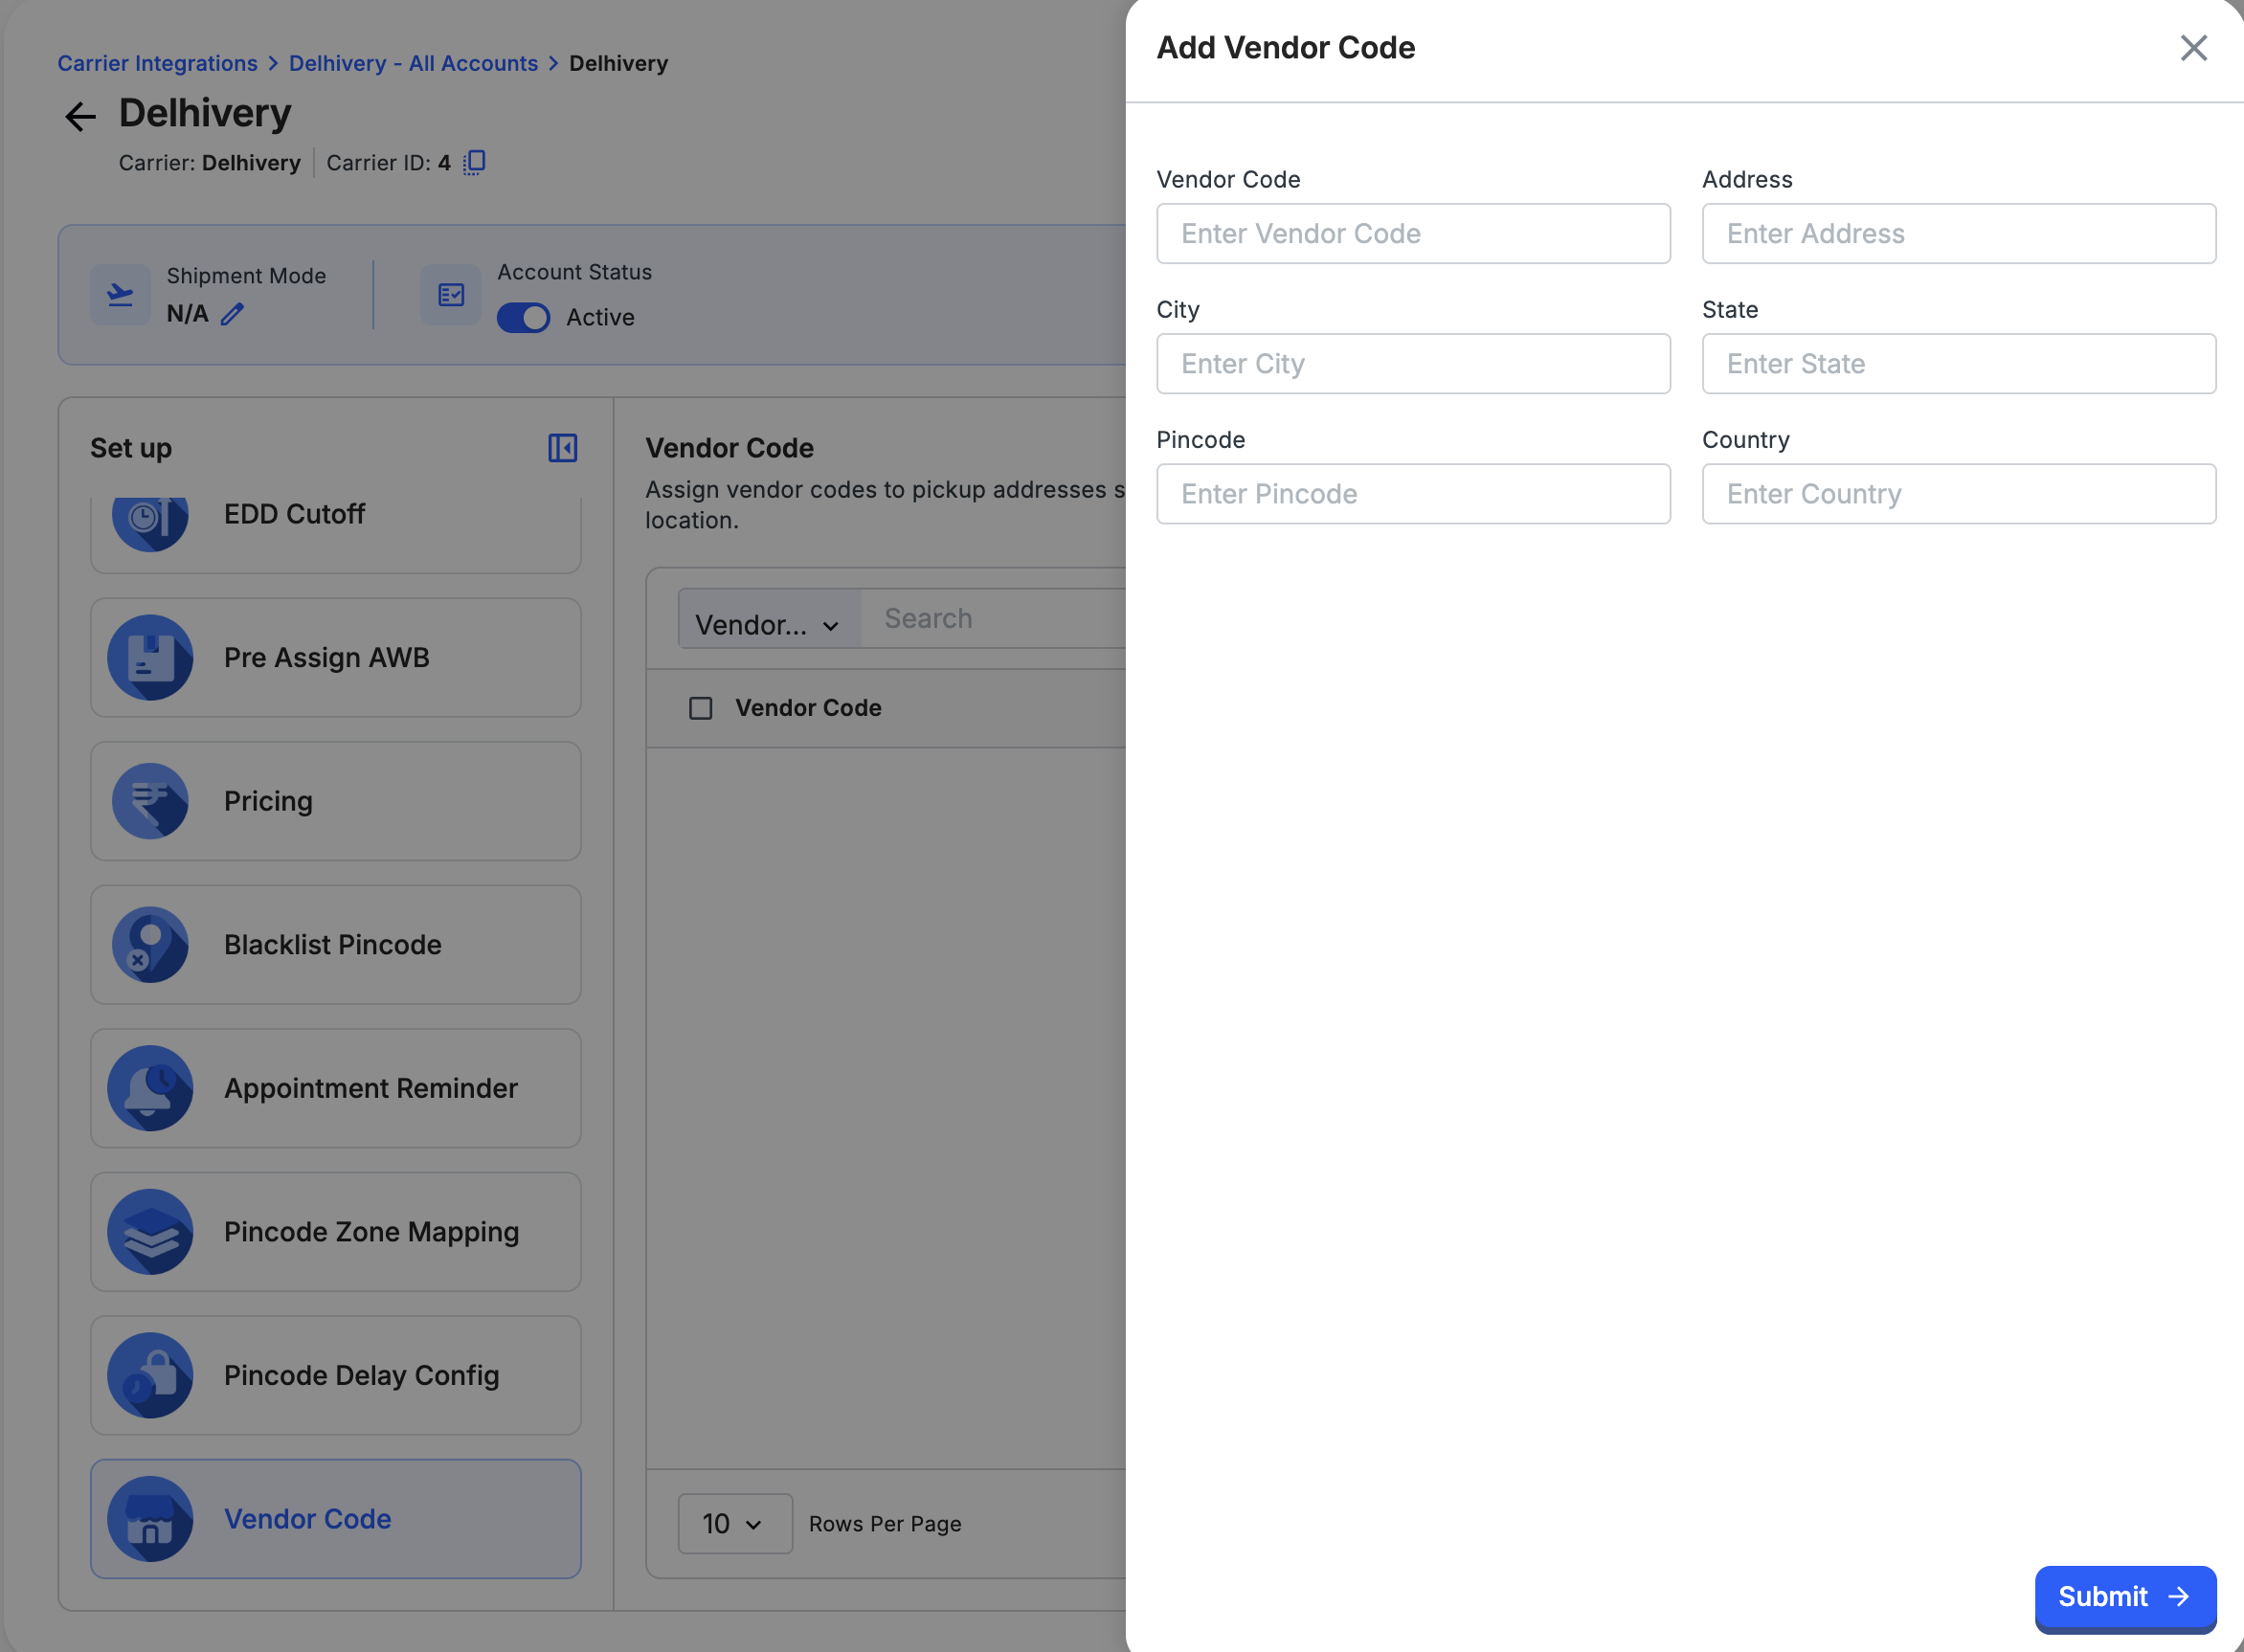
| Field | What to enter |
|---|---|
| Vendor Code | Code registered with the courier for this pickup location (or the code Clickpost assigned after courier registration, if applicable). |
| Address | Same pickup address line as on create-order. |
| City | Same as pickup_info.pickup_city. |
| State | Same as pickup_info.pickup_state. |
| Pincode | Same as pickup_info.pickup_pincode. |
| Country | Same as pickup_info.pickup_country (for example IN). |
After you save
- Place a test create-order using that pickup address (or pass the same value in
additional.vendor_codewhen your courier doc allows it). - Add one row per distinct pickup location you ship from.
Common mistake: Vendor code or address on this screen does not match the pickup/drop/return on the order — create-order fails or the courier sees the wrong warehouse.
Updated 26 days ago
Did this page help you?