Create an Courier partner Account
Please follow the below steps 1- 6 in order to configure/update a courier partner account before starting with the courier partner onboarding documents.
-
Visit the Clickpost dashboard: https://dashboard.clickpost.ai/settings/courier/integrations.
-
Search any courier partner name you wish to integrate into the search bar, select it, and Click: "Create Account".
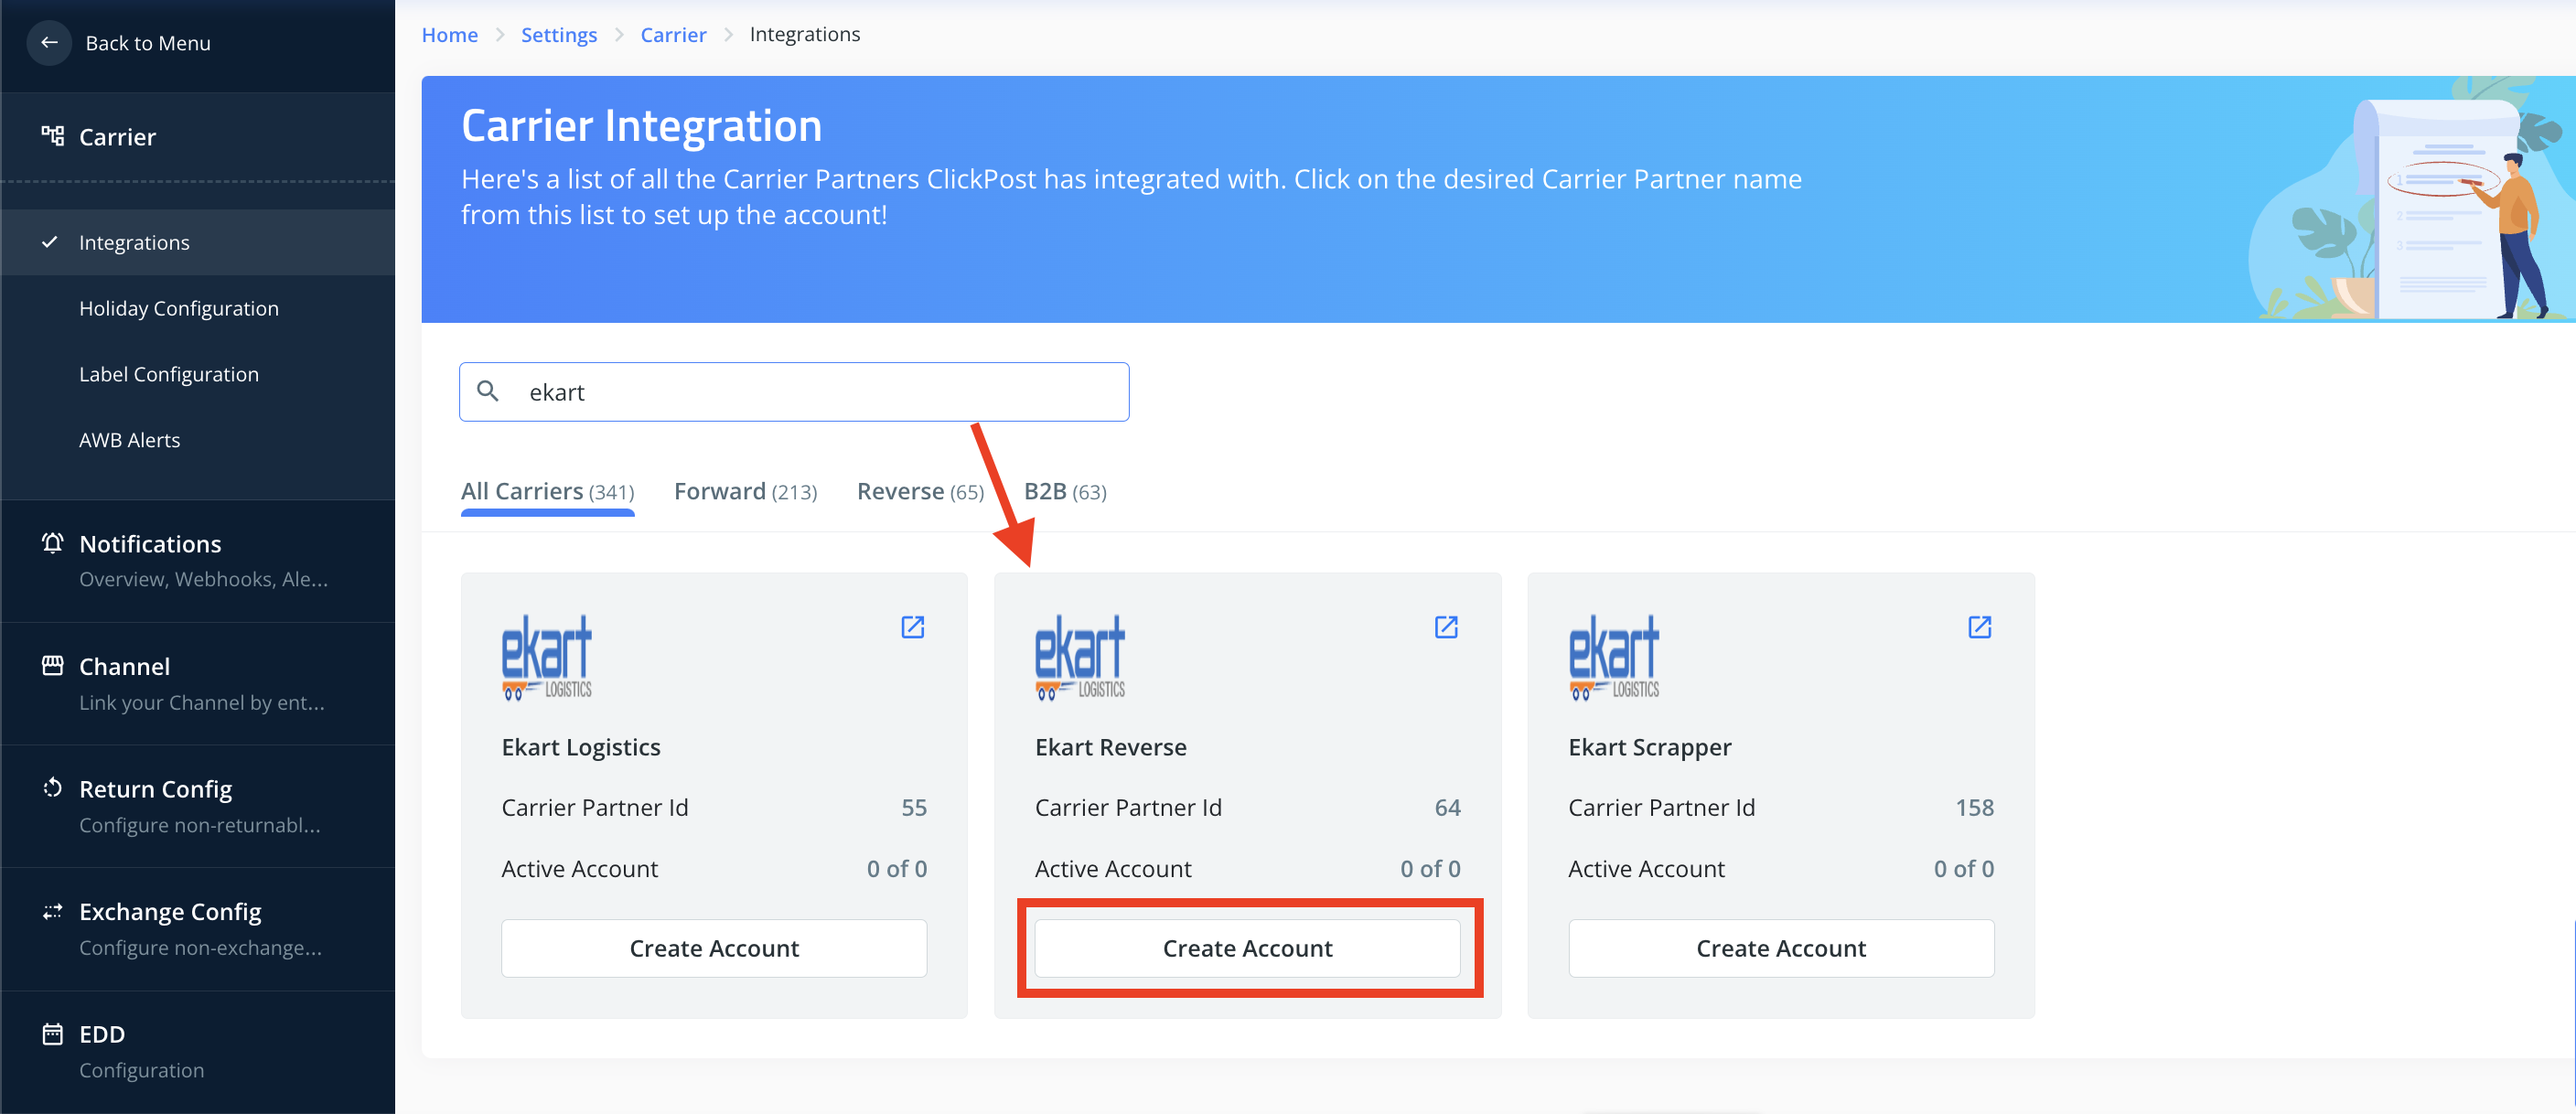
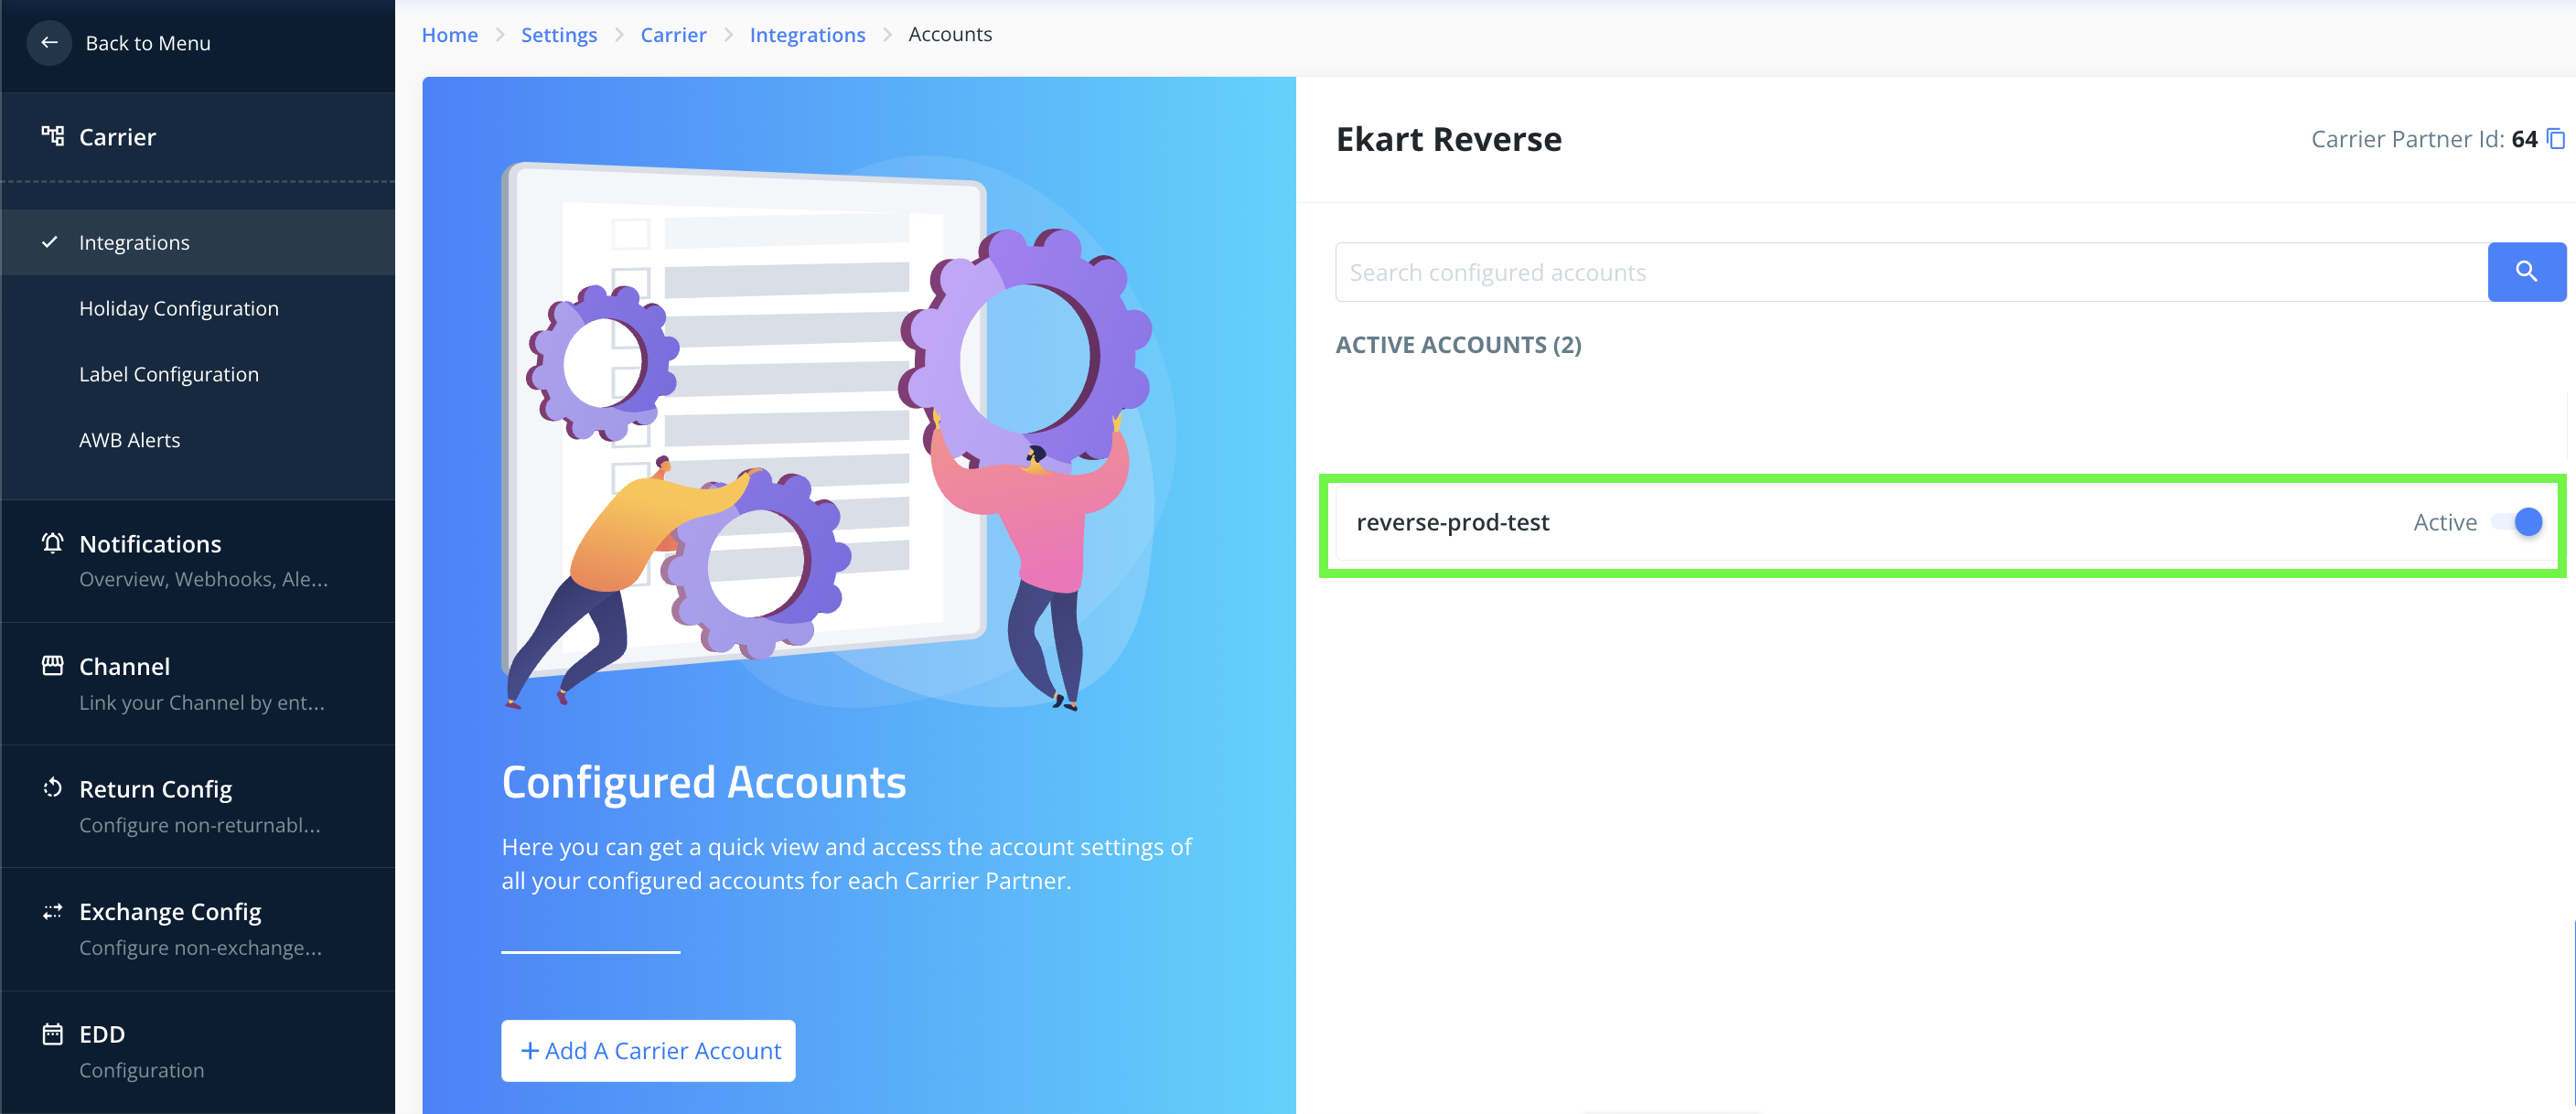
- On the next screen, Click on the "Add A Carrier Account" button.

- In the text input field, add the name that you'd want to associate with this instance of courier account. This is the account_code value that will be needed to be passed in the Clickpost APIs for shipment creation, cancellation, and tracking. Here we are giving it a placeholder name -- reverse-prod-test.

- Once done, you'll be greeted with a screen like this. You can click on the field referring to the new account that you just created.
-
Upon clicking, you'll see the courier account section like the following. Each account can have differing credentials due to different modes of transportation, location of origin warehouse, speed of shipping, different label configuration, etc.
To add credentials to your account, just click on the Credential.

Now you can follow with steps in the specific courier partner document to complete onboarding successfully.
Here's a Video Guide:
Updated 12 months ago