
ATS - Amazon Shipping
Amazon Transportation Services (ATS) offers various shipping and logistics services, including air, ground, and ocean freight. They also offer warehousing and fulfillment services. This allows Amazon to deliver products to customers worldwide quickly and efficiently.
Courier Partner ID: 212
Services Integrated
- Order Creation
- Order Cancellation
- Tracking via Webhook
- Non-Delivery Report
- Label Generation
- Tracking via Polling
Steps to set up ATS (Amazon Transportation Services) on Clickpost
Step 1: Access the Amazon Transportation Services Integration
Navigate to the Carrier Integrations section in Clickpost, locate Amazon Transportation Services, and click View Accounts.
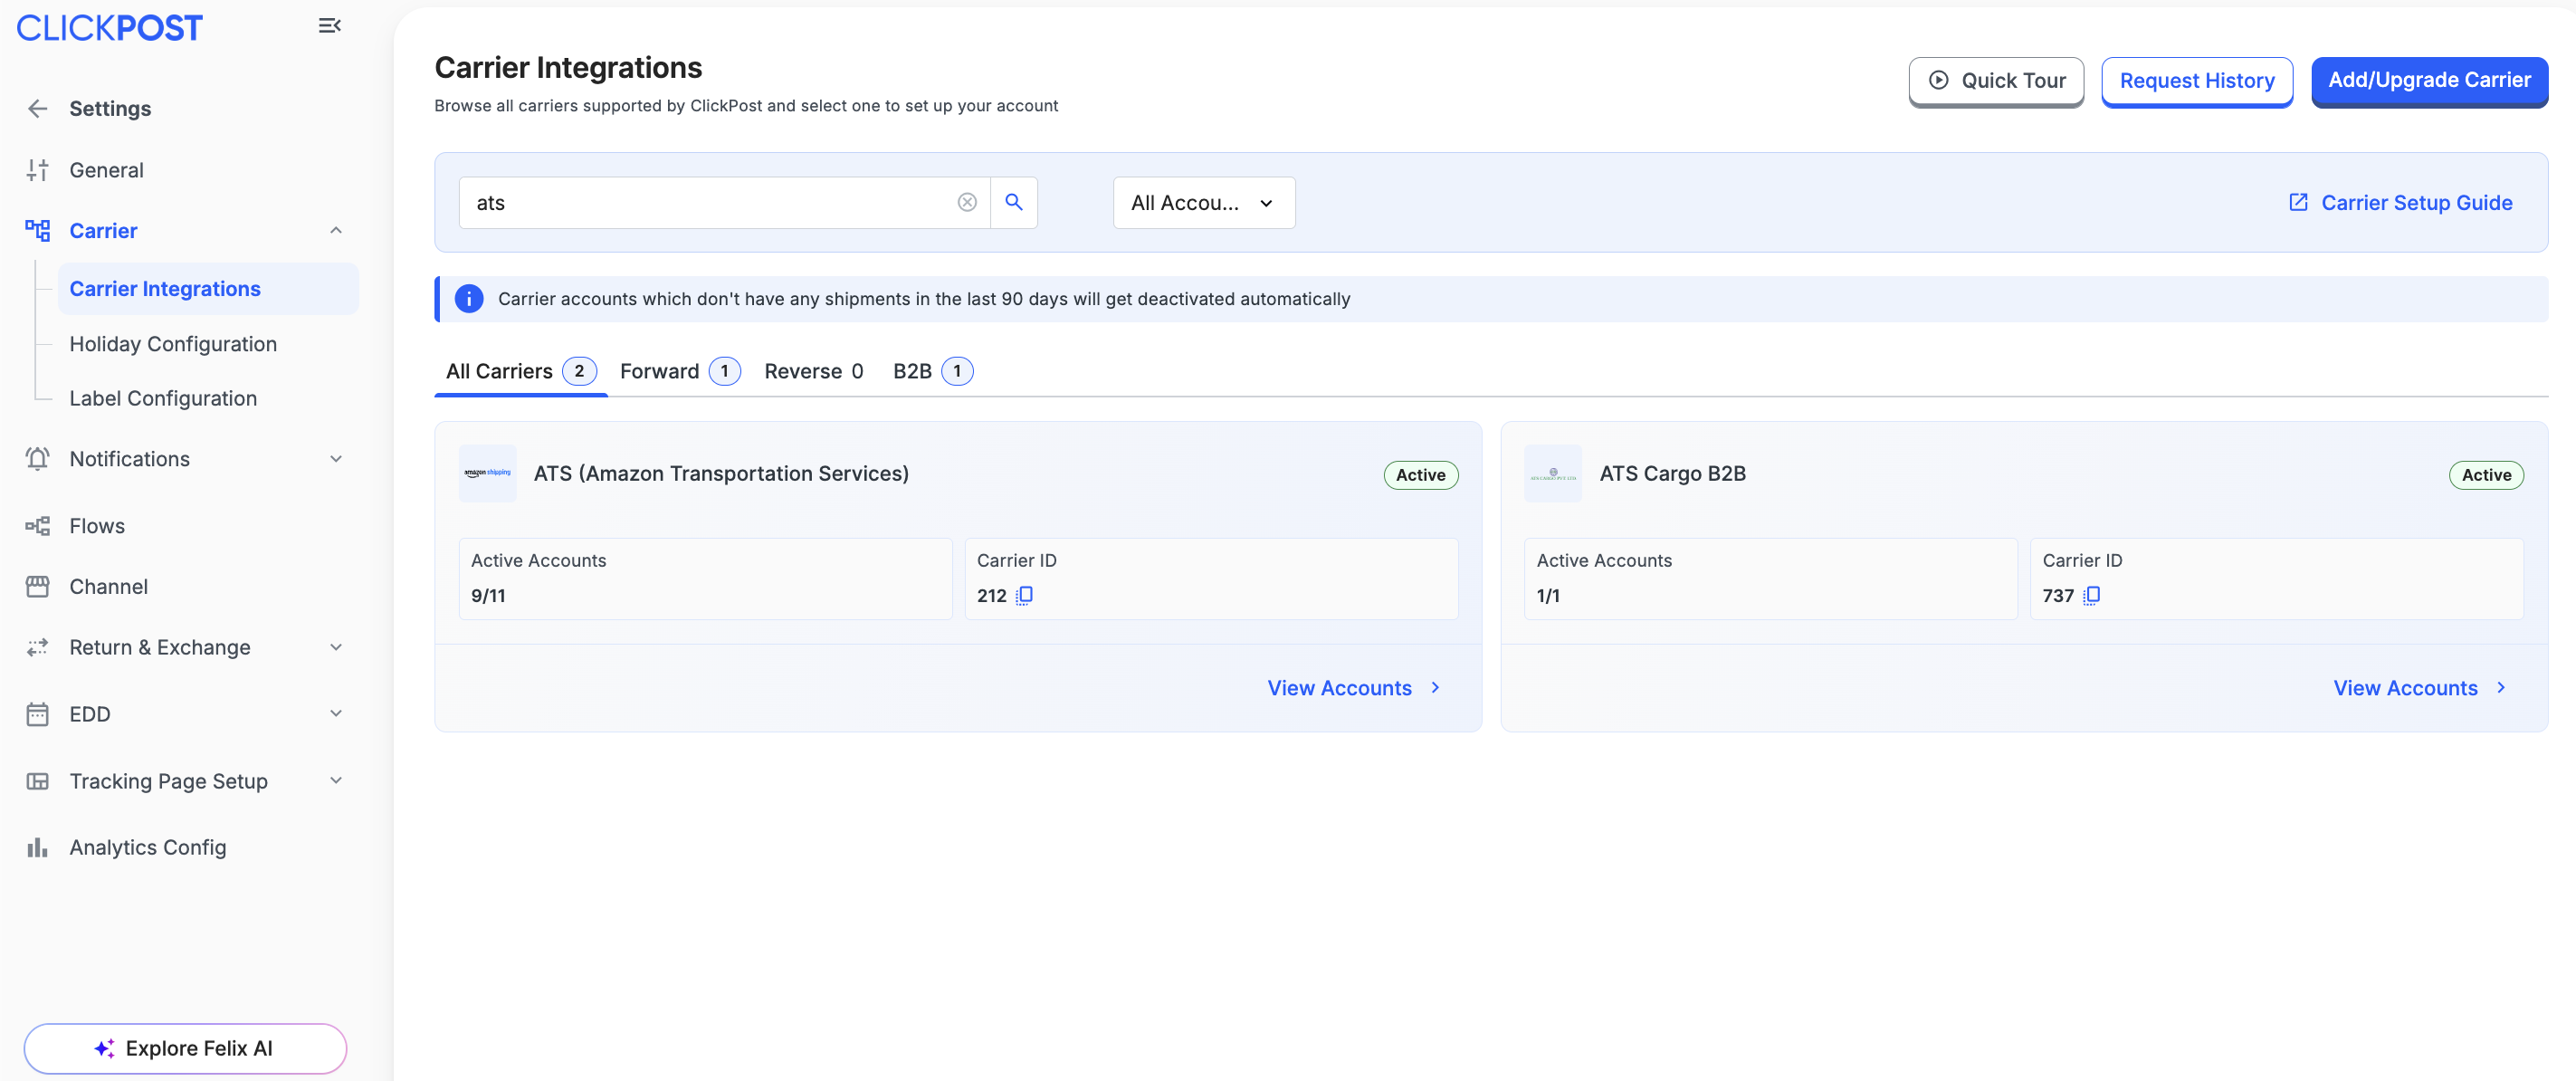
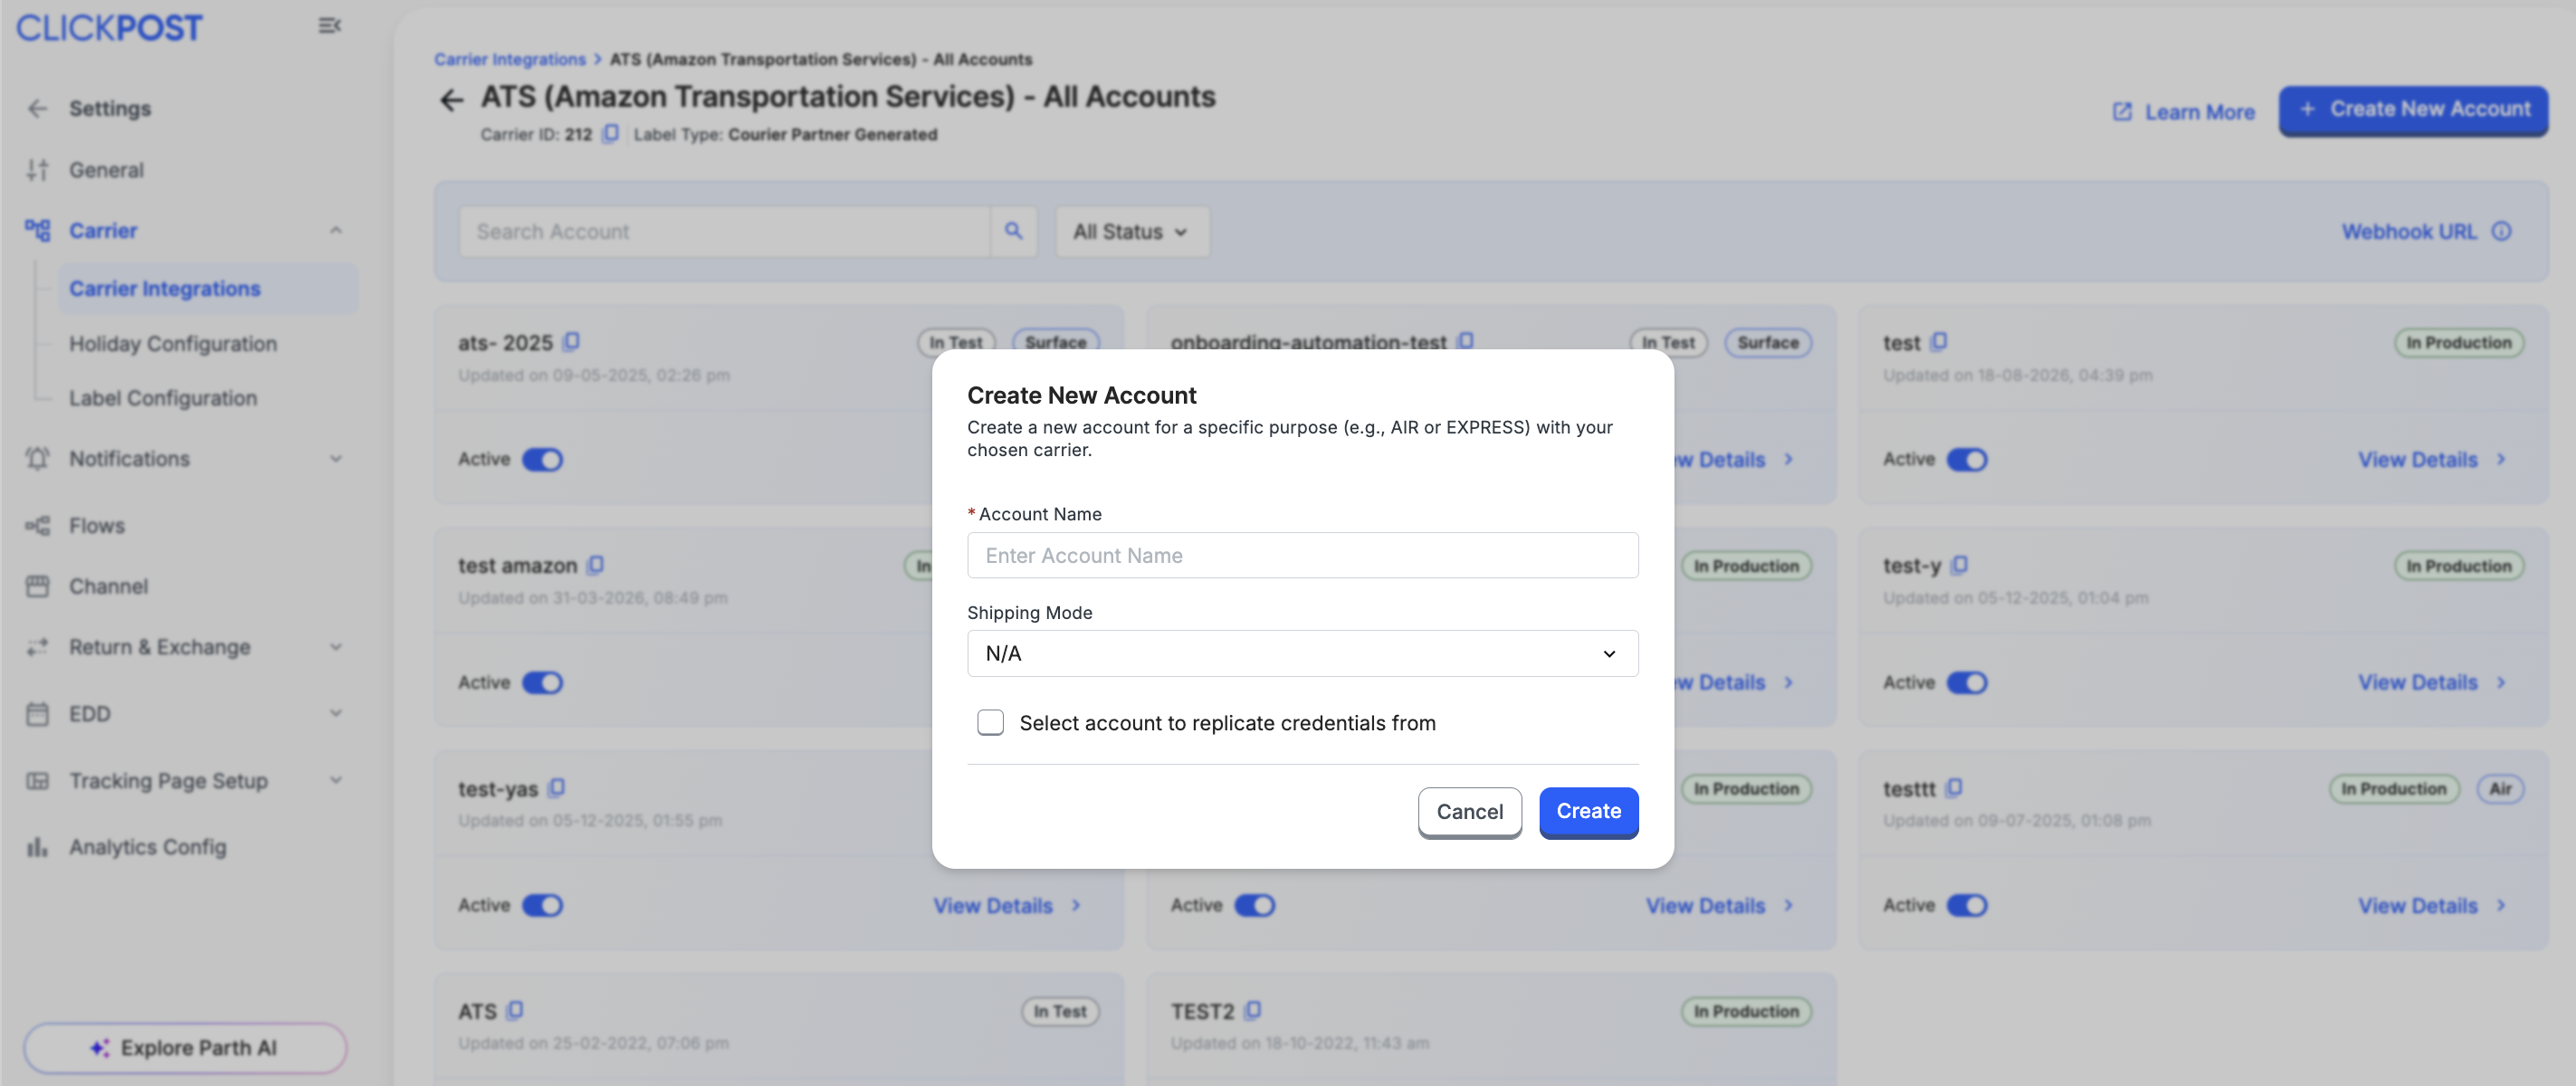
Step 2: Create a New ATS Account Entry
On the Amazon Transportation Services accounts page, click Create New Account, enter a clear and identifiable Account Name, and then click Create.
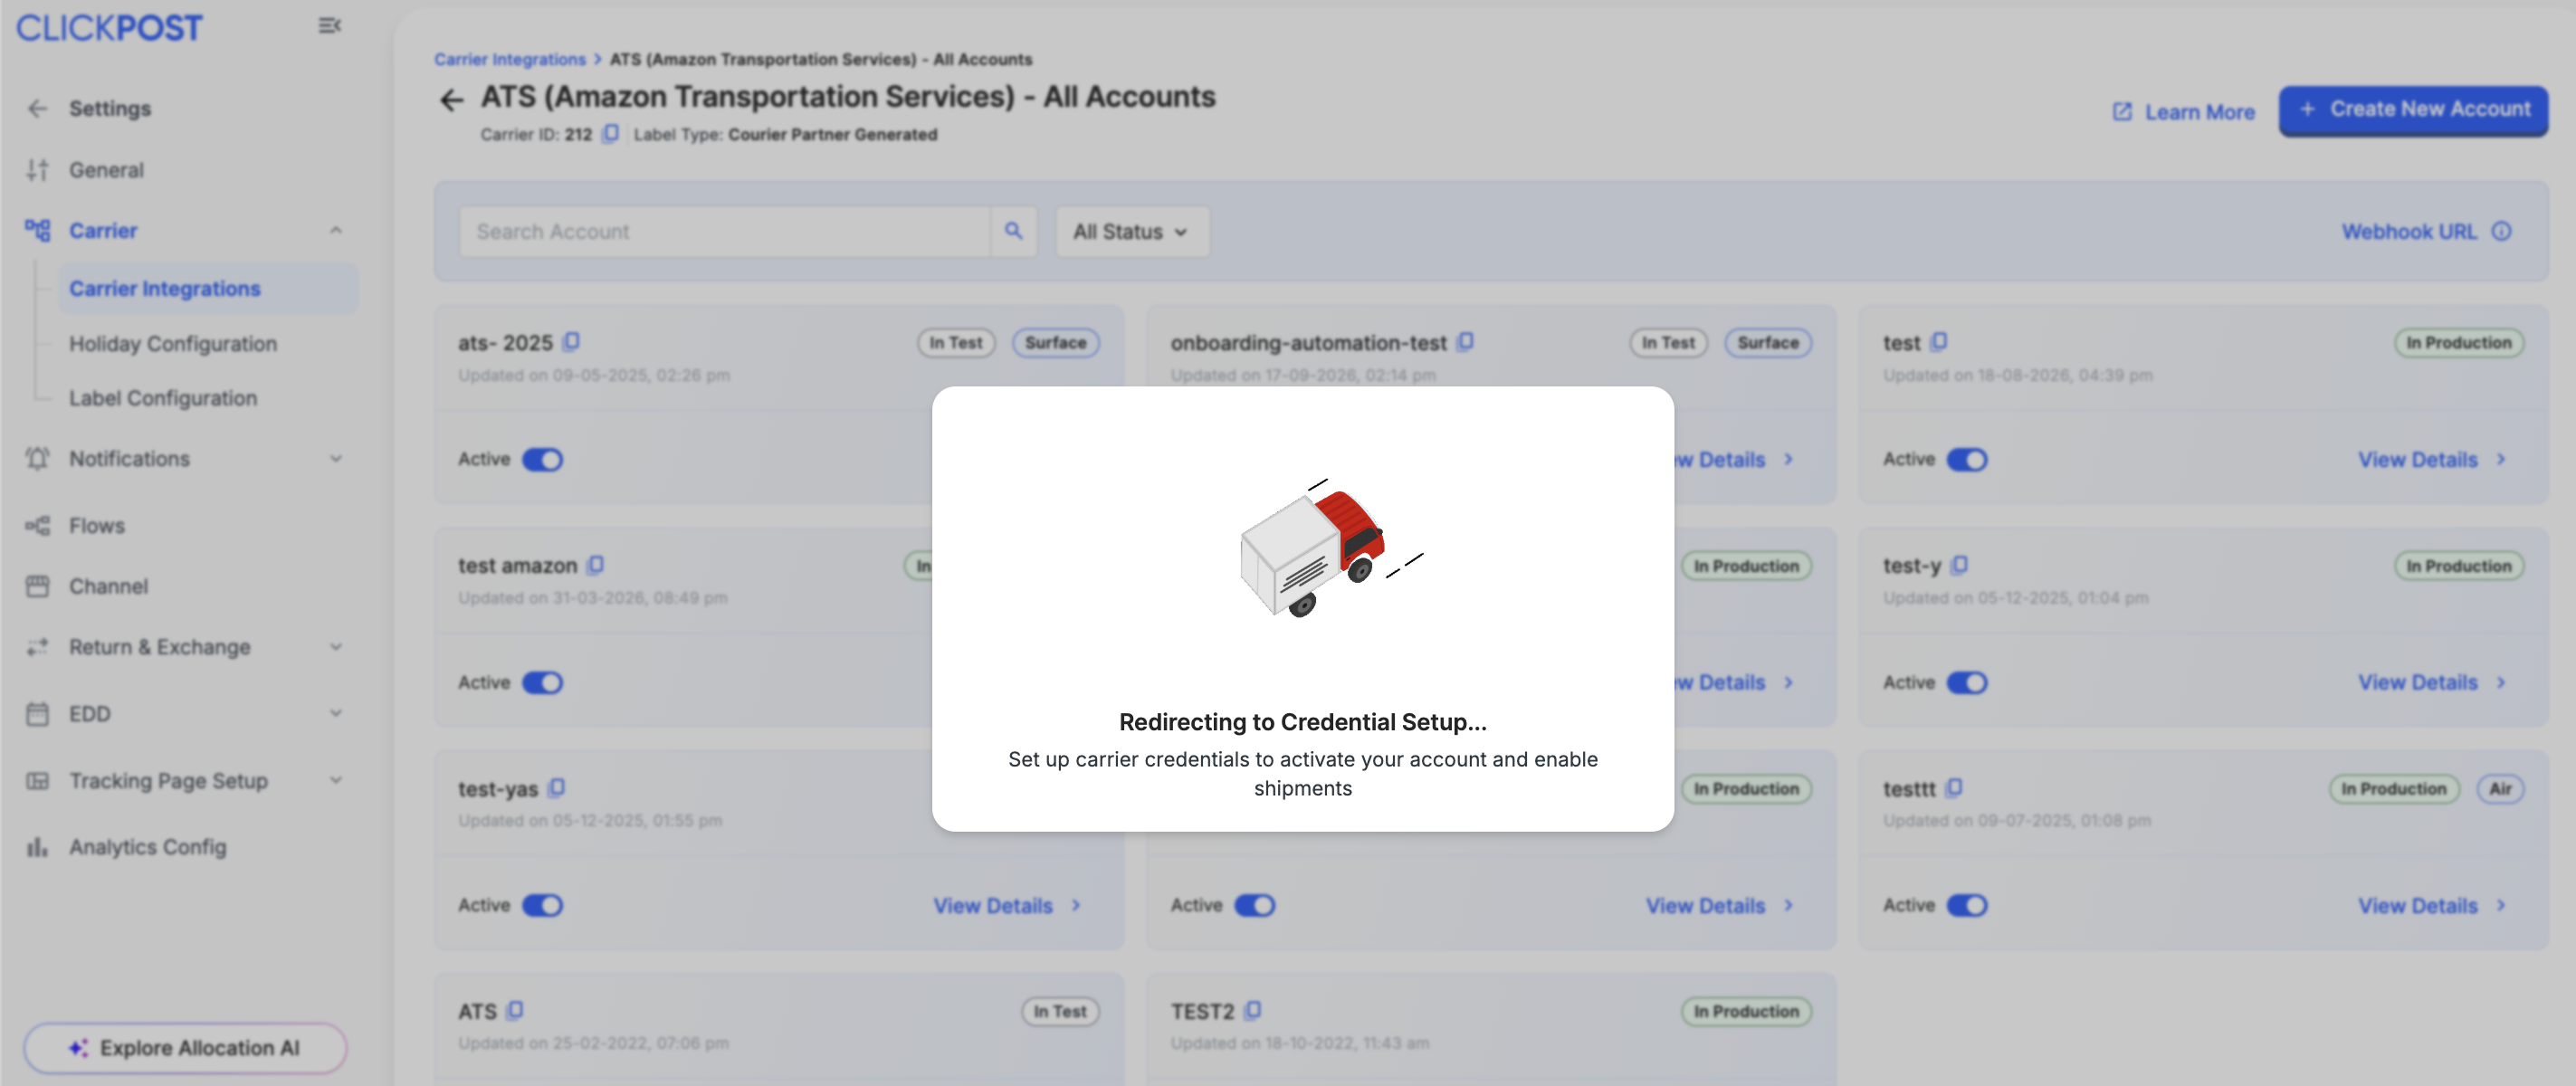
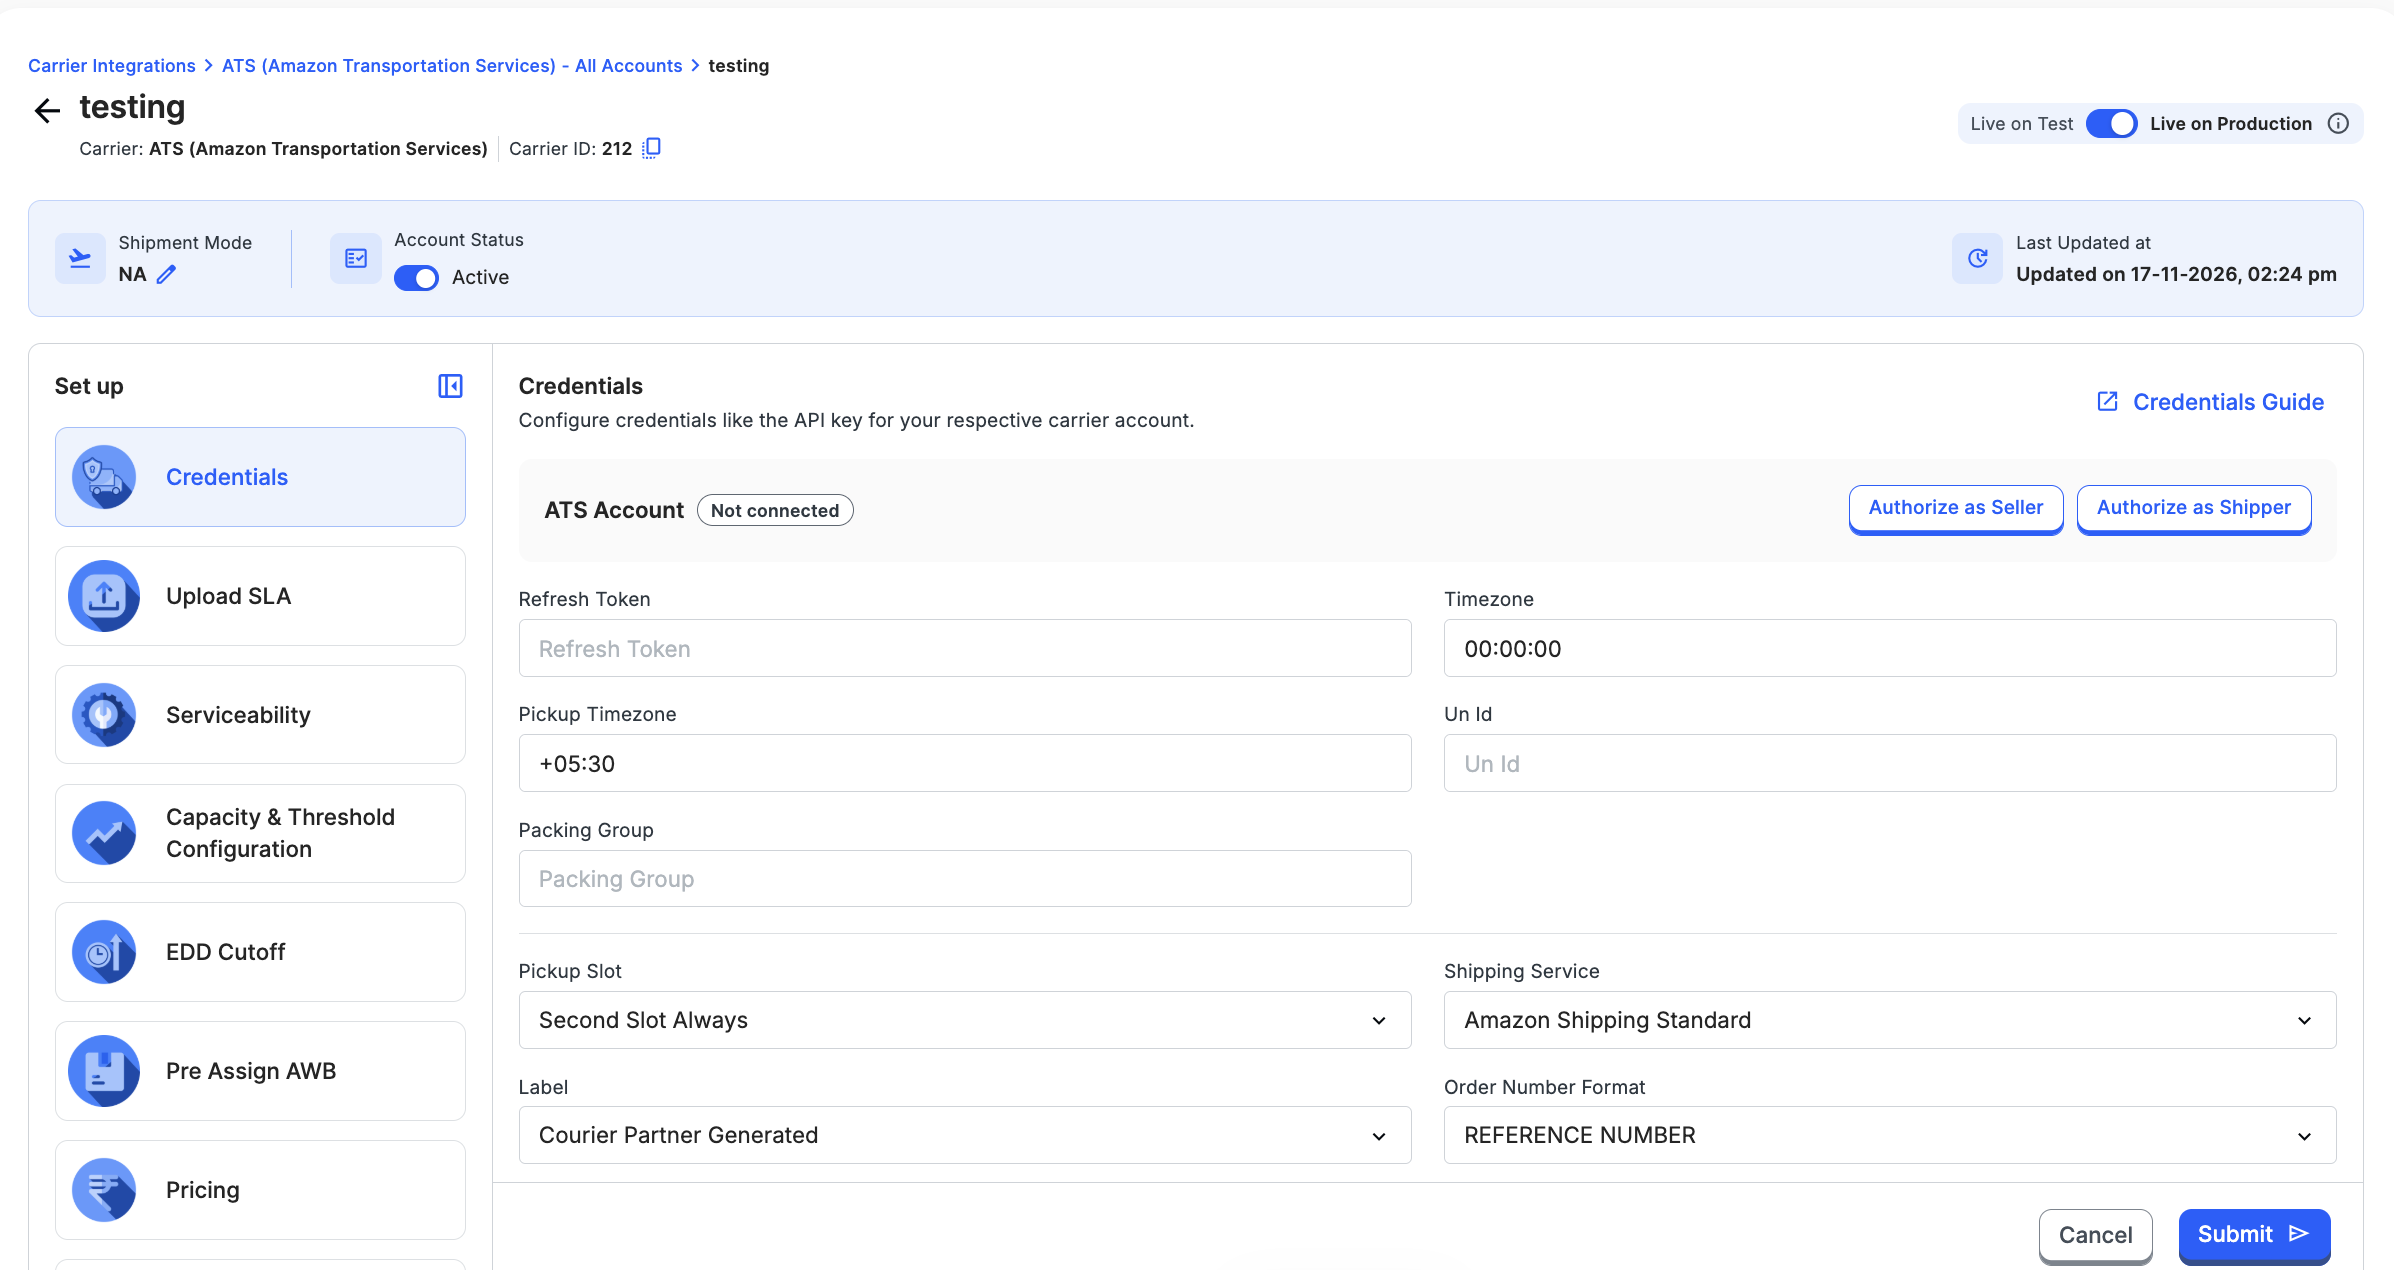
Step 3: Open the Credentials Setup and Start Authorization
Wait to be redirected to the Credentials Setup page for the new account, then click Authorize as Shipper if you have a Shipper account, or click Seller if you have a Seller Central account to begin linking your Amazon Shipping credentials.
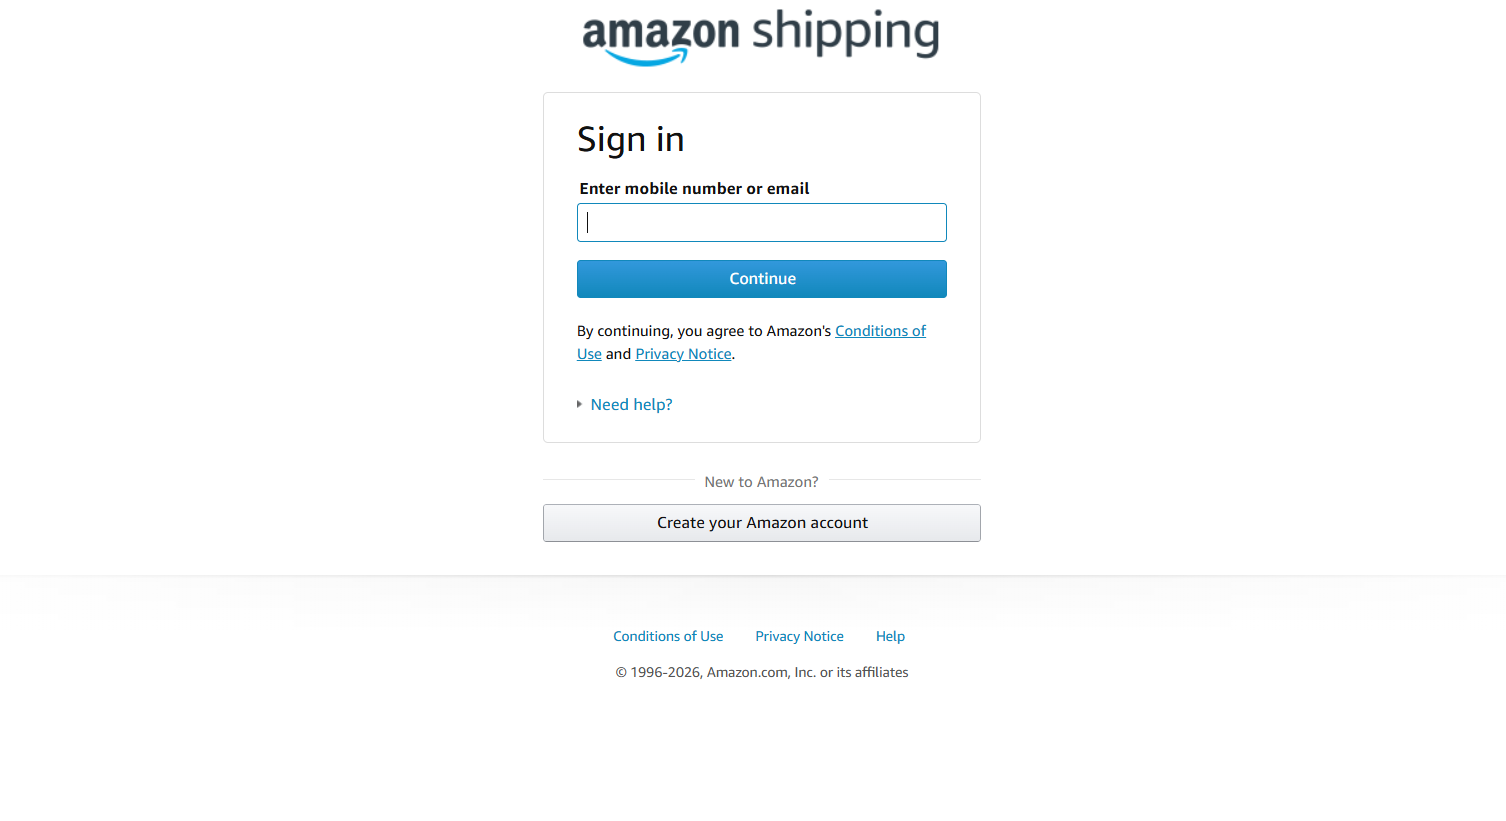
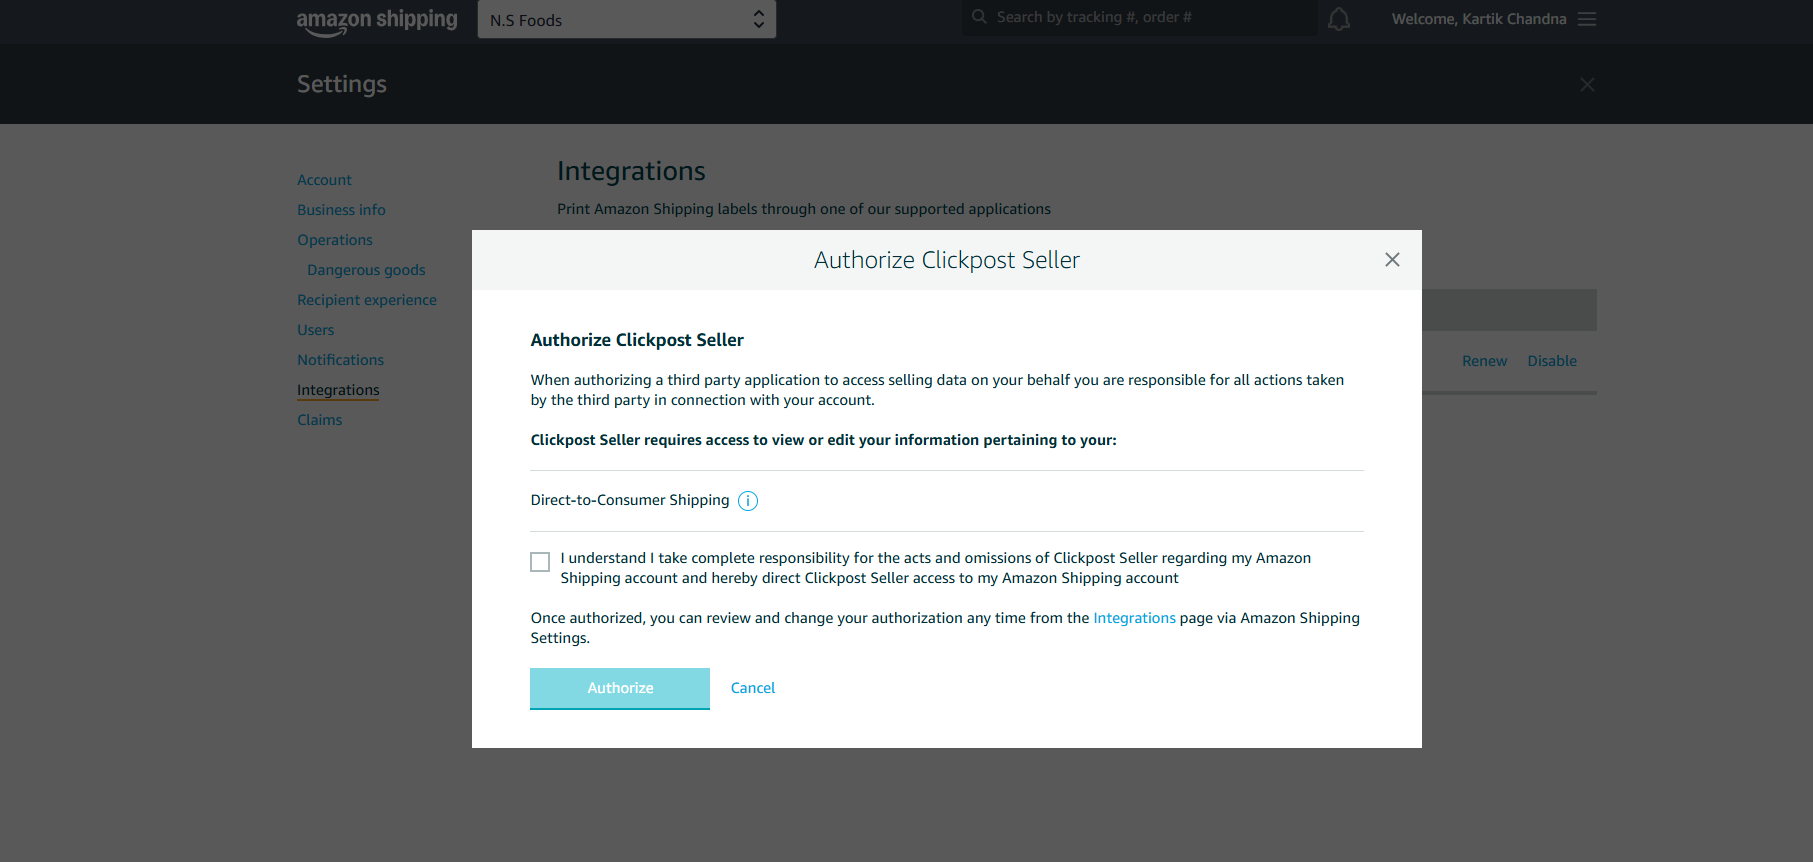
Step 4: Authorize with Your Amazon Shipping Account
Sign in using your Amazon Shipping account credentials. Select the acknowledgment checkbox to confirm your responsibility for the integration and click Authorize to grant Clickpost access.
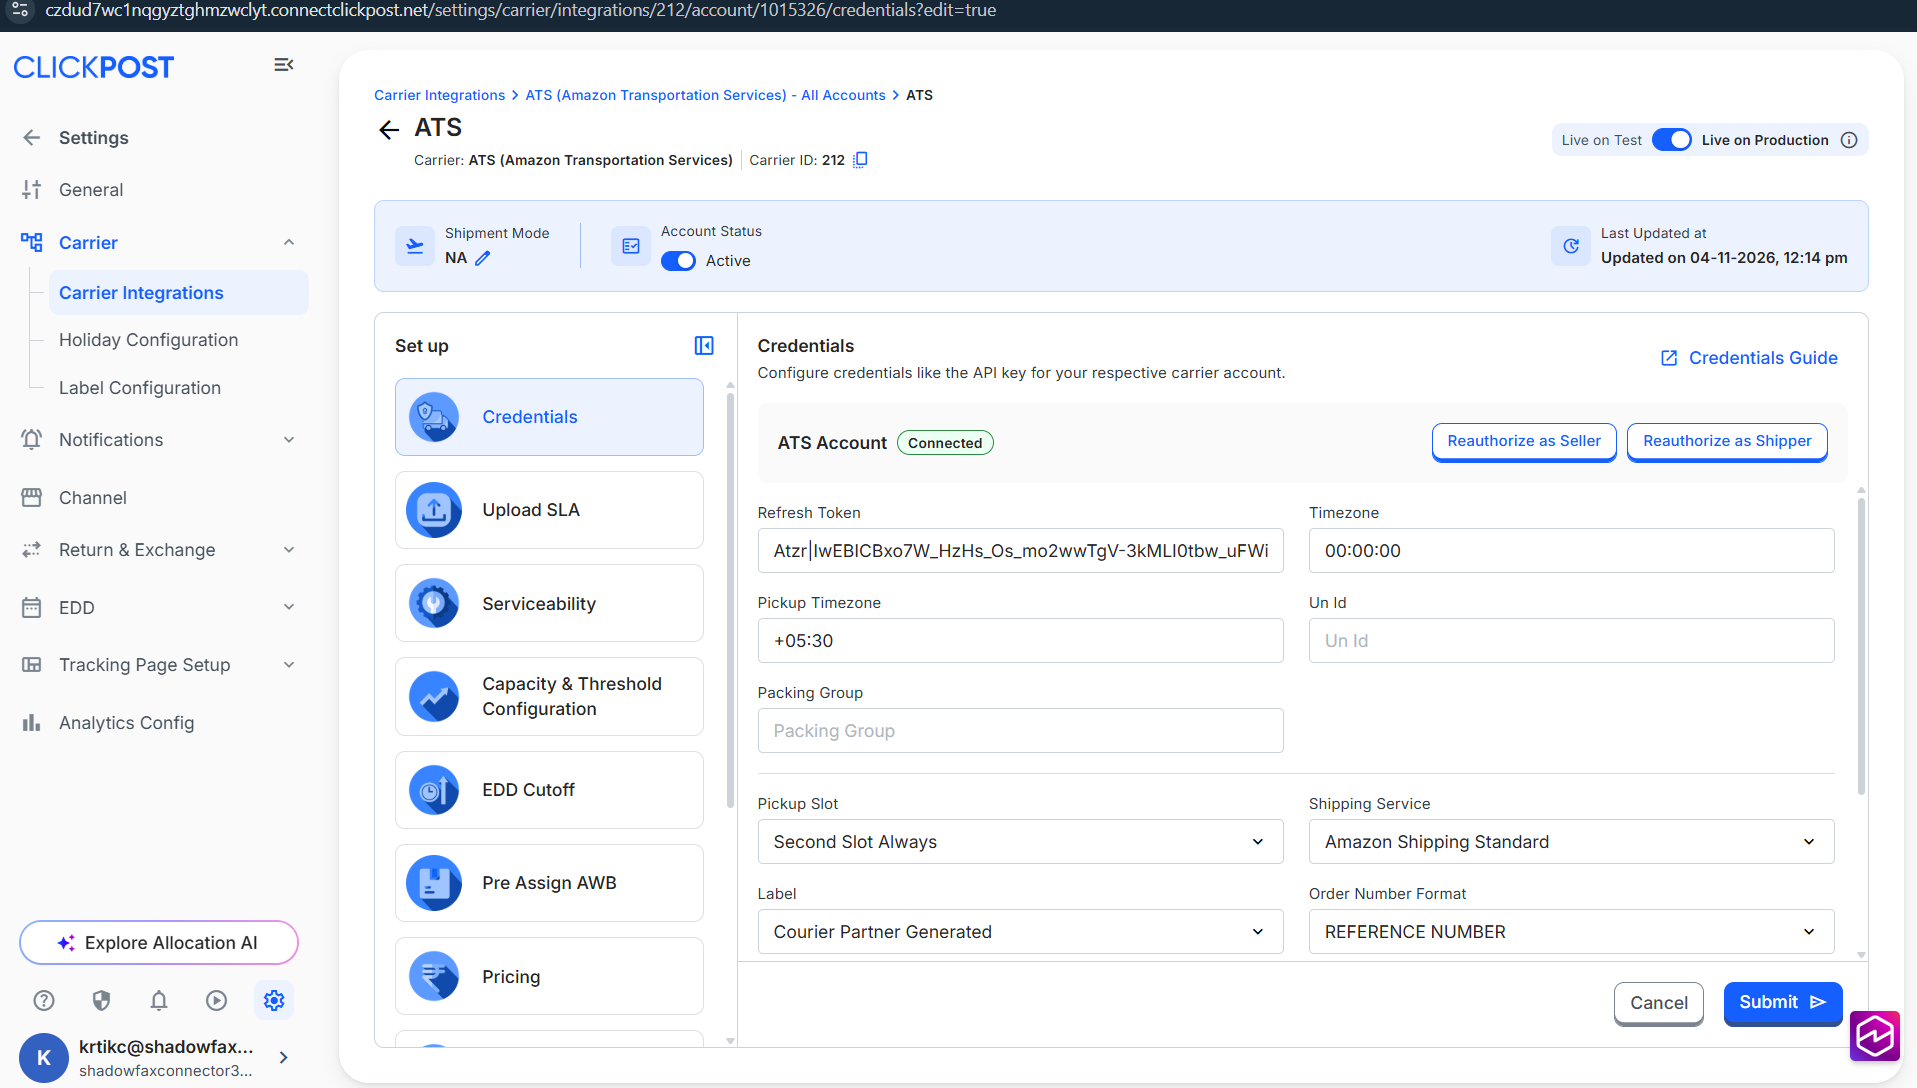
Step 5: Review and Submit Connected Credentials
Review the connected credentials and configuration details shown on the screen to ensure they are correct, then click Submit to finalize the connection.
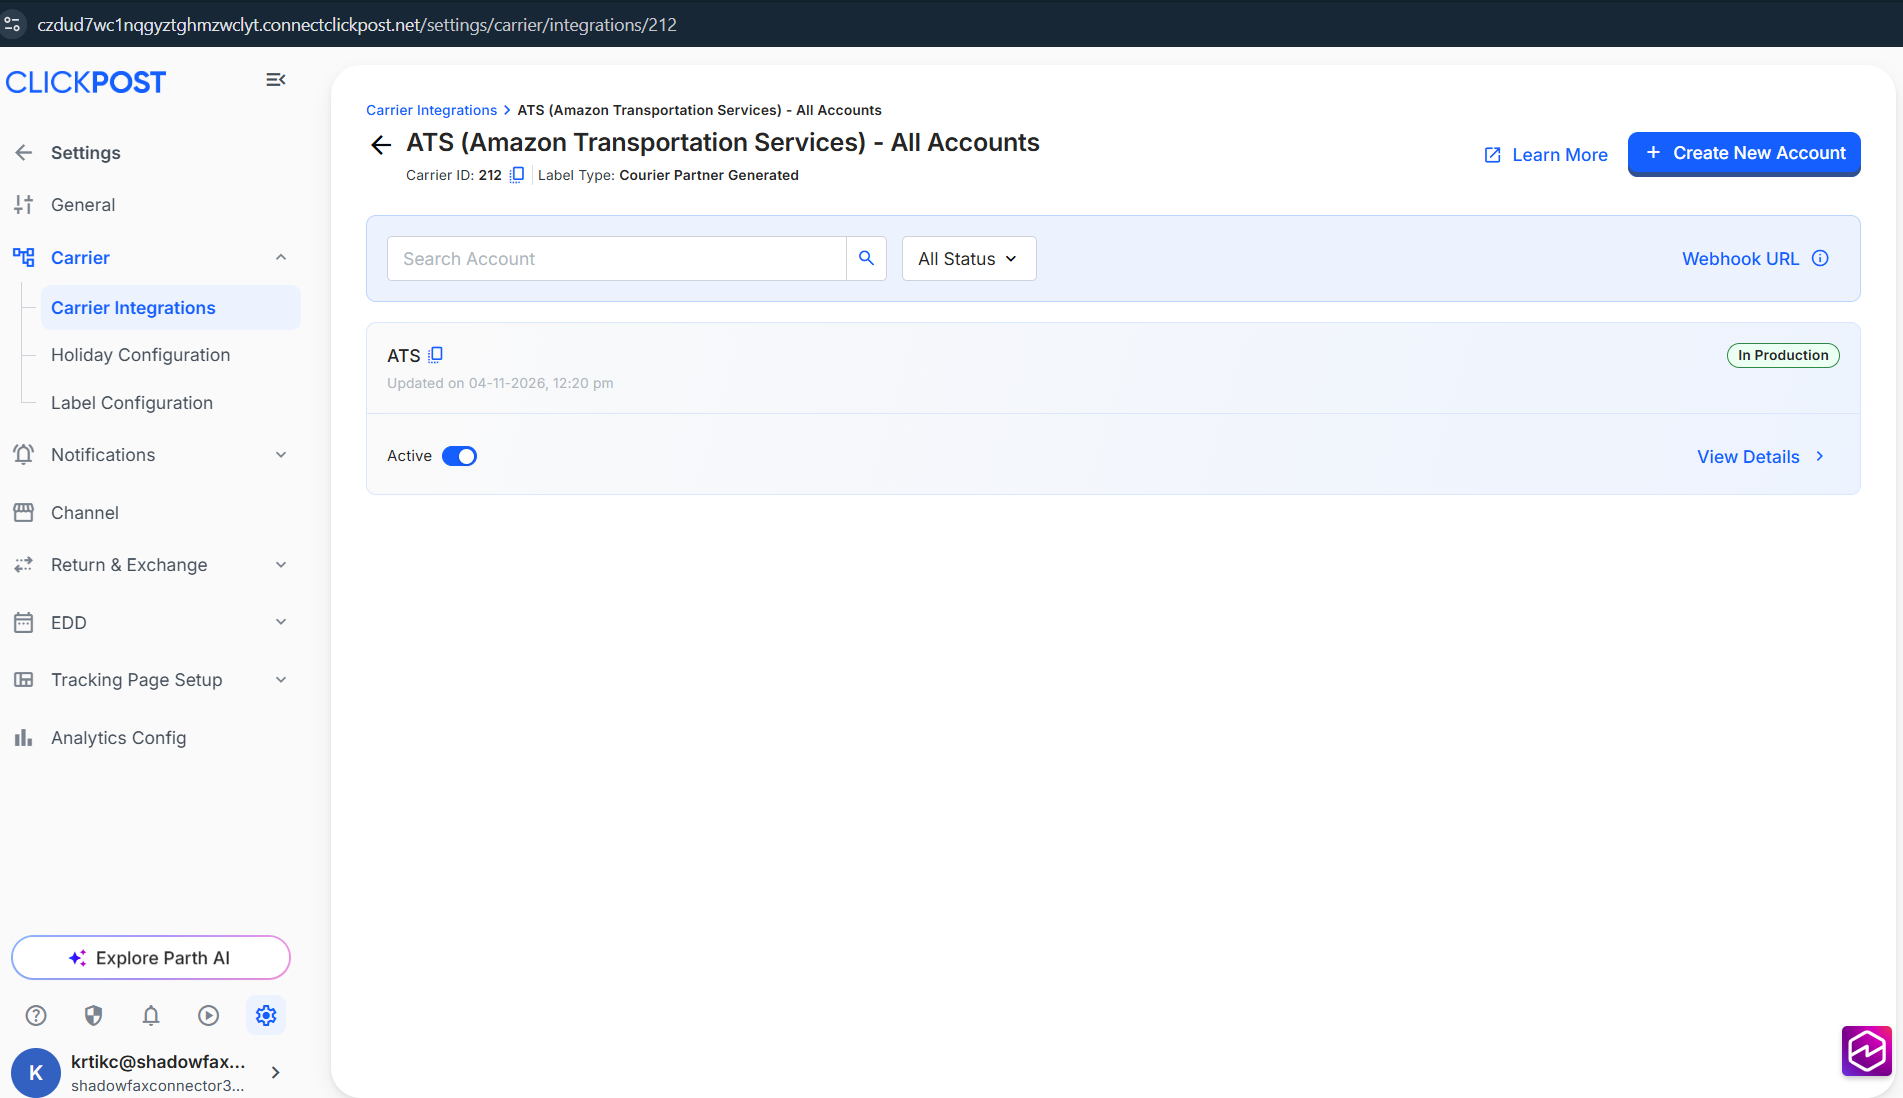
Step 6: Verify the ATS Account Status
Confirm that the newly created ATS account is marked as Active and configured for Production, indicating that the integration is successfully set up and ready for use.
Note: Authenticate only once to avoid conflicting tokens. Inactive for 90+ days? Click Reauthorise.
Here, you can add the credentials shared by the ATS team. To give you a brief:
| Name | value | description |
|---|---|---|
Enter refresh_token | Configure this as mentioned in the steps above | |
Enter timezone | For IST customers, it’ll always be 05:30:00 | The timezone in which the enterprise is going to send. E.g.: If the enterprise sends us the pickup time in the format. If the enterprise sets this field as. |
Enter pickup slot | Two possible values: Next Available Slot Second Slot Always ATS has two pickup slots in its API:
| Second Slot Always Next Available Slot For such scenarios, they can choose the Next Available Slot |
Enter pickup_timezone | +HH:MM | Enter the timezone offset for the pickup location |
Enter shipping service | AIR / EXP / STD | Choose your preferred shipping service between :
|
Enter activate service flow | Yes/No | A toggle to activate or deactivate the integration's service flow |
Enter label | Defines the format or source of the shipping label to be used. Select between:
| |
Enter order number format | Defines the format in which you want to pass the order number. Select between:
| |
Enter dangerous goods | Yes/No | A toggle to activate or deactivate the ATS DG service flow |
Enter un_id | It is a crucial four-digit identification number assigned by the United Nations to hazardous chemicals, substances, or materials that may pose risks during transportation. When creating a shipment on Amazon for hazardous items (such as lithium batteries, aerosols, or chemicals), you must use the "UN" prefix followed by the number (e.g., UN3480 for lithium-ion batteries, UN1993 for flammable liquids) | |
Enter packing_group | On Amazon, a "Dangerous Goods Packing Group" classifies hazardous products by their risk level (I, II, or III) to determine necessary safety precautions, special packaging, and storage. Packing Group I signifies high danger, II medium, and III low danger, which affects whether a product can be sold through FBA (Fulfillment by Amazon). | |
Enter Label Size | Label size: 6x4 (Default) 2x3 3x4 |
- Once done, kindly press Submit, and you have set up ATS (Amazon Transportation Services) on Clickpost.
- Steps to Configure Fast Track Service of ATS in Clickpost:
- Ensure the ATS account is specifically activated for FastTrack services in the Amazon system. Your Amazon Relationship Manager will help in this.
- Set up the shipping rates applicable to your account in the Amazon system. Your Amazon Relationship Manager will help in this.
- Configure the list of serviceable pincodes for FastTrack shipments in the Clickpost Account.
- Steps to Configure ATS Custom Label in Clickpost:
- Get the brand's Amazon poc to activate the custom label response in the API. ATS needs to enable brand account with permissions / confugs where custom label tags are sent in api response.
- Go to the ATS Account in ClickPost.
- Navigate to Credentials.
- Select Custom ATS Label as the label type.
- The next step is optional: configure a new .html in case it is not added automatically to the account configured in the clickpost label configuration section.
Once enabled, the system expects additional custom tags in the label HTML to populate specific data points. The following extra tags must be present in your HTML template: You can also configure additional elements via clickpost on the dashboard with the help of CSM/Support/Onboarding POC.
ship_mode,promise_delivery_date,delivery_station,sector,encrypted_tracking_code, custom_ats_route_field
Note:
- Pre-assigned AWBs: No need to configure pre-assigned AWBs; AWBs are generated by ATS in real-time during the order creation API call and returned in response.
- Labels: Clickpost does generate a custom label only for ATS orders. Labels are generated by ATS and returned in the API response to the customer.
Updated 5 days ago