
Shopify Pre dispatch ( Shipment creation) configuration
Shopify Pre dispatch ( Shipment creation) configuration is divided into 2 parts
1: Clickpost<> Shopify APP installation
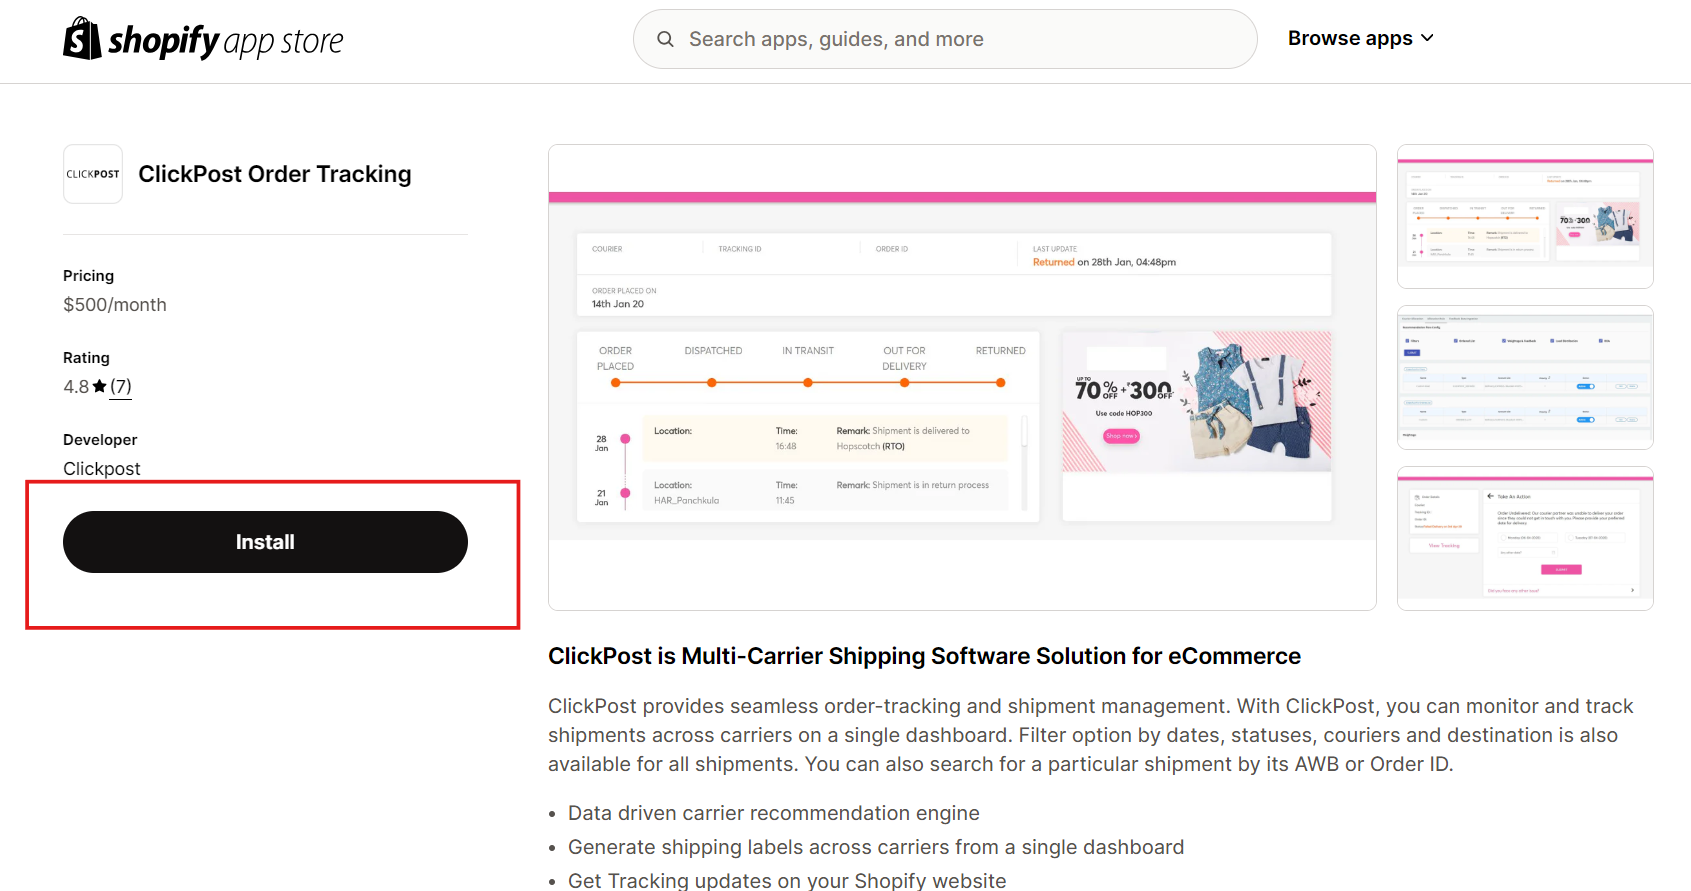
Step 1: Visit below ClickPost App URL and logon into your Shopify account
https://apps.shopify.com/clickpost-app
Step 2: Click on "Install"
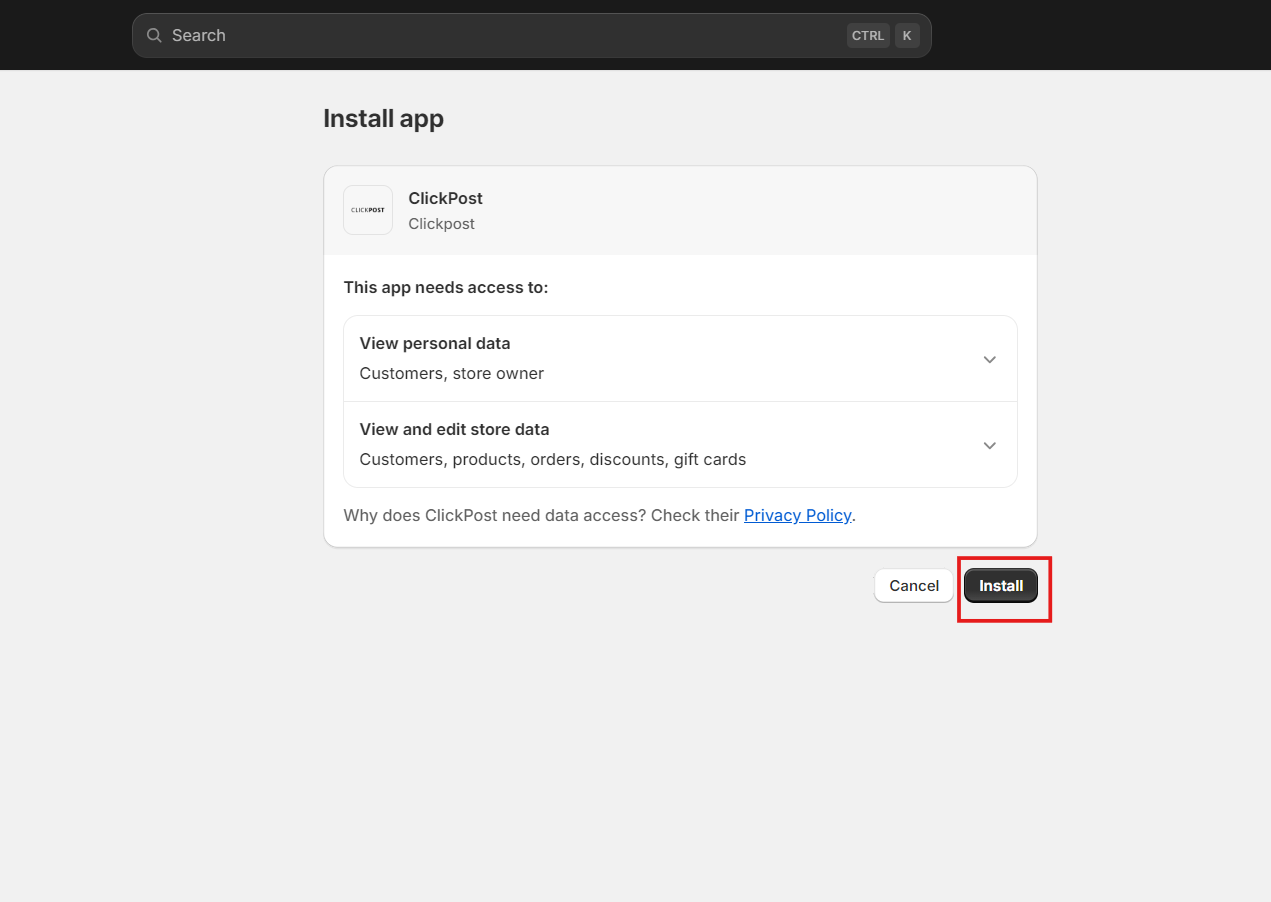
Step 3: Click on "Install" on your Shopify store
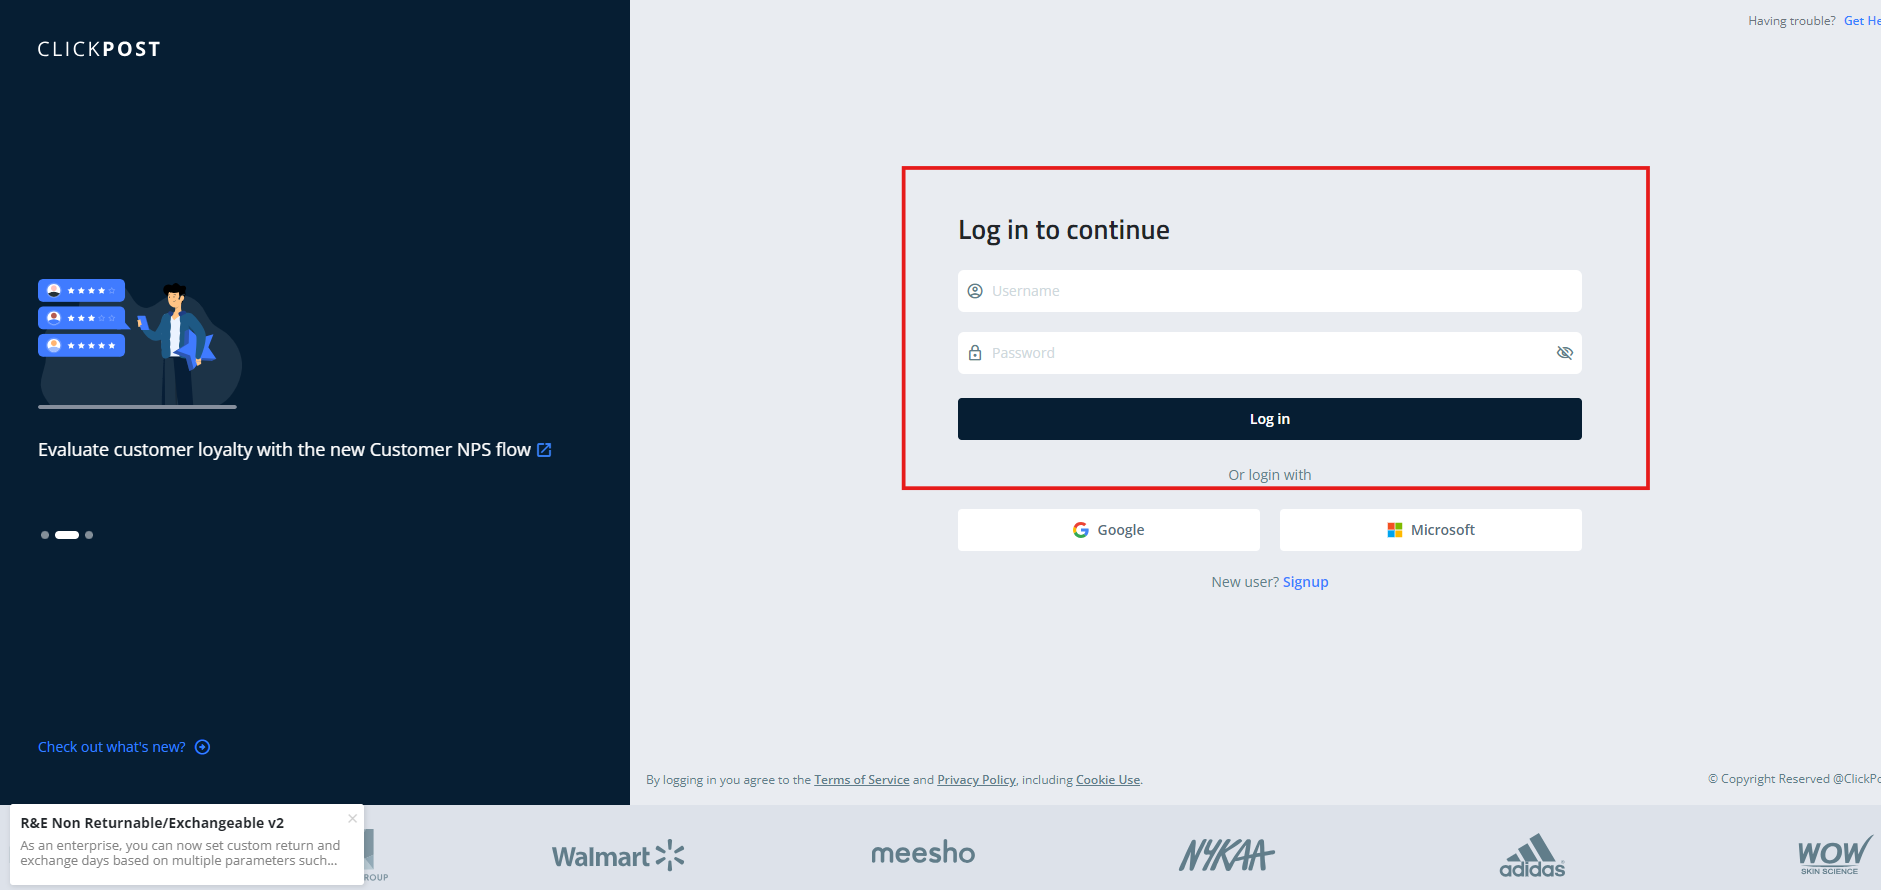
Step 4: Post which you will be redirected to Clickpost dashboard log in page , please login with credentials shared by Clickpost team
Step 5: You will redirected below page, please add the account name as per your requirement
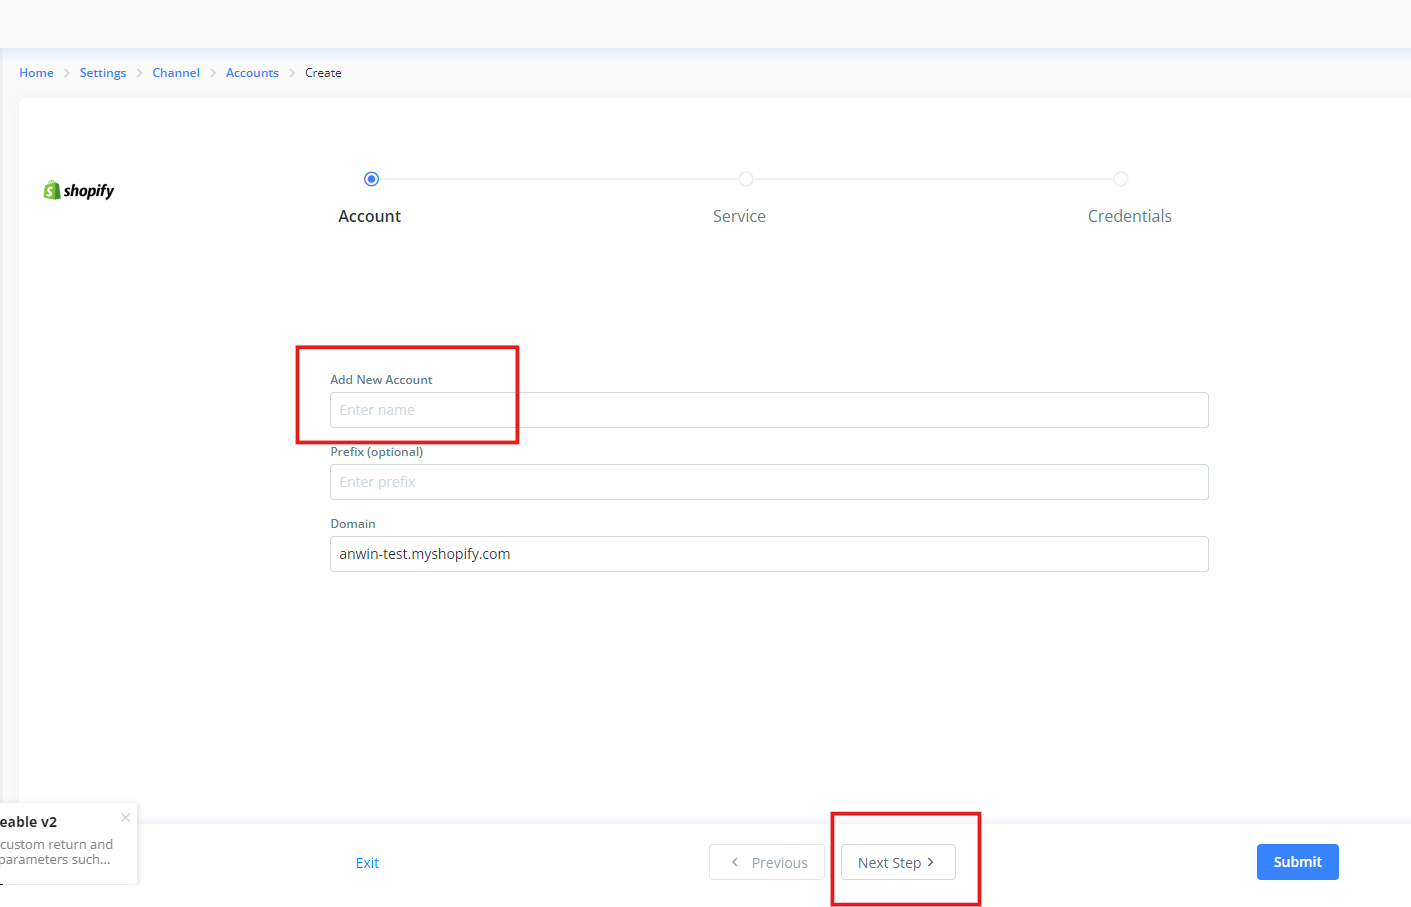
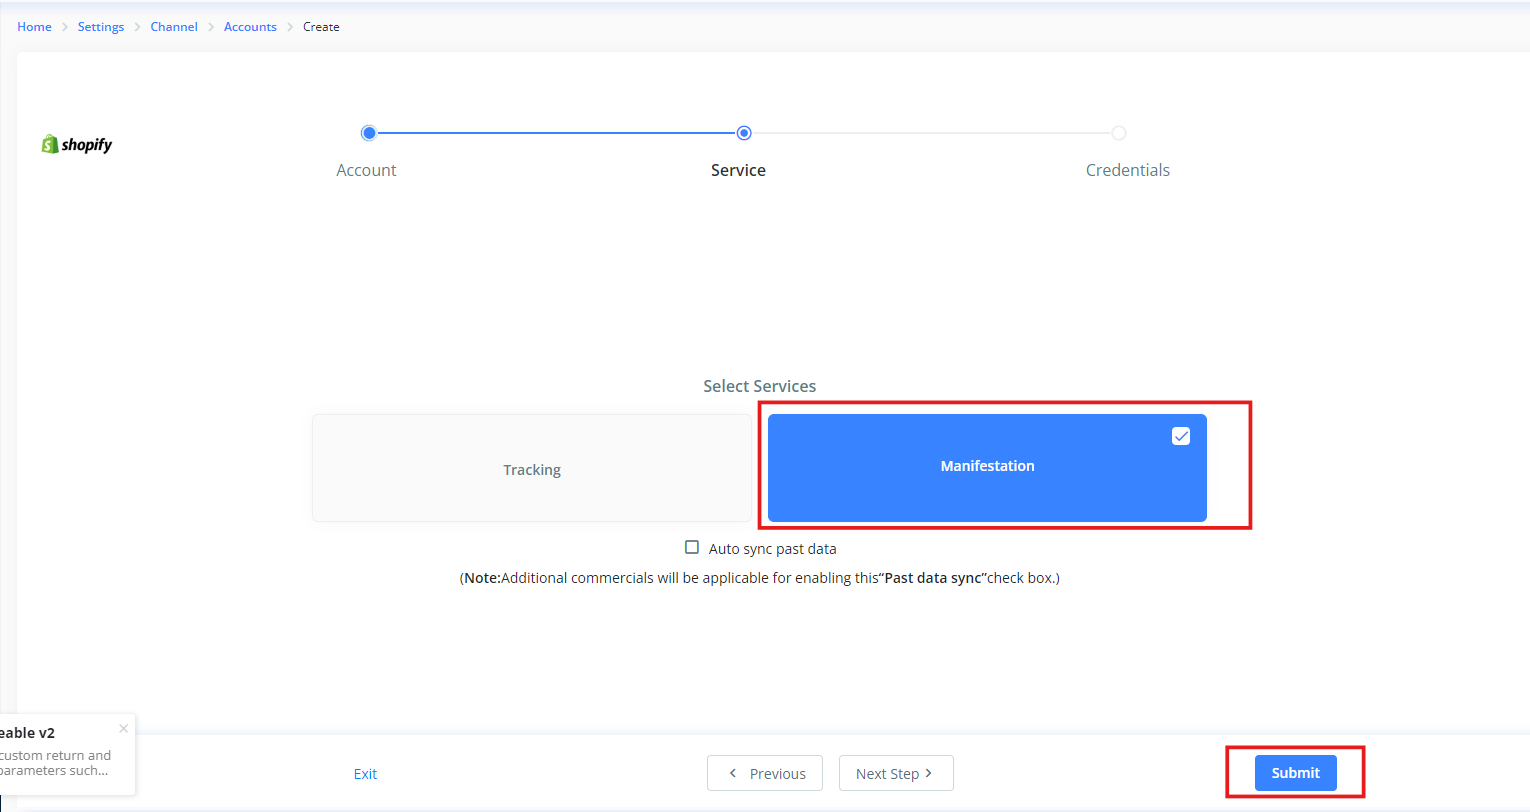
Step 6: Select "Manifestation" and Click on "Submit"
2: Warehouse configuration
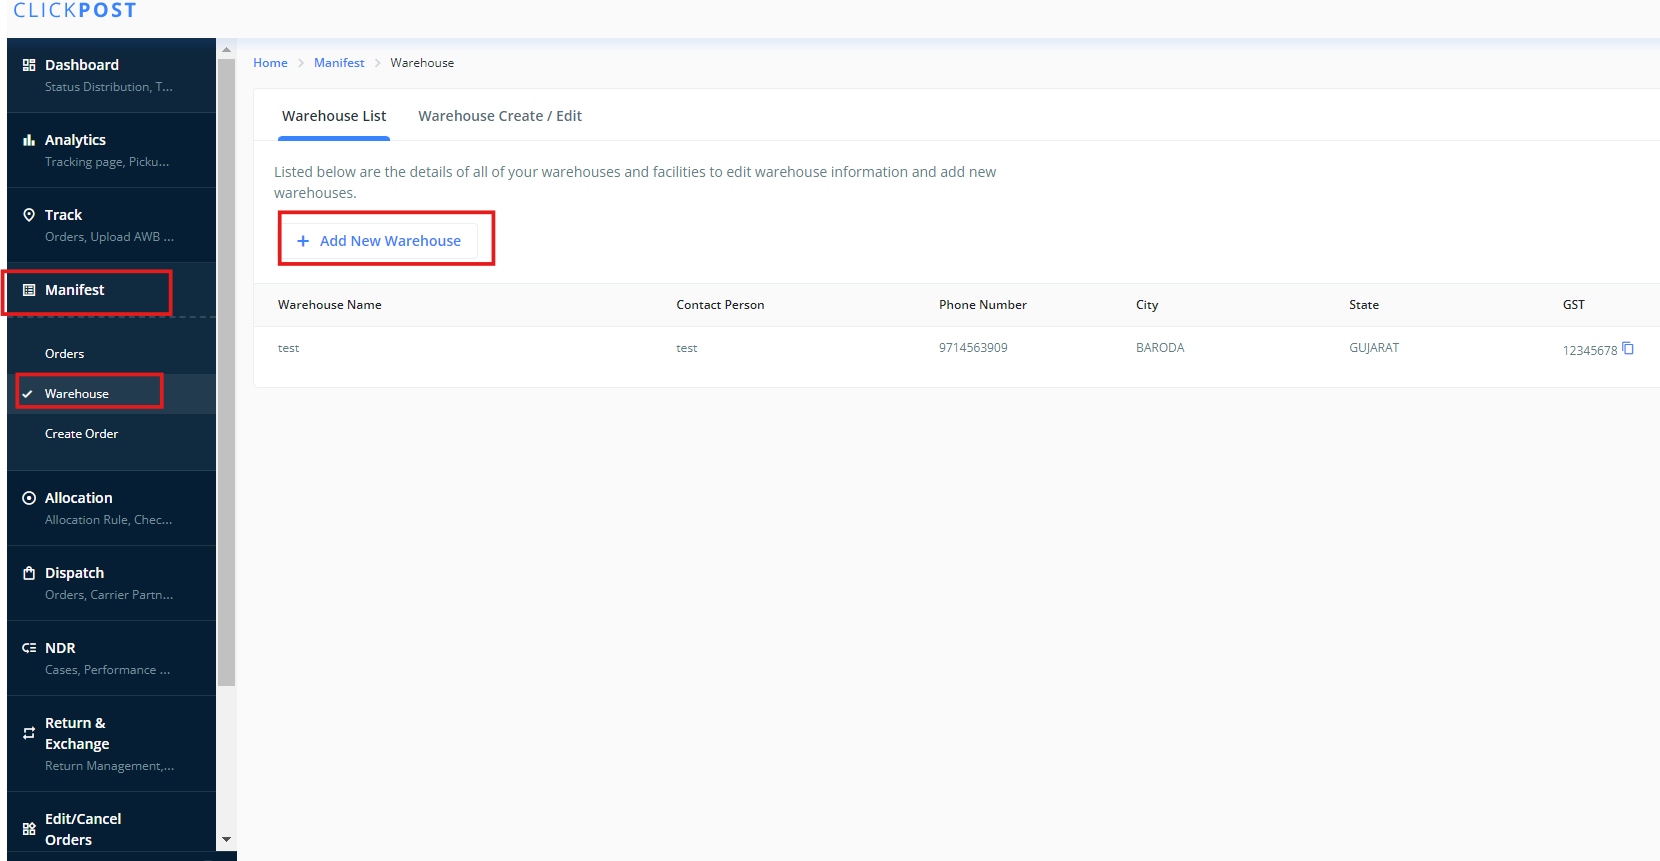
Step 1: Login into Clickpost dashboard , then go to Manifest >> Warehouse >> Add new warehouse ( Please add warehouse details from which you want to initiate pickup)
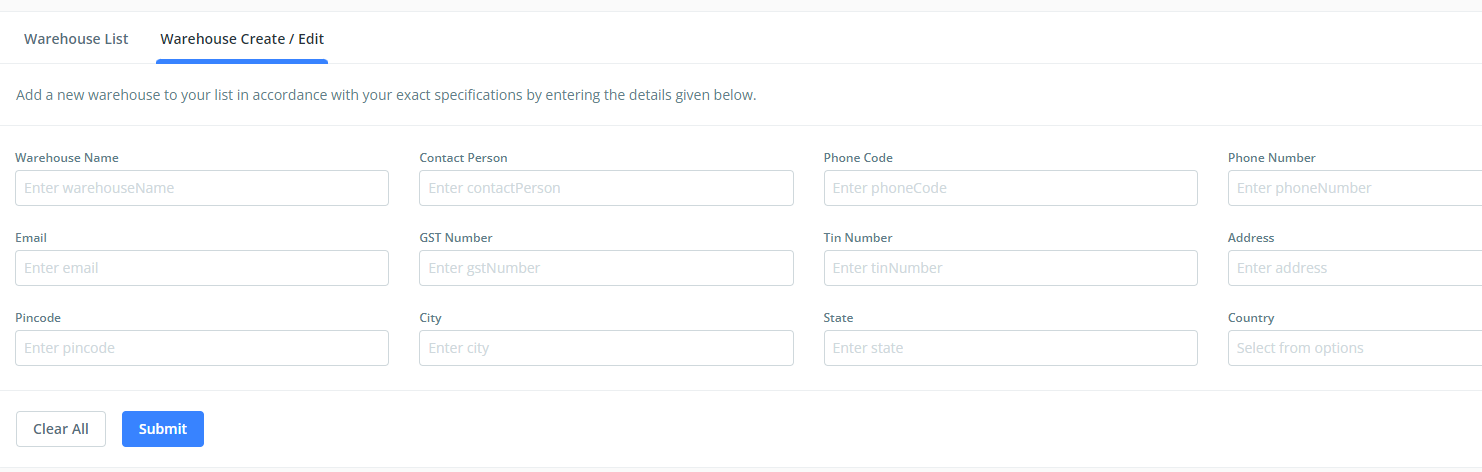
Step 2: Add all information
- Add GST number in Tin Number field
- Phone code should 91
- Add pincode, we will fetch City, State , and Country from backend
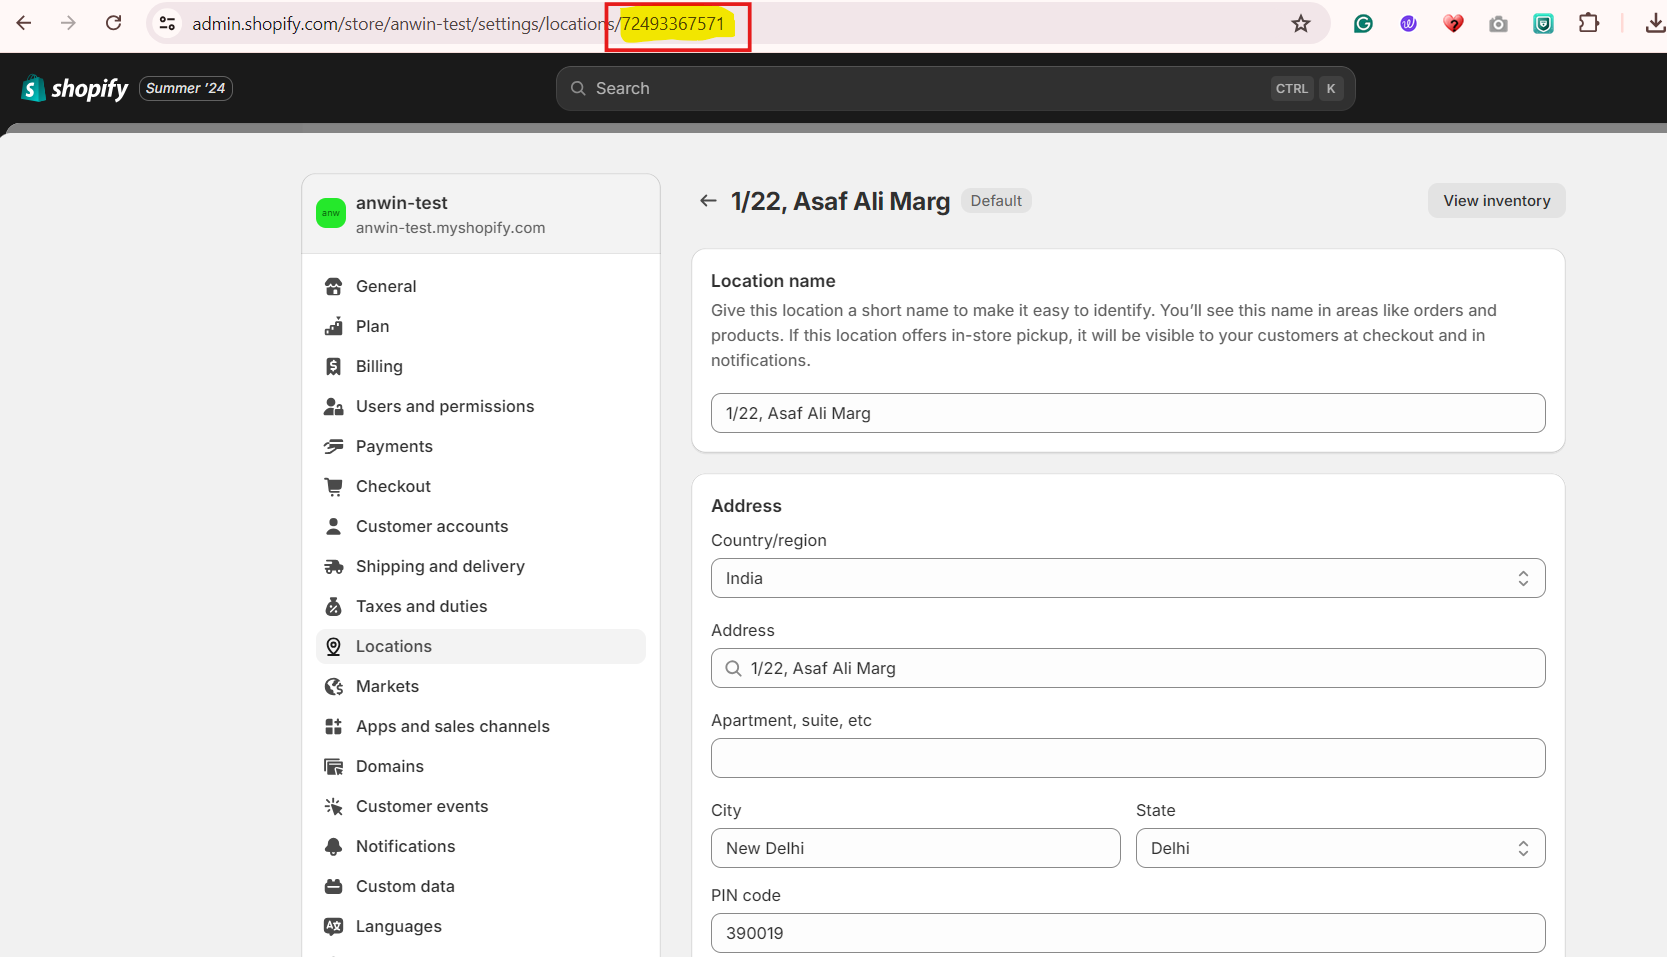
Step 3: Login into your Shopify panel , go to Settings >> Locations >> then Click on the warehouse
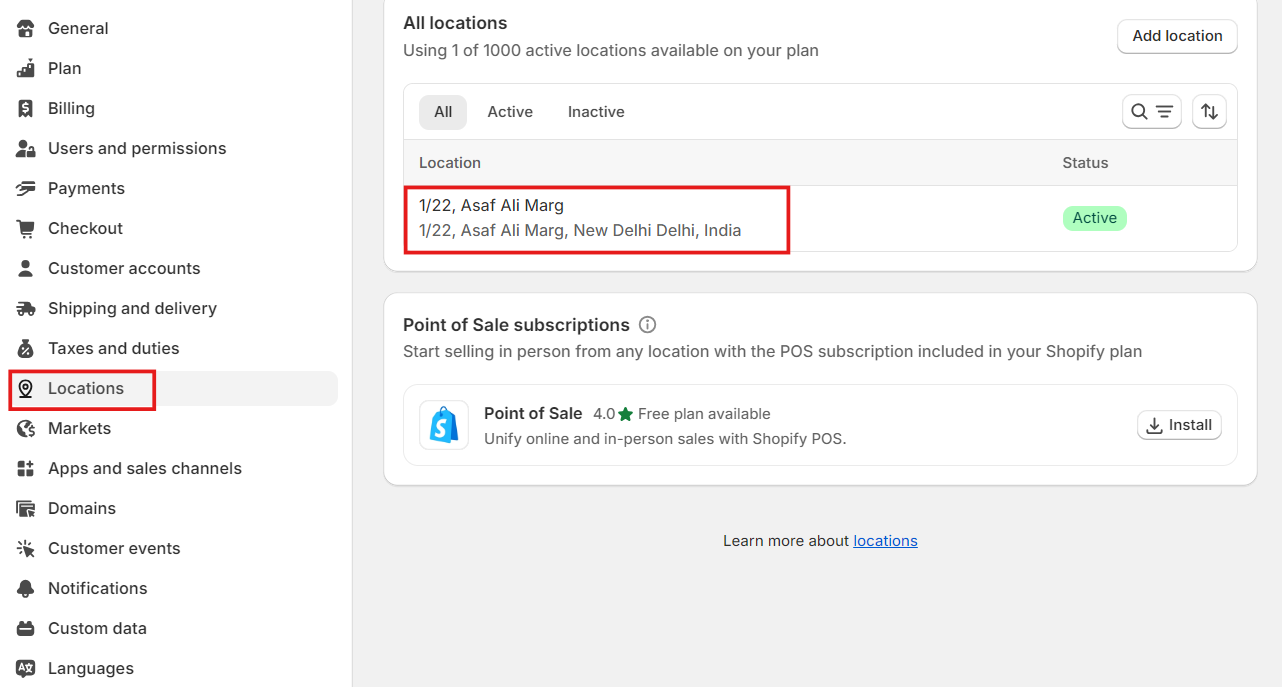
Step 4: Copy the numeric warehouse code from URL
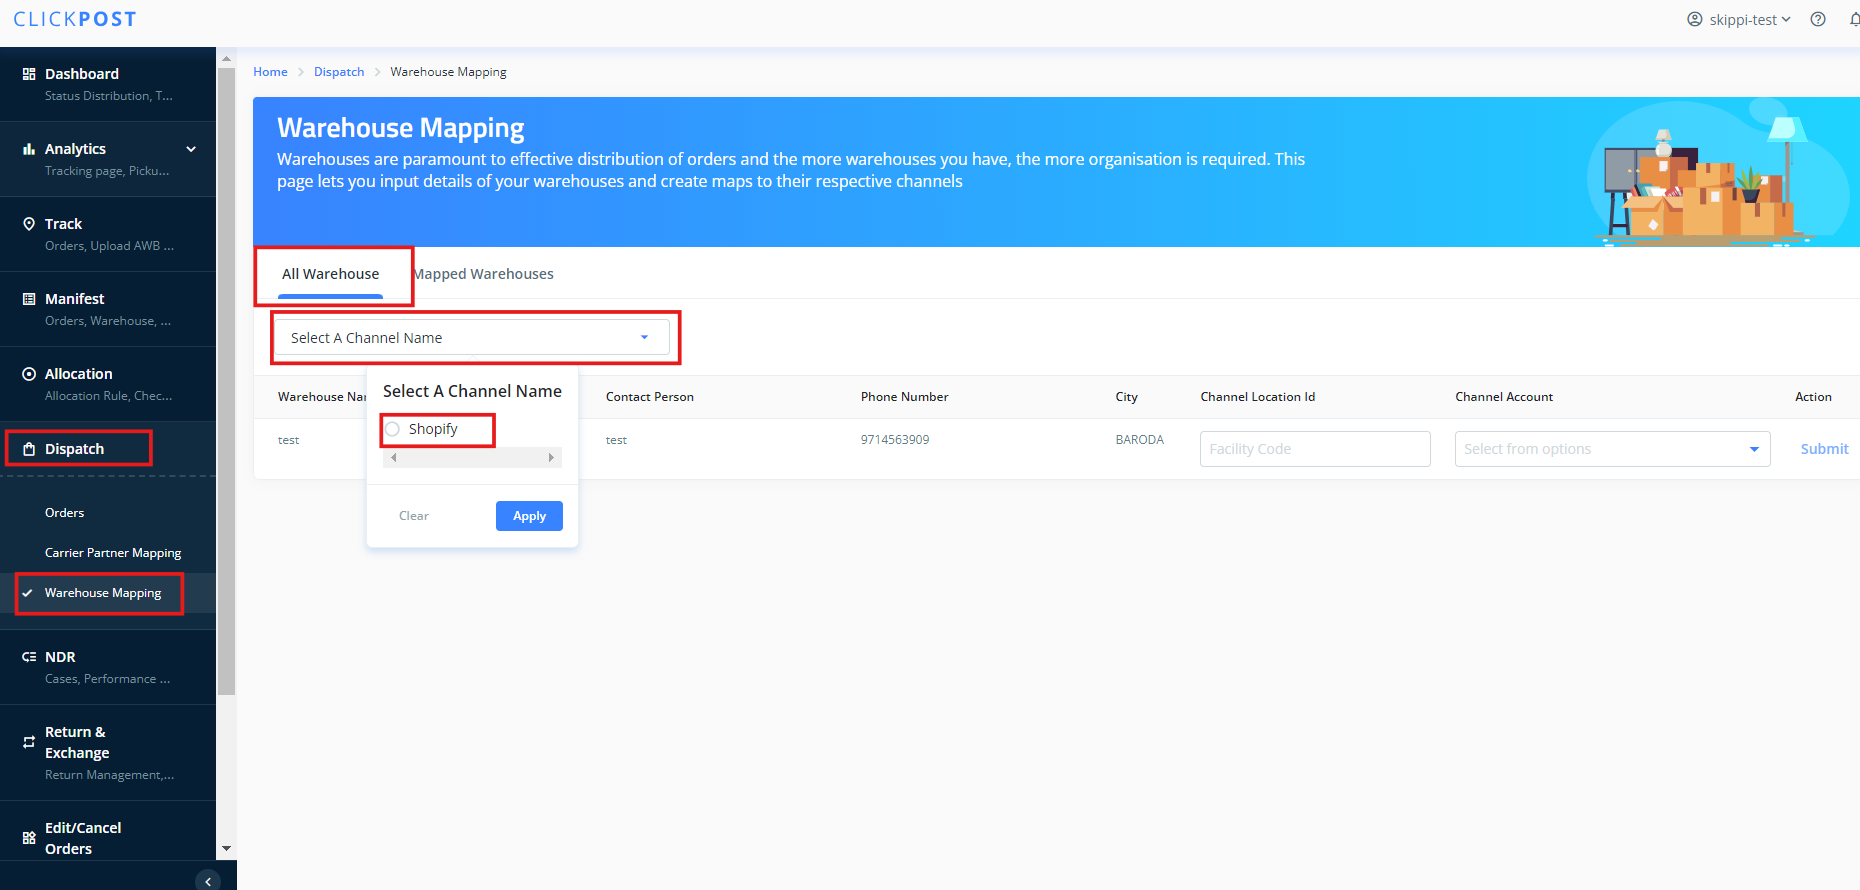
Step 5: On Clickpost dashboard, go to Dispatch >> Warehouse mapping >>All warehouses >> from "Select a channel name" drop-down select Shopfy channel and Click on apply
Step 6: Post which add the warehouse code from Shopify into "Channel location ID" field and select channel account name from the drop-down and click on submit.
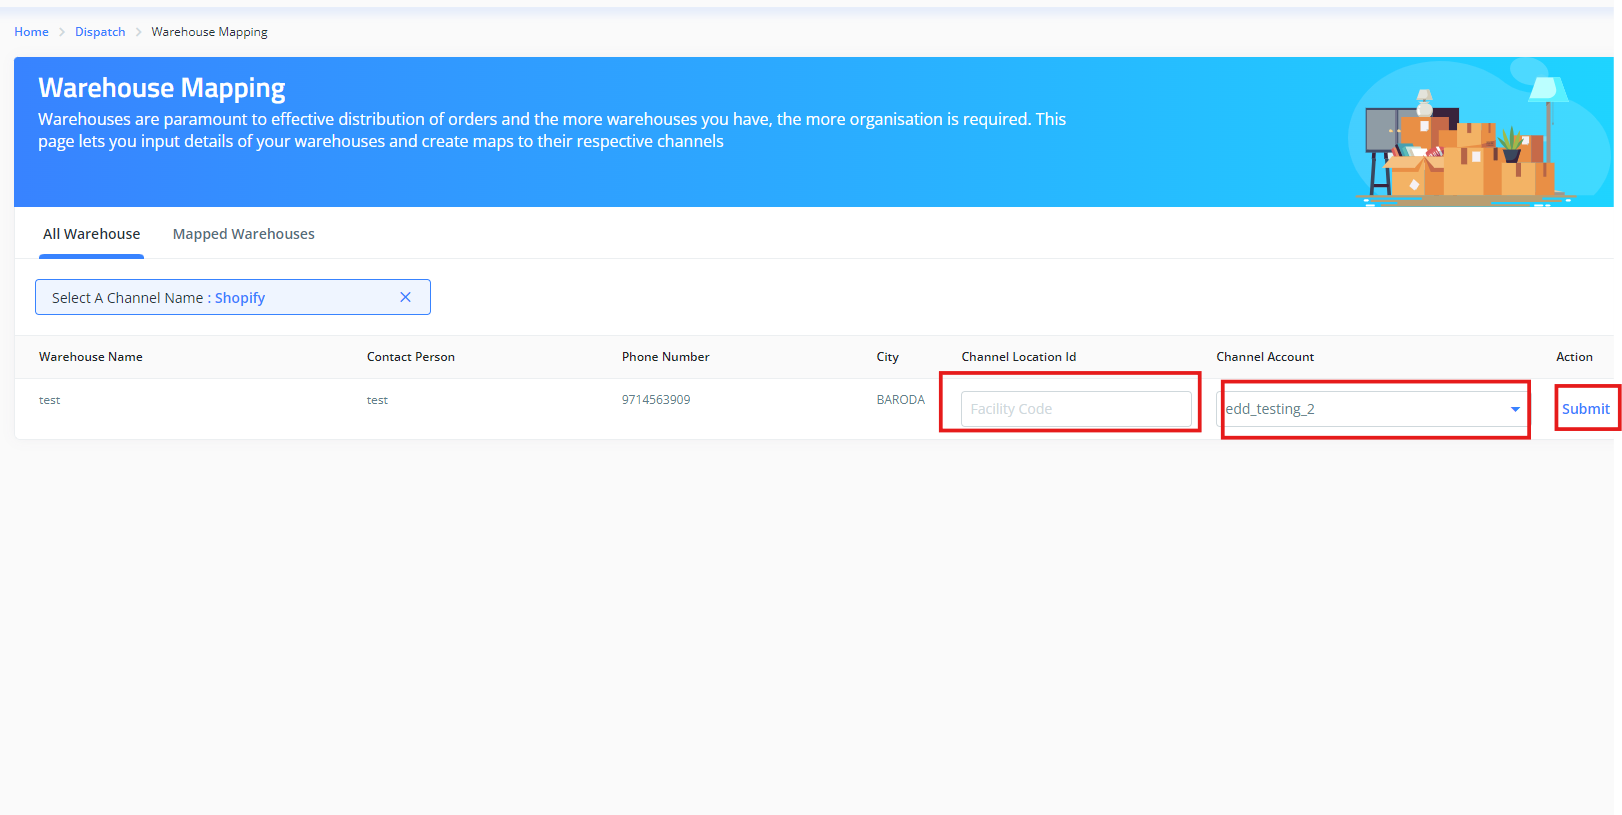
Once the above steps are completed, Clickpost will get data from Shopify for all new updated orders.
Updated 7 months ago