
ERPNext Integration
Who can use this integration?
This integration is suitable for customers operating in India and primarily doing B2B MPS logistics movements. Movements like warehouse to store, warehouse to warehouse, vendor to warehouse etc are termed as B2B MPS movements.
Features
Using ClickPost app in ERPNext you can get access to following features:
- Carrier Recommendations
- Based on performance based allocation parameters or allocation rules set in ClickPost, you will get the list of recommended carriers.
- Shipment Creation and label generation
- Generate shipments via a form or bulk upload via file in ERPNext to create shipments with carrier of your choice. After the shipment is successfully created you will get waybill copy and box stickers generated via ClickPost in ERPNext.
- Shipment Tracking via Polling and Webhook
- Fetch the latest status and complete shipment timeline.
- Fetching Proof of Delivery
- After the shipment is Delivered, fetch the POD document.
- Shipment cancellation
- Cancel a shipment anytime before pickup.
Guide to setup ClickPost app in ERPNext
Follow these 3 steps to setup ClickPost app
-
ClickPost App installation
Please see the relevant steps below Based on whether you have a self hosted version of ERPNext or you are on Frappe Cloud
- Self Hosted Steps
- Run this command with frappe user from frappe-bench folder
Bench get-app https://github.com/Akhilam-Inc/ClickPost-ERPNext-Integration.git - After the app is successfully installed, load the app on your site using the below command. Replace
clickpost_erpnext_integrationwith your own app name.
Bench —site install-app clickpost_erpnext_integration
- Run this command with frappe user from frappe-bench folder
- Frappe Cloud
- If you are using the Frappe Cloud version of ERPNext, you can download the Clickpost app directly from marketplace.
- Self Hosted Steps
-
Configure ClickPost in ERPNext
Once you have installed the ClickPost app, follow these steps to correctly configure it and hit save.
-
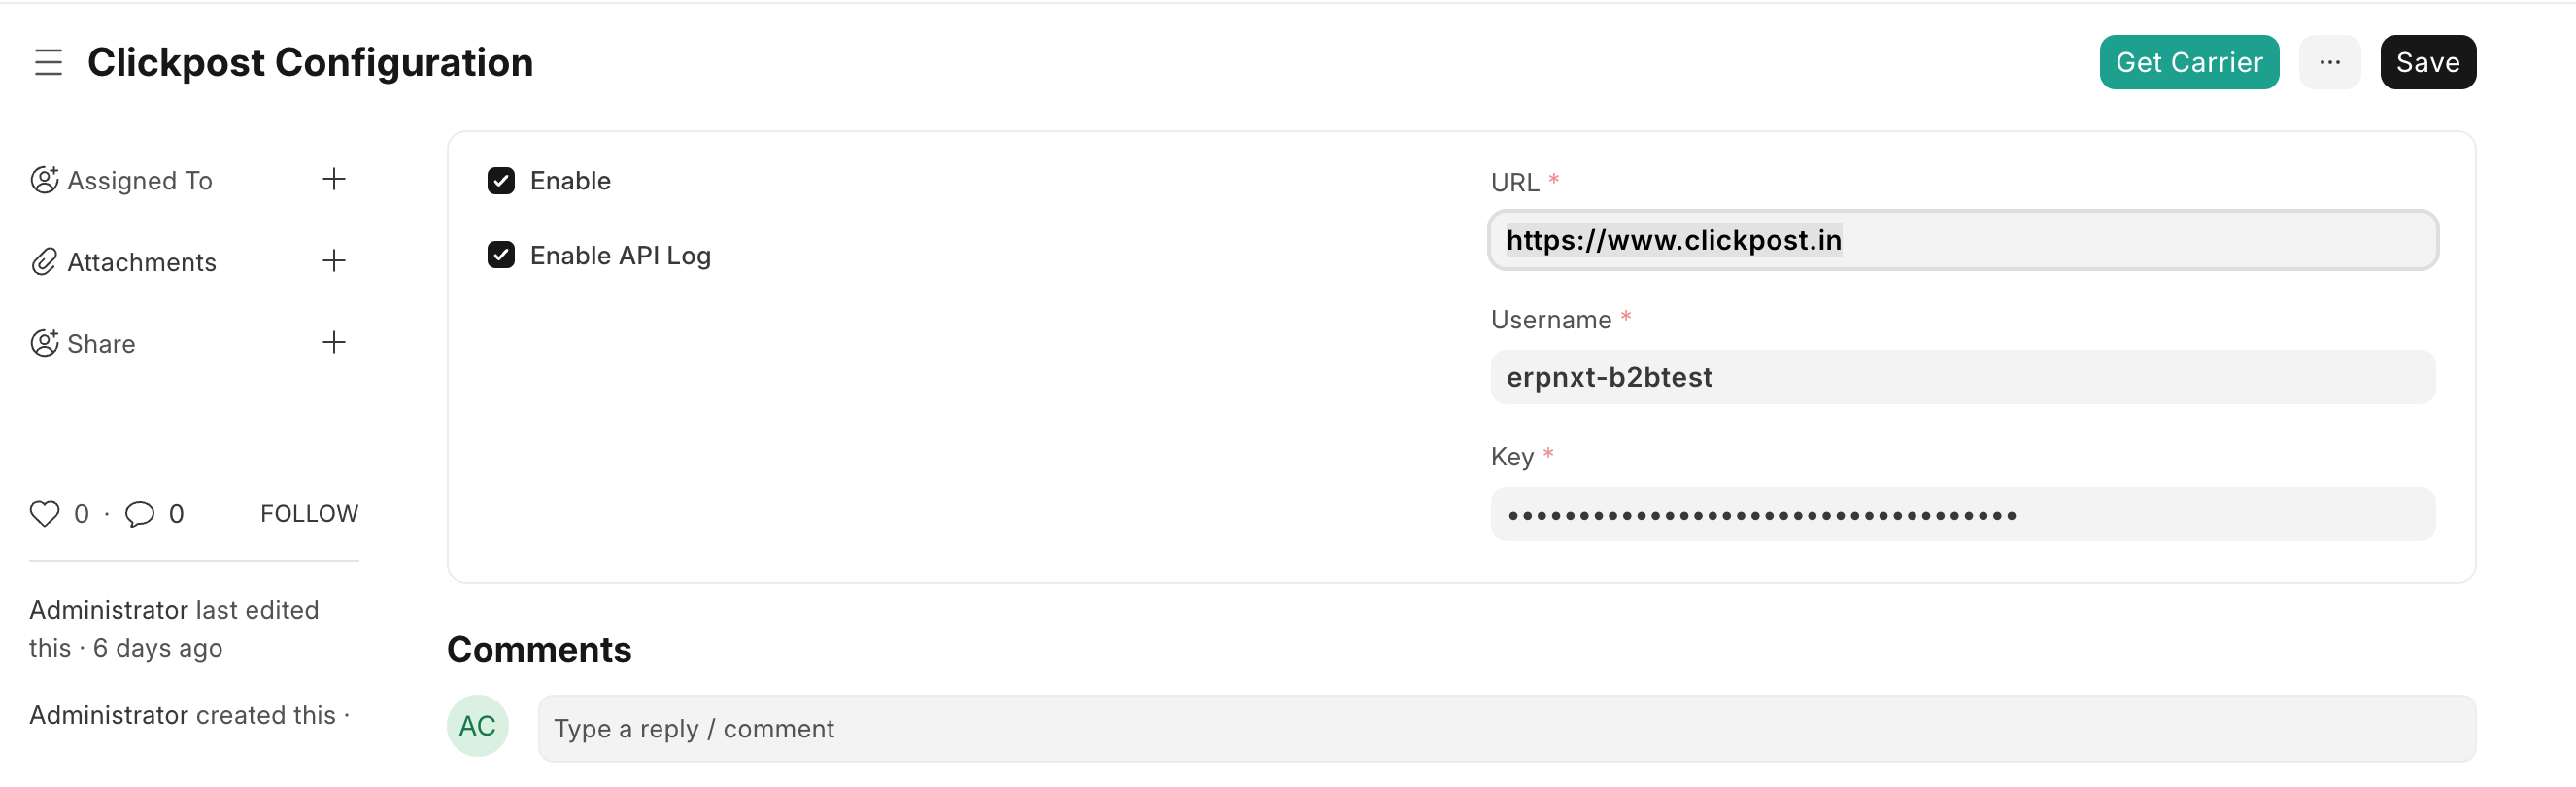
Enter your username and key as received from your Onboarding Manger.
-
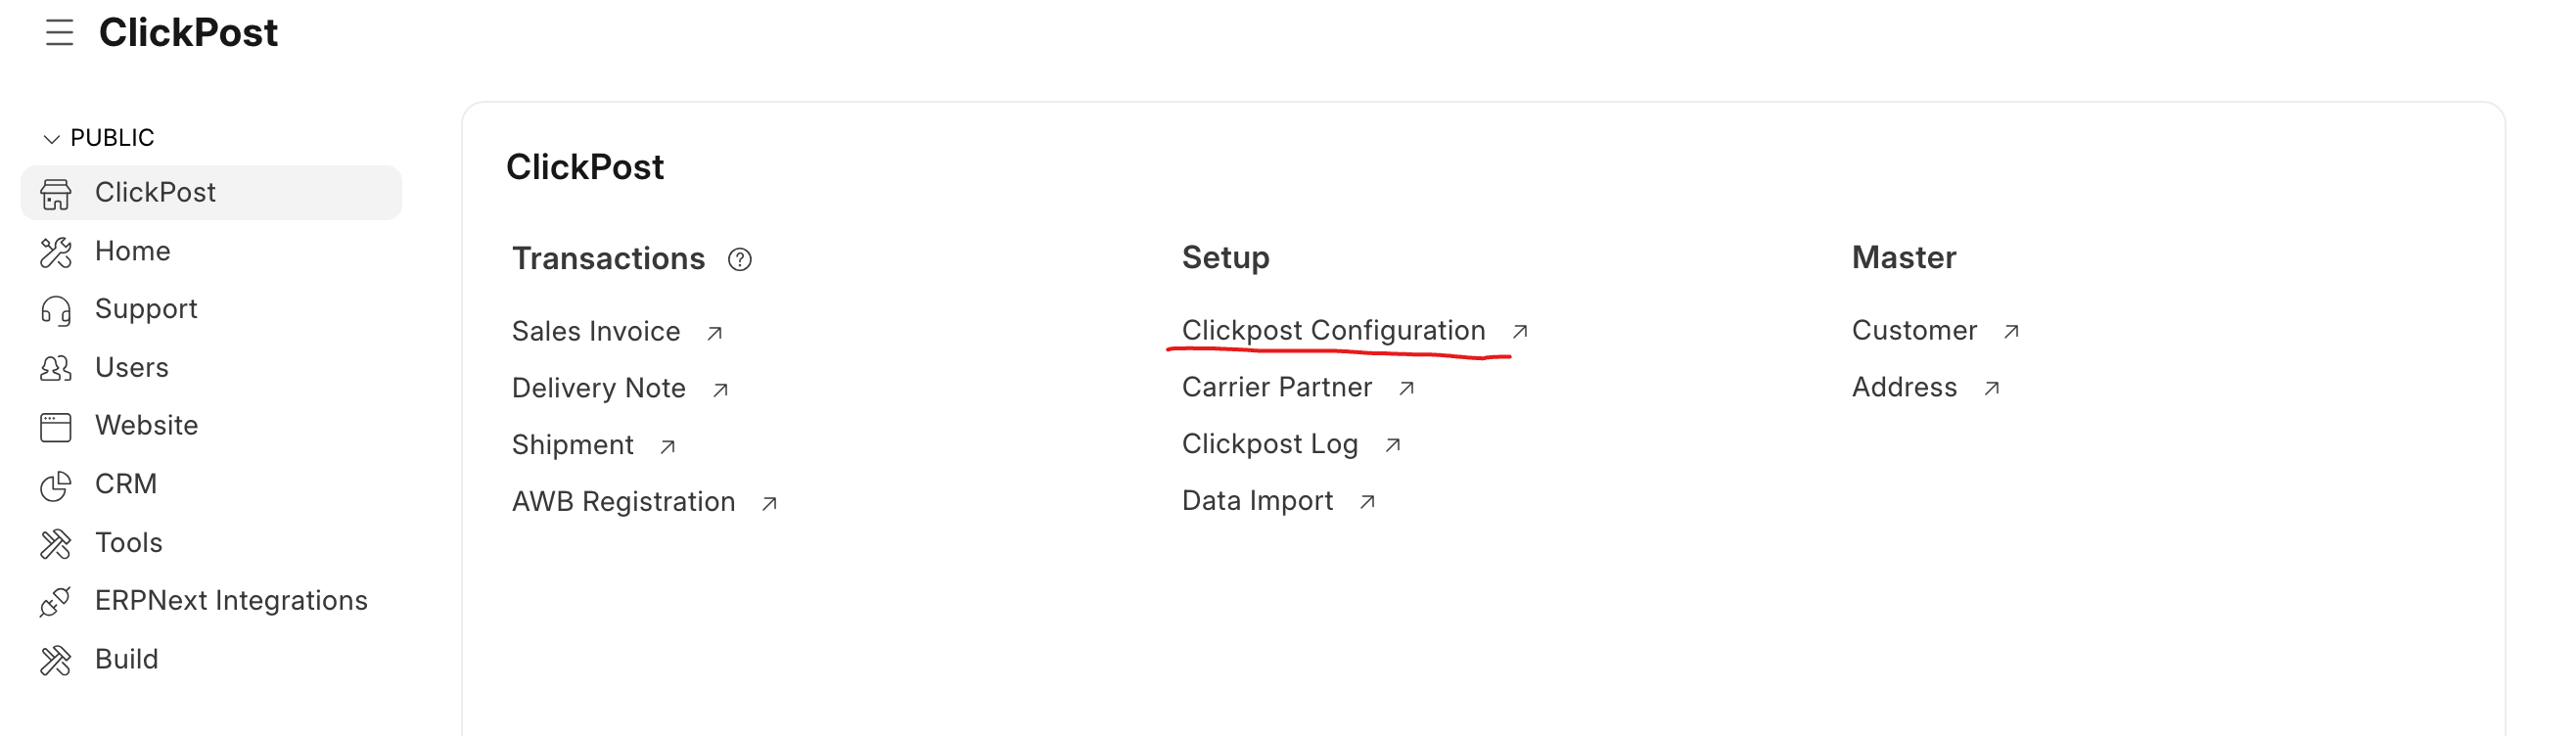
Go to ClickPost configuration page under ClickPost app.
-
Make sure all checkboxes- Enable, Enable Log are turned on.
-
Keep the URL as
https://www.clickpost.in
-
-
Configure carriers and webhook URL in ClickPost
Go to your ClickPost dashboard (b2b.clickpost.in) and follow these steps
-
From settings, go to carrier integrations and choose your B2B carrier.
-
Create carrier accounts under the carrier of your choice and enter credentials.
-
Now, go to your ClickPost app in ERPNext.
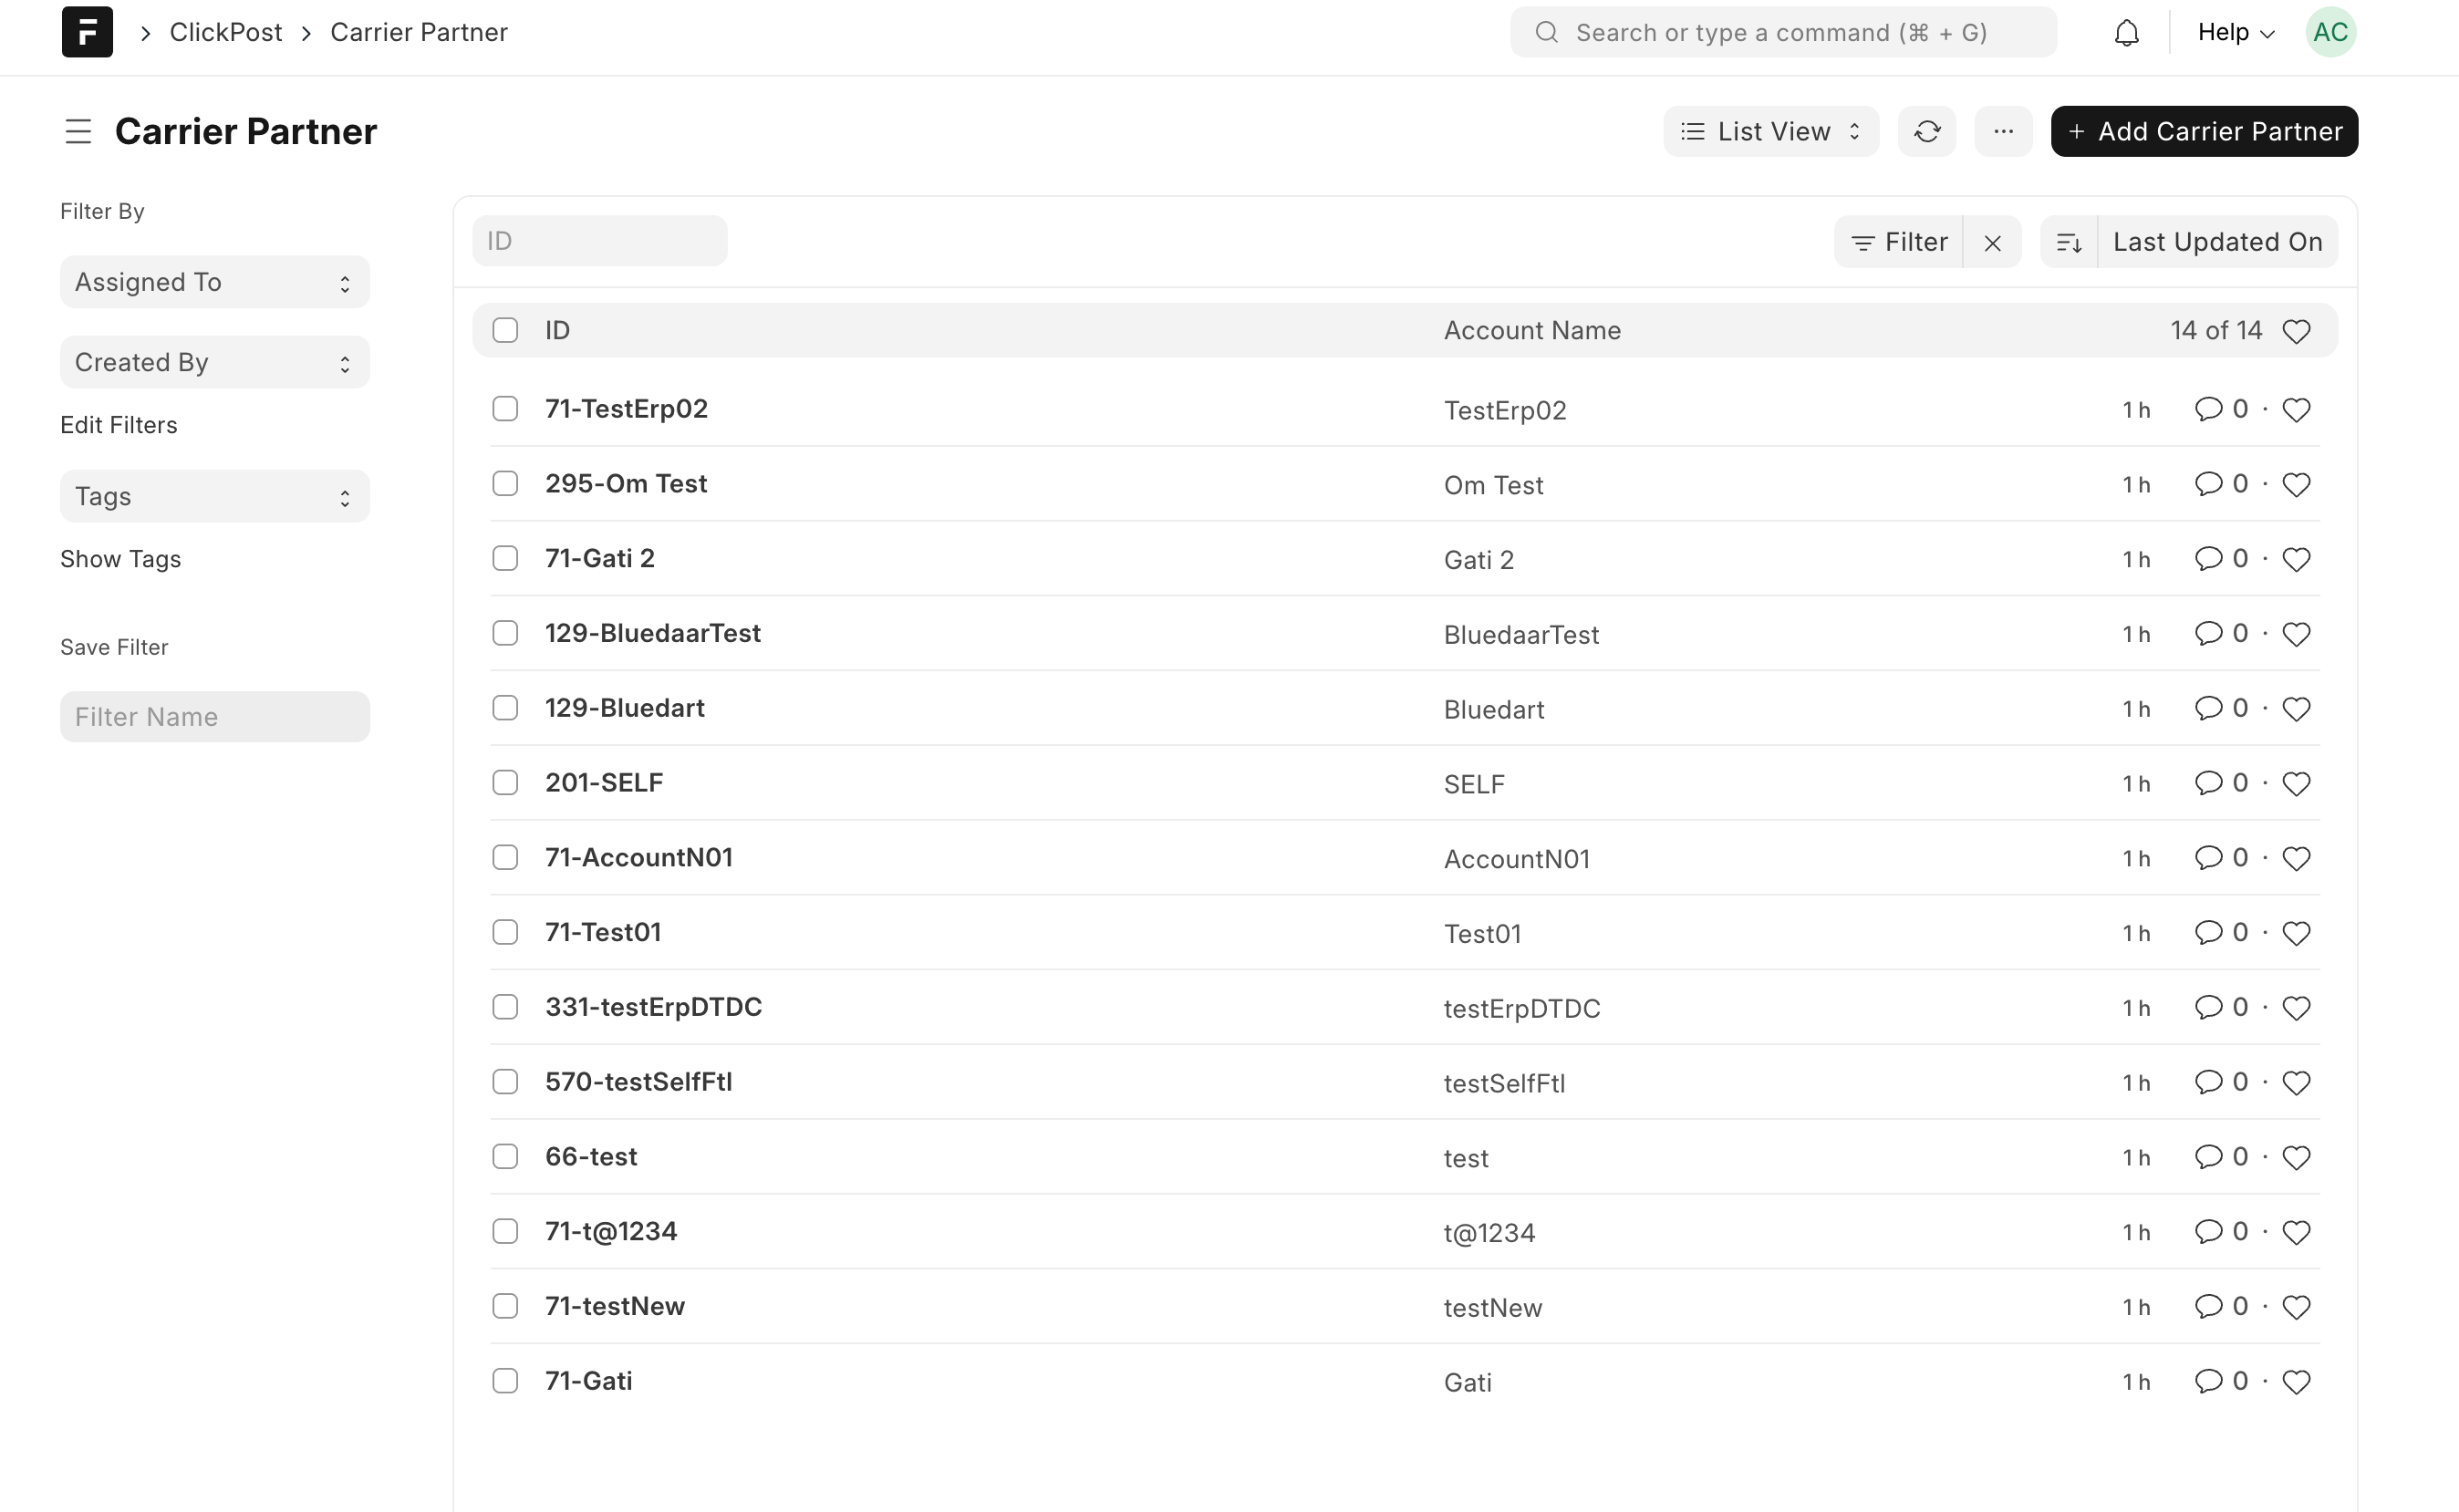
- From configurations click on Get Carrier. This will fetch all the active carrier accounts from ClickPost in ERPNext.
- Now to Carrier Partner page and you should be able to see all the active carrier accounts that you created on clickpost dashboard.
-
To get instant tracking updates for any shipment you need to set your webhook URL in ClickPost dashboard.
- To get the webhook URL which you can put in ClickPost dashboard, please follow the steps mentioned in this video.
- Go to settings > Notifications > webhook > All Status
- Enter your Webhook URL and hit submit. Follow these steps to get the webhook URL.
- From Auth Configurations, choose your authentication method and enter the required details.
-
Guide to carrier allocation
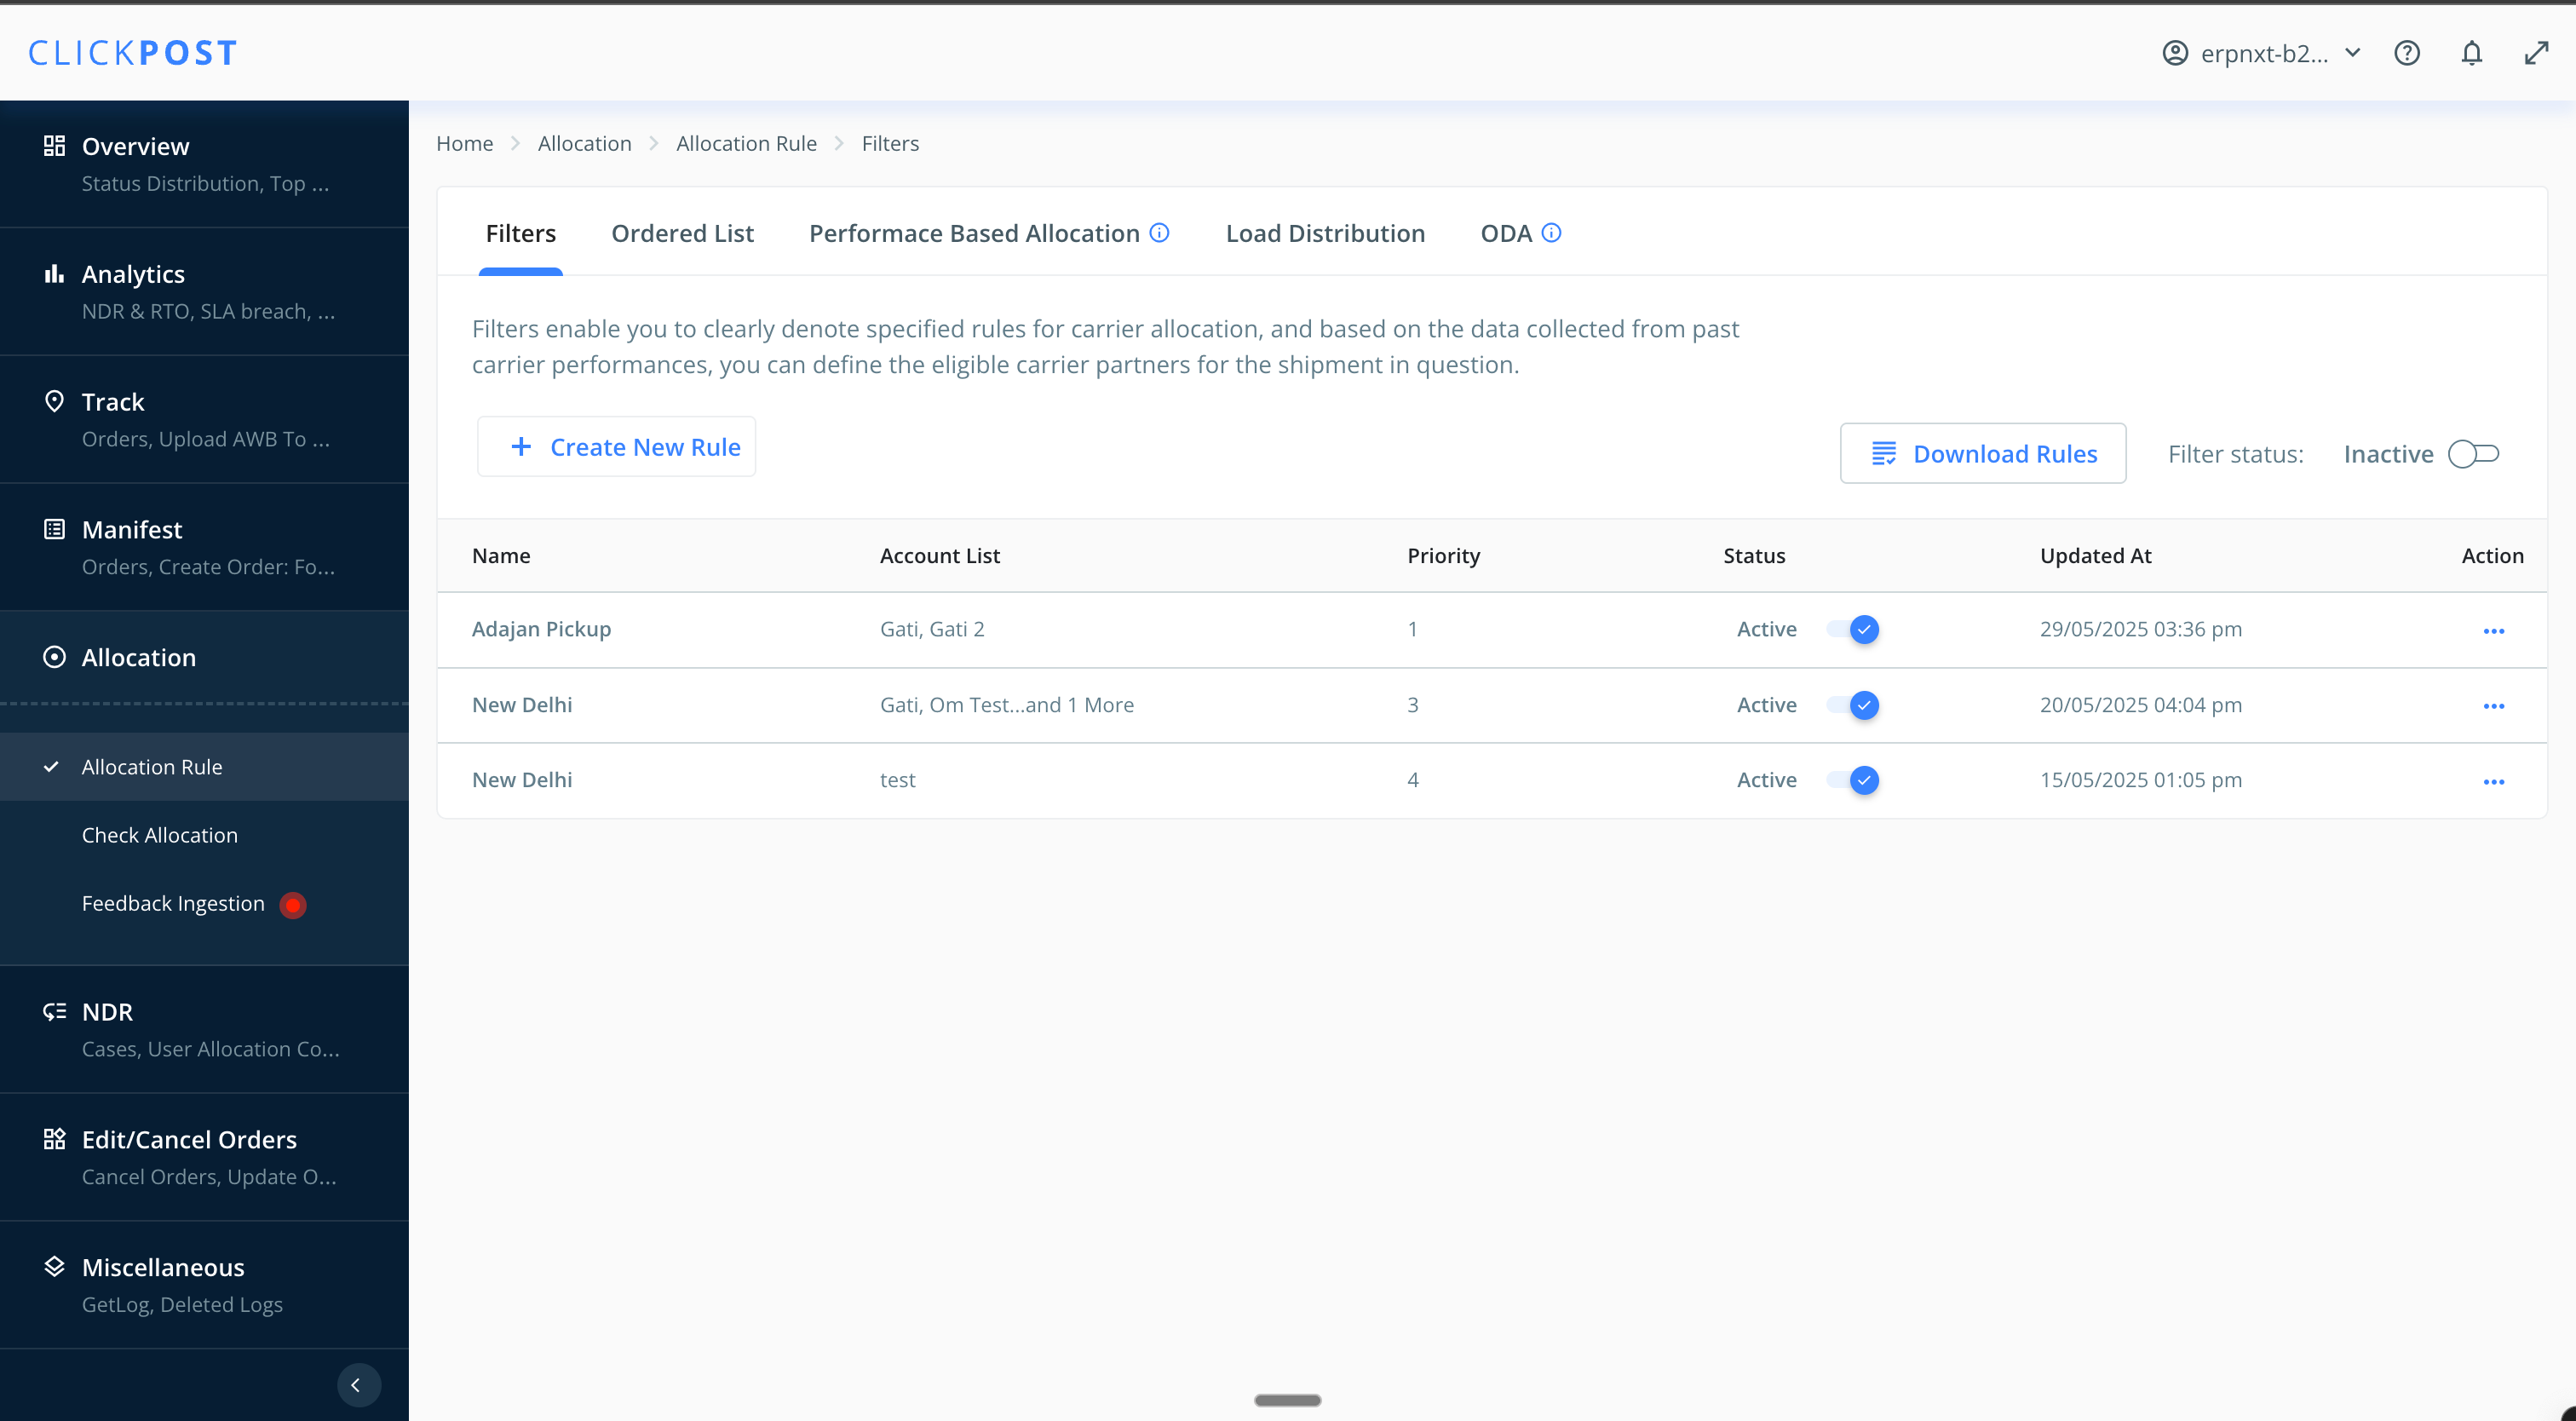
- From the ClickPost dashboard, make sure your Allocation rules are setup.
-
In ERPNext, from ClickPost configuration make sure "Use carrier recommendation" checkbox is toggled on.
-
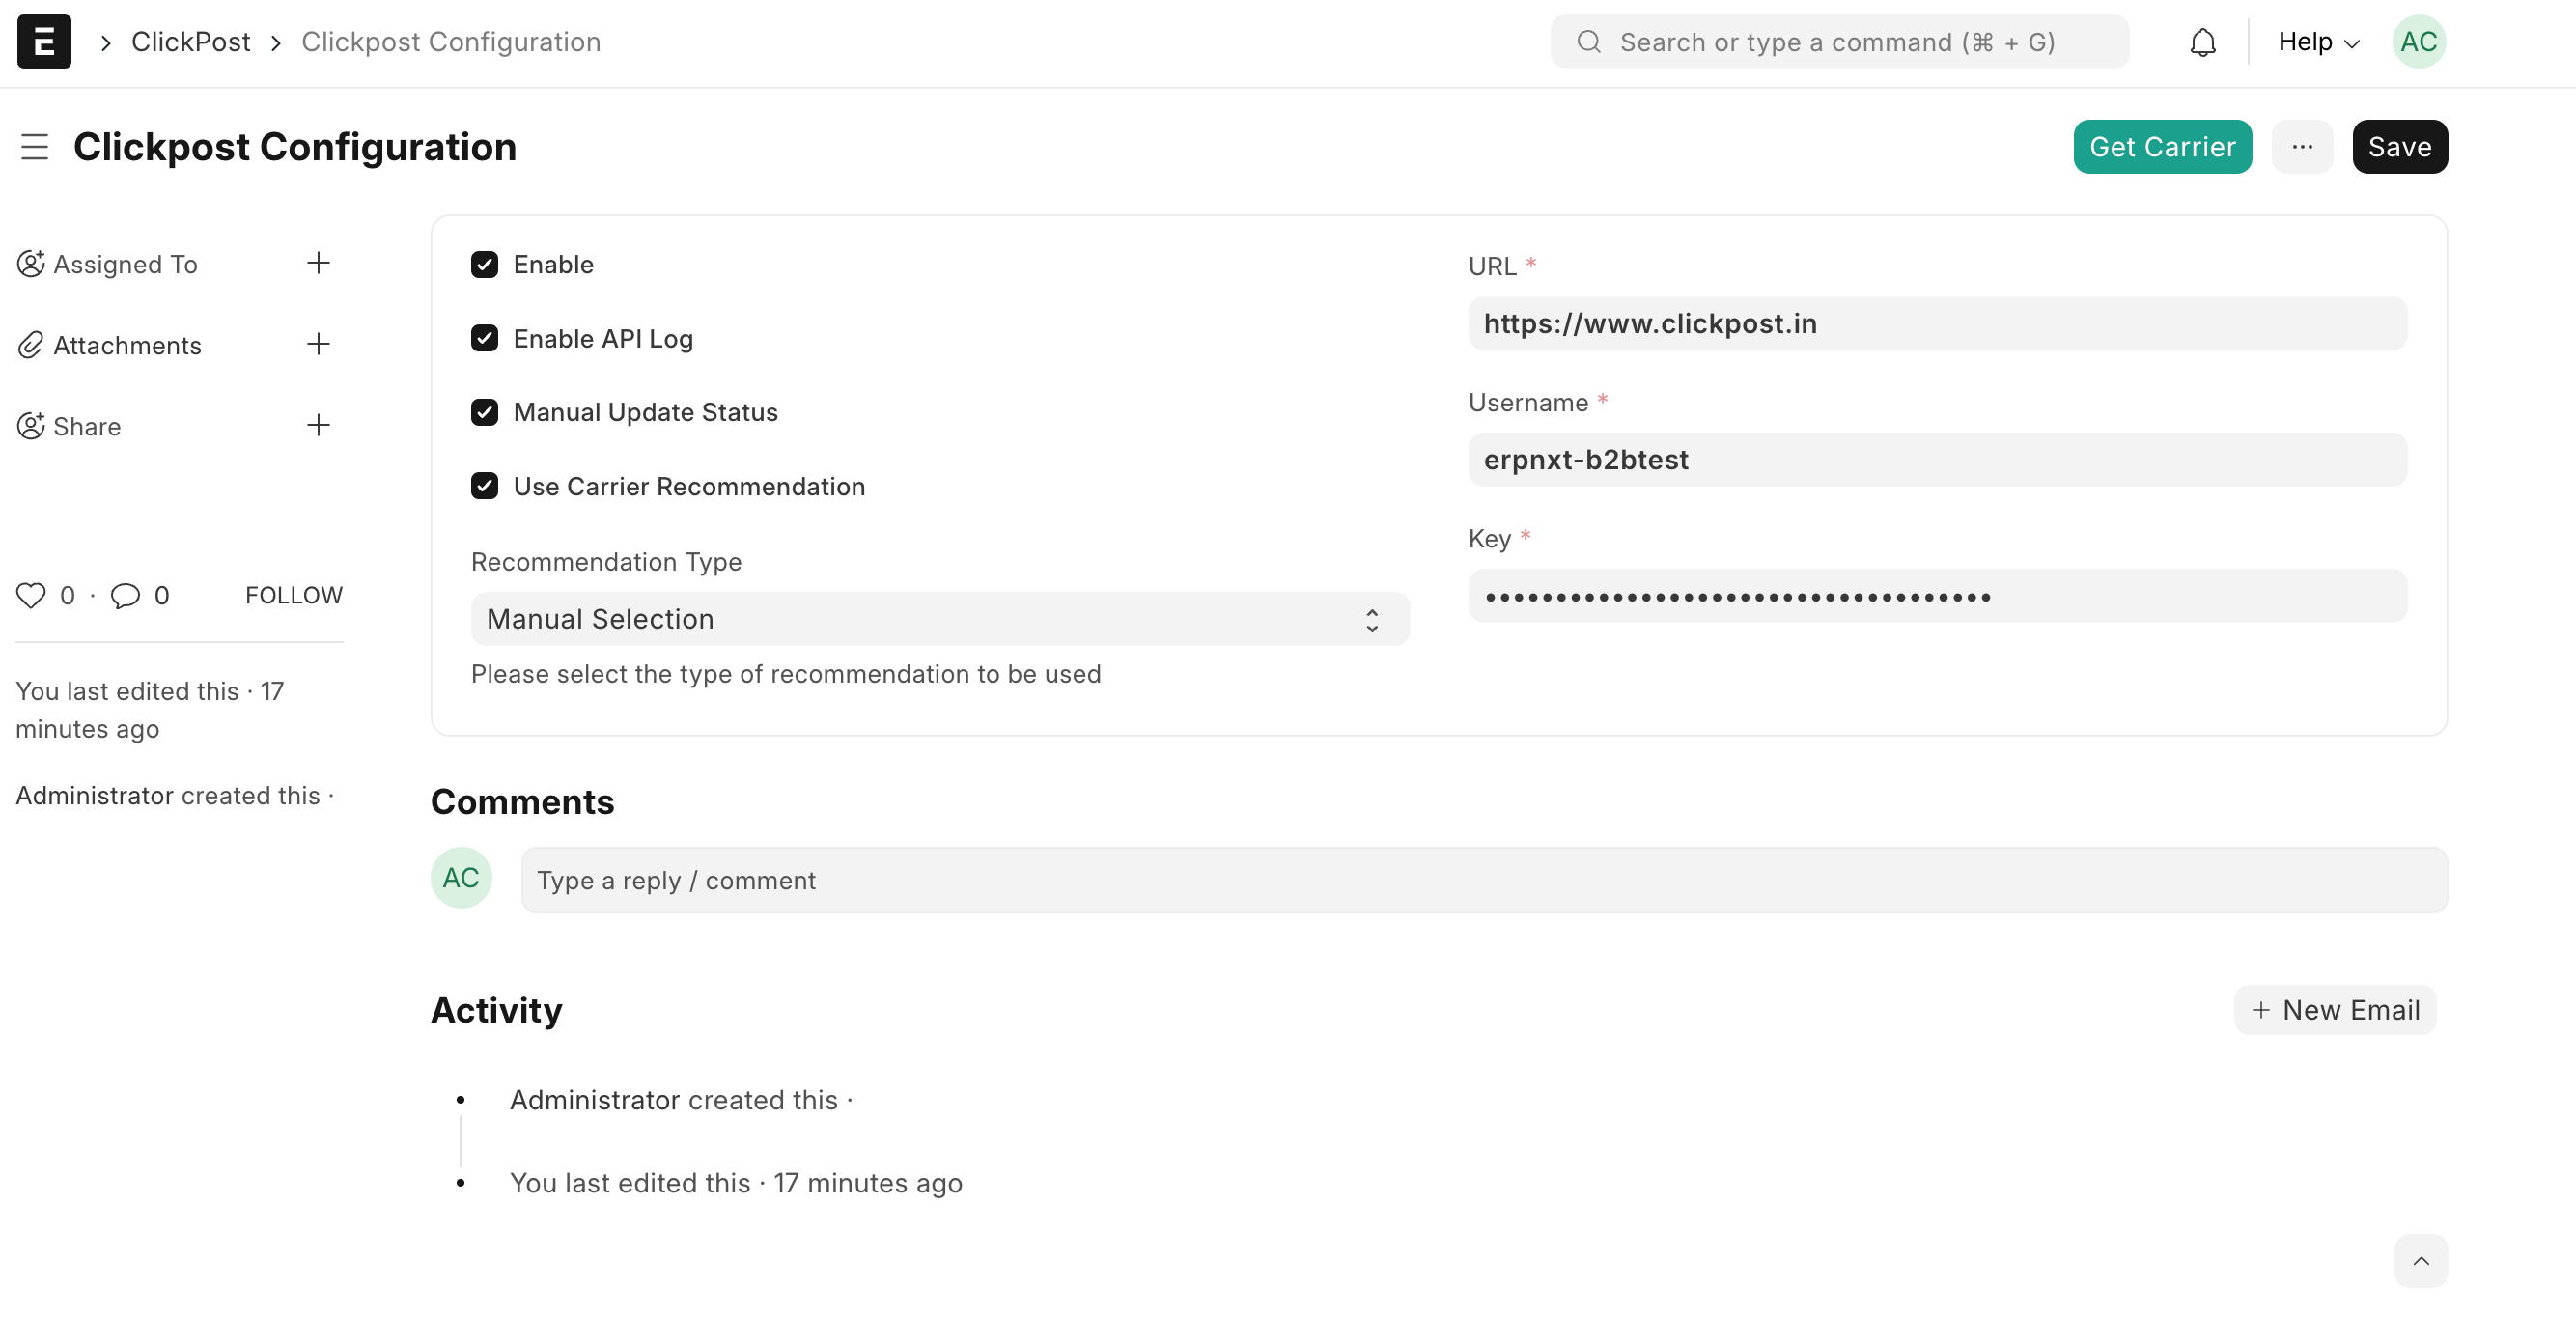
You will see 2 options:
-
Manual Selection- If this option is chosen then you can manually select a carrier account from a prioritised list of carrier accounts while creating a shipment. This prioritised list is generated after the recommmendation is successful. You will also be able to see the calculated shipping charge if the carrier pricing is uploaded in ClickPost.
-
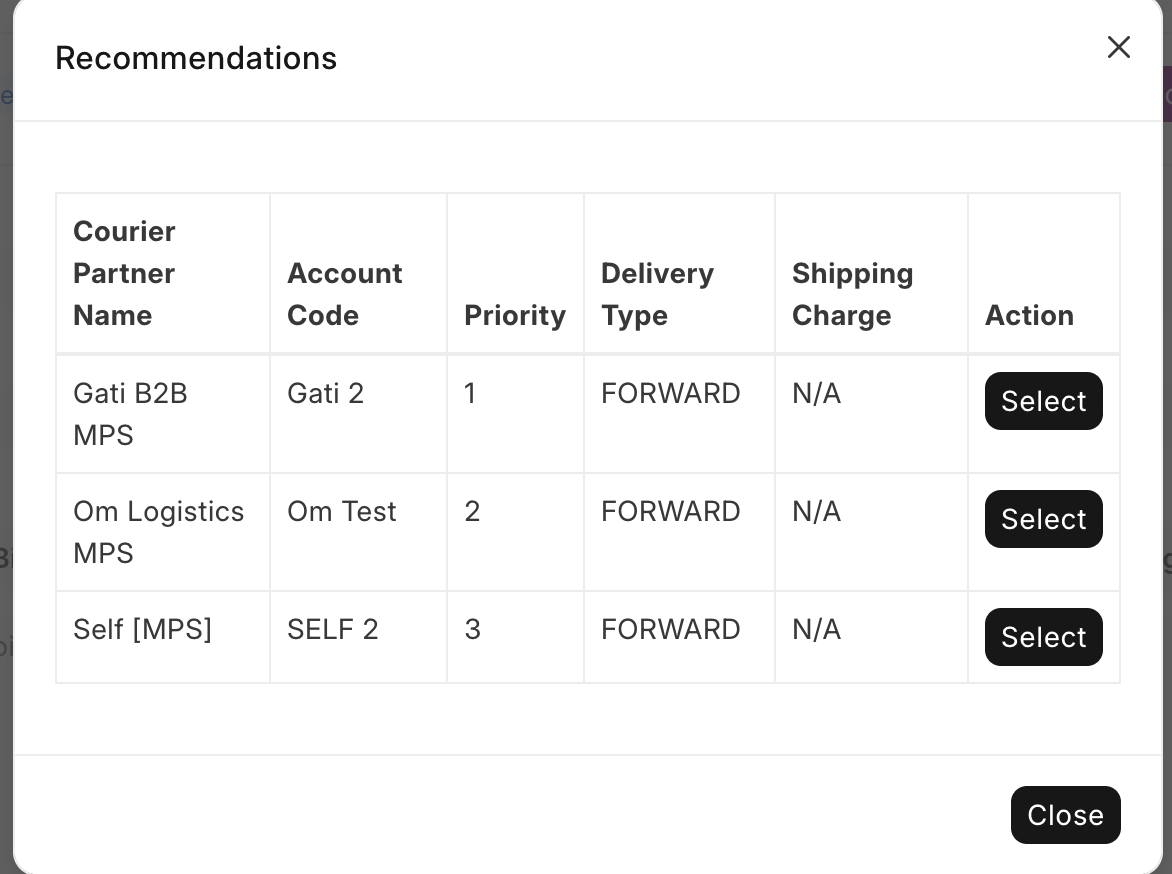
Automatic Order Creation- If this option is selected then recommendation and order creation will happen together. First the system will fetch the list of recommended carriers and automatically create order with the first carrier in the list. If the order creation fails with the first carrier then it will try with second carrier. The system will try order creation with top 3 carriers.
-
Guide to create shipments and print labels
-
Before shipment creation make sure you have setup your customer and address master from ClickPost configuration. Adding an address in ERPNext will automatically create an entry in ClickPost location master.
-
Also, add your sales invoice or Delivery note from ClickPost configuration.
-
Go to the shipment page and click on "Add Shipment". To bulk create orders go to Data Import under ClickPost configuration.
-
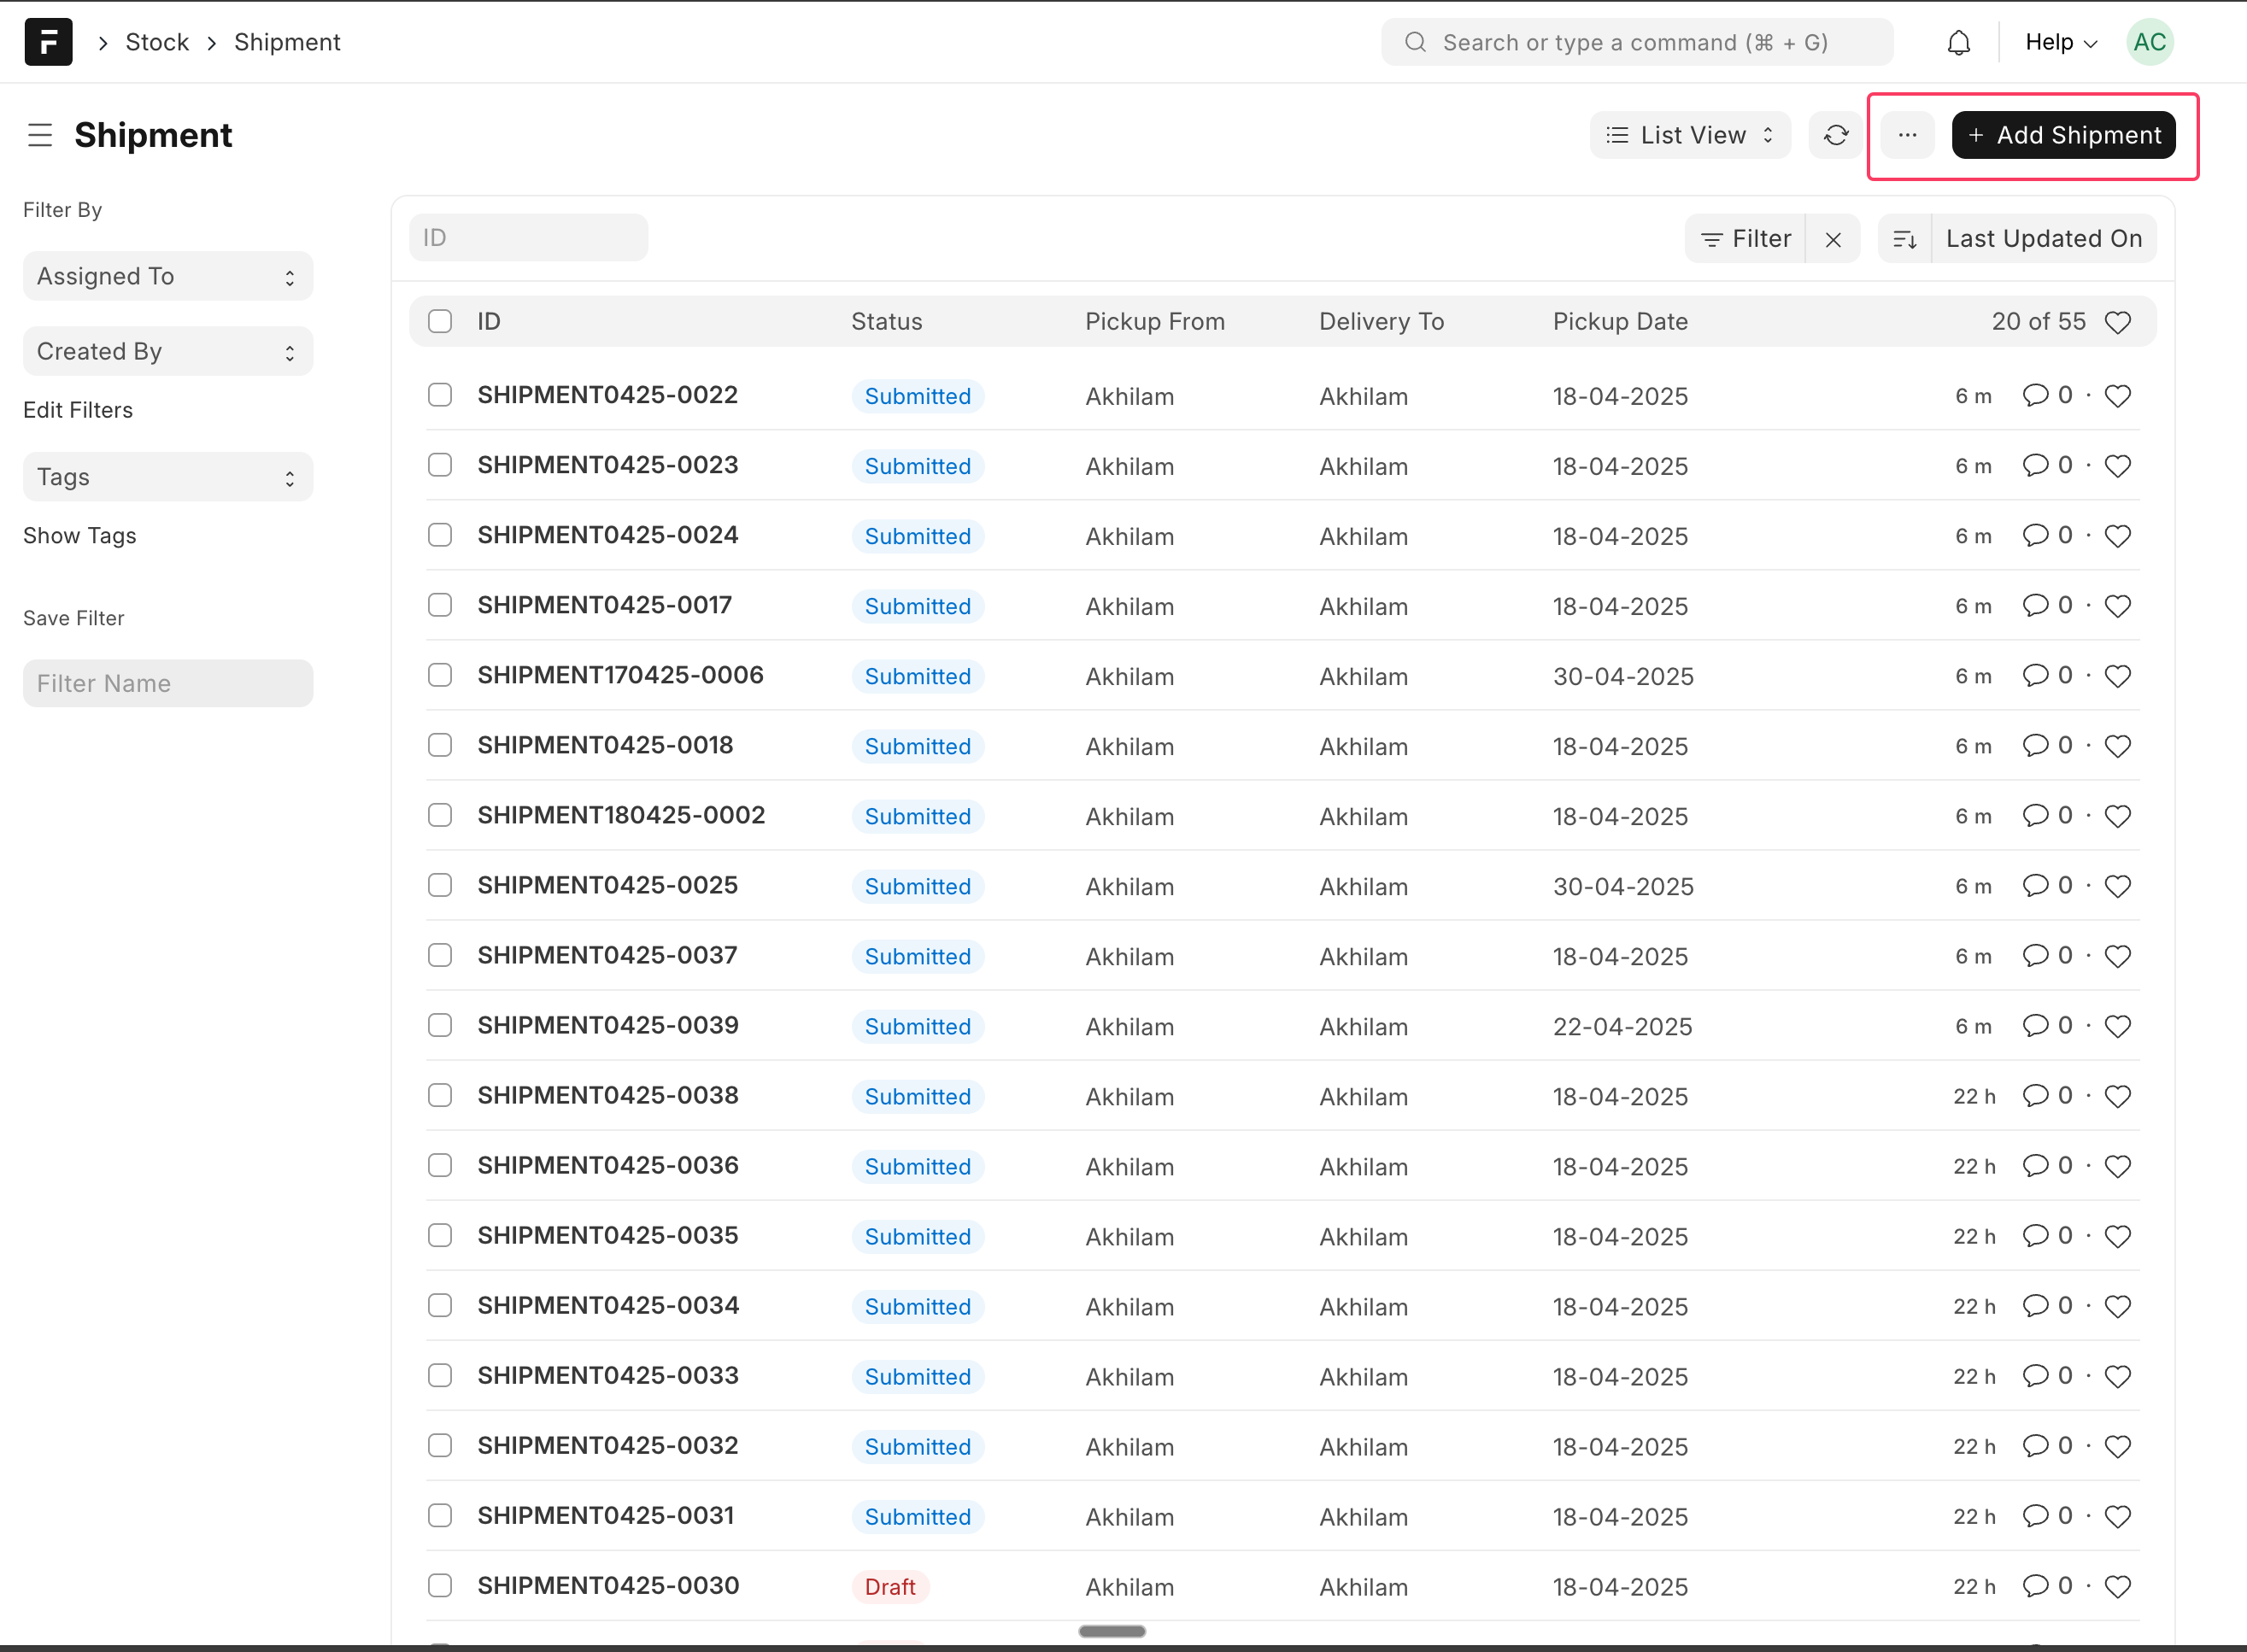

Fill the shipment form and Click on save.
-
Once you have done all the changes, click on submit and then click on create shipment.
-
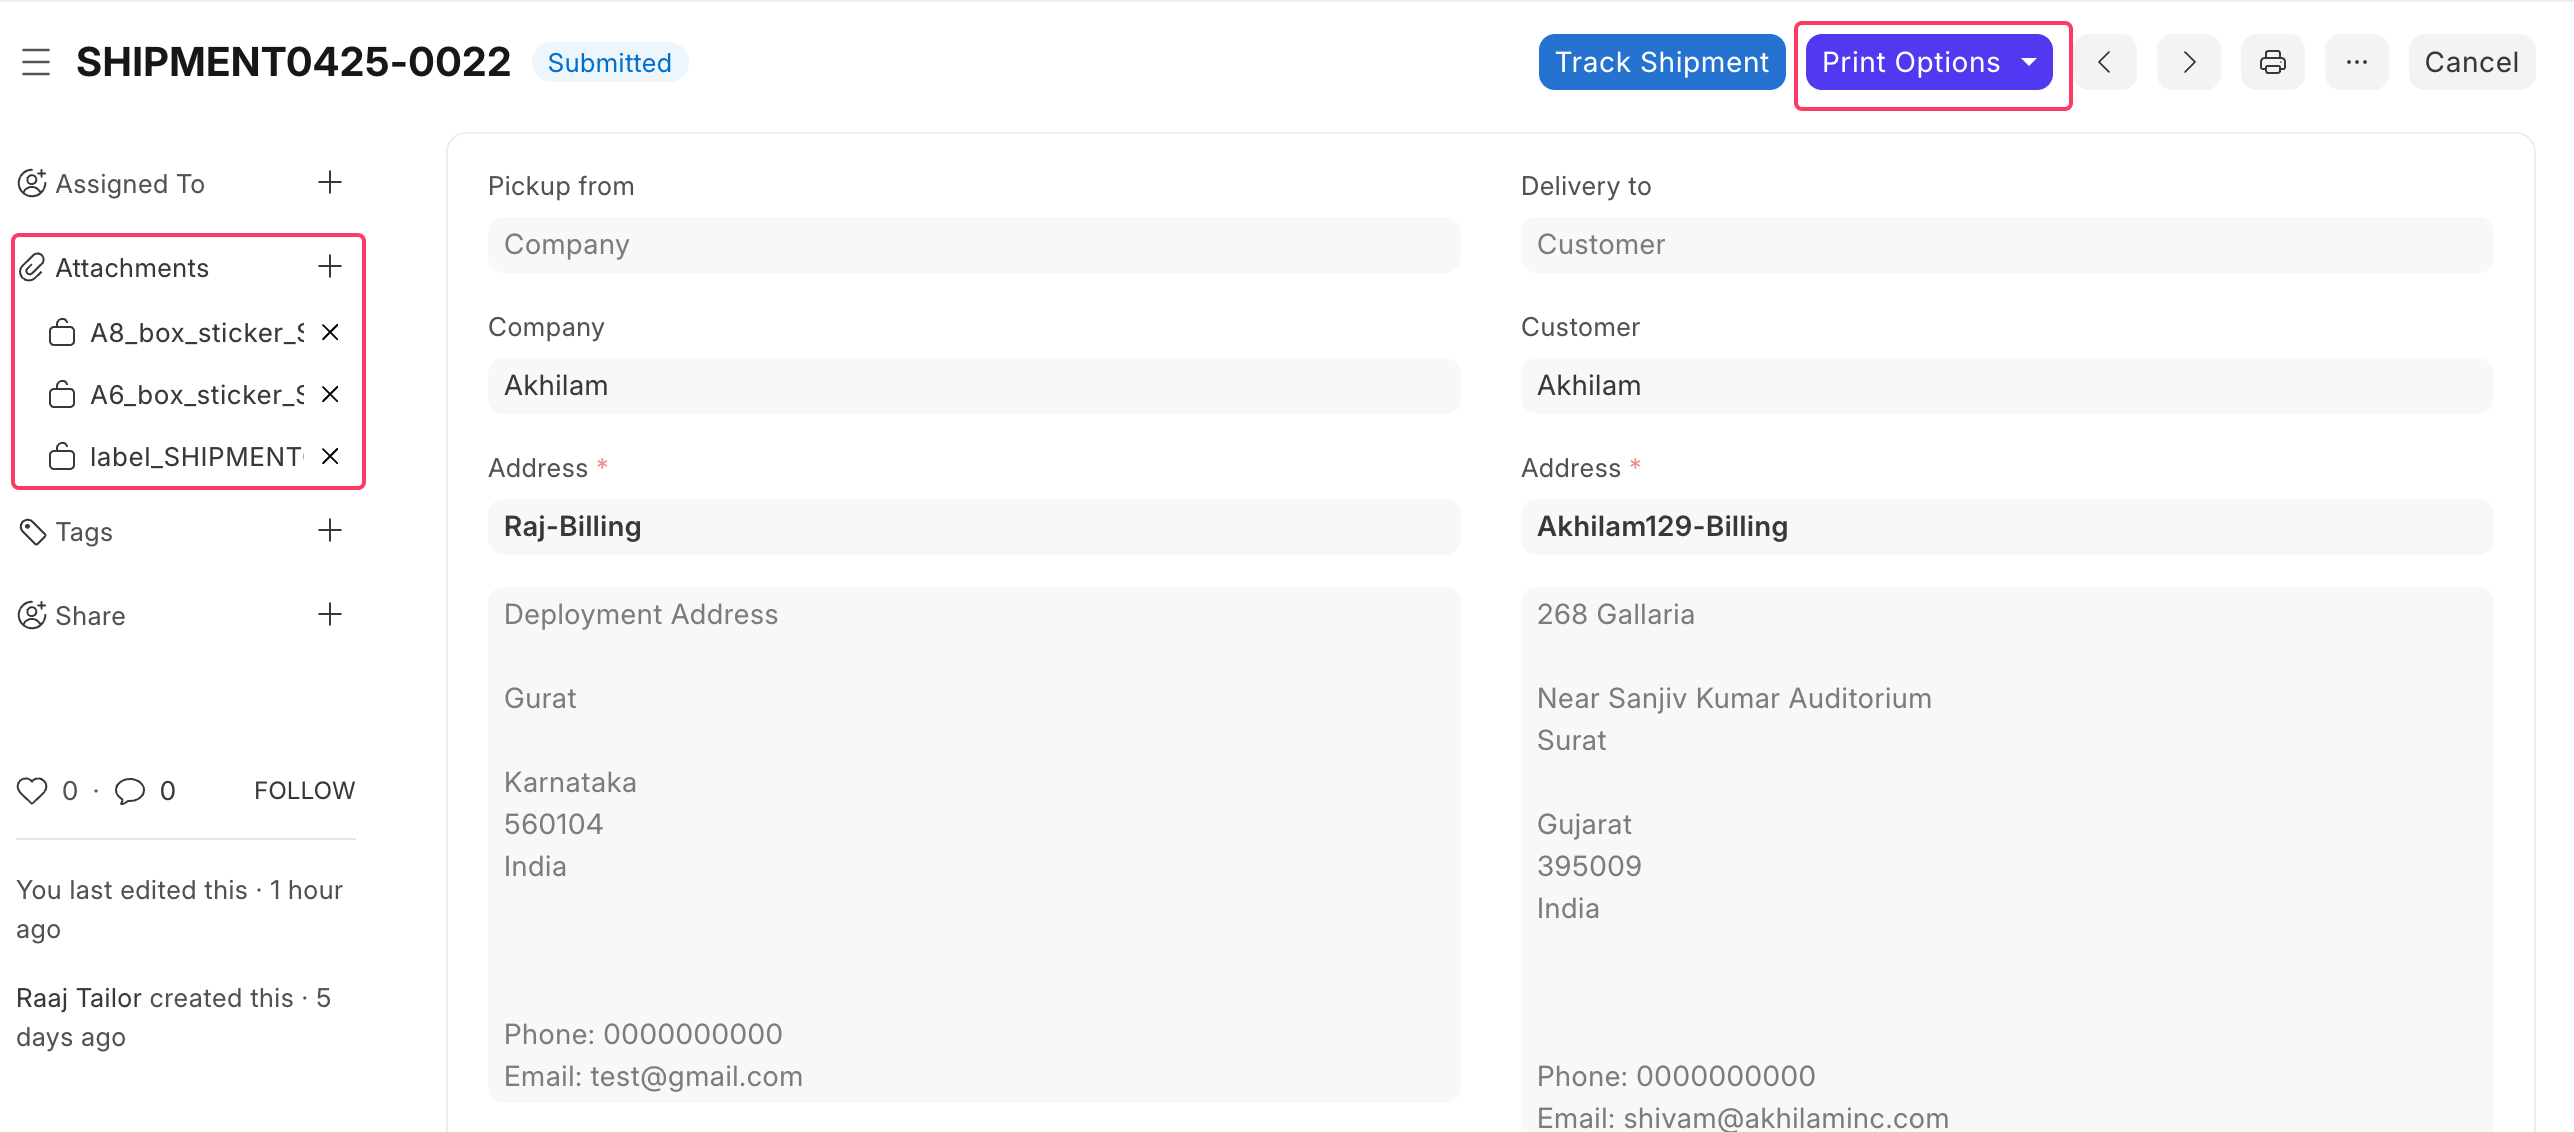
After the shipment is successfully created, click on Update Shipment to fetch the shipping waybill and box stickers. These will be available under attachments. You can click on Print Options drop down to print the relevant documents.
Guide to track shipments and fetch POD
-
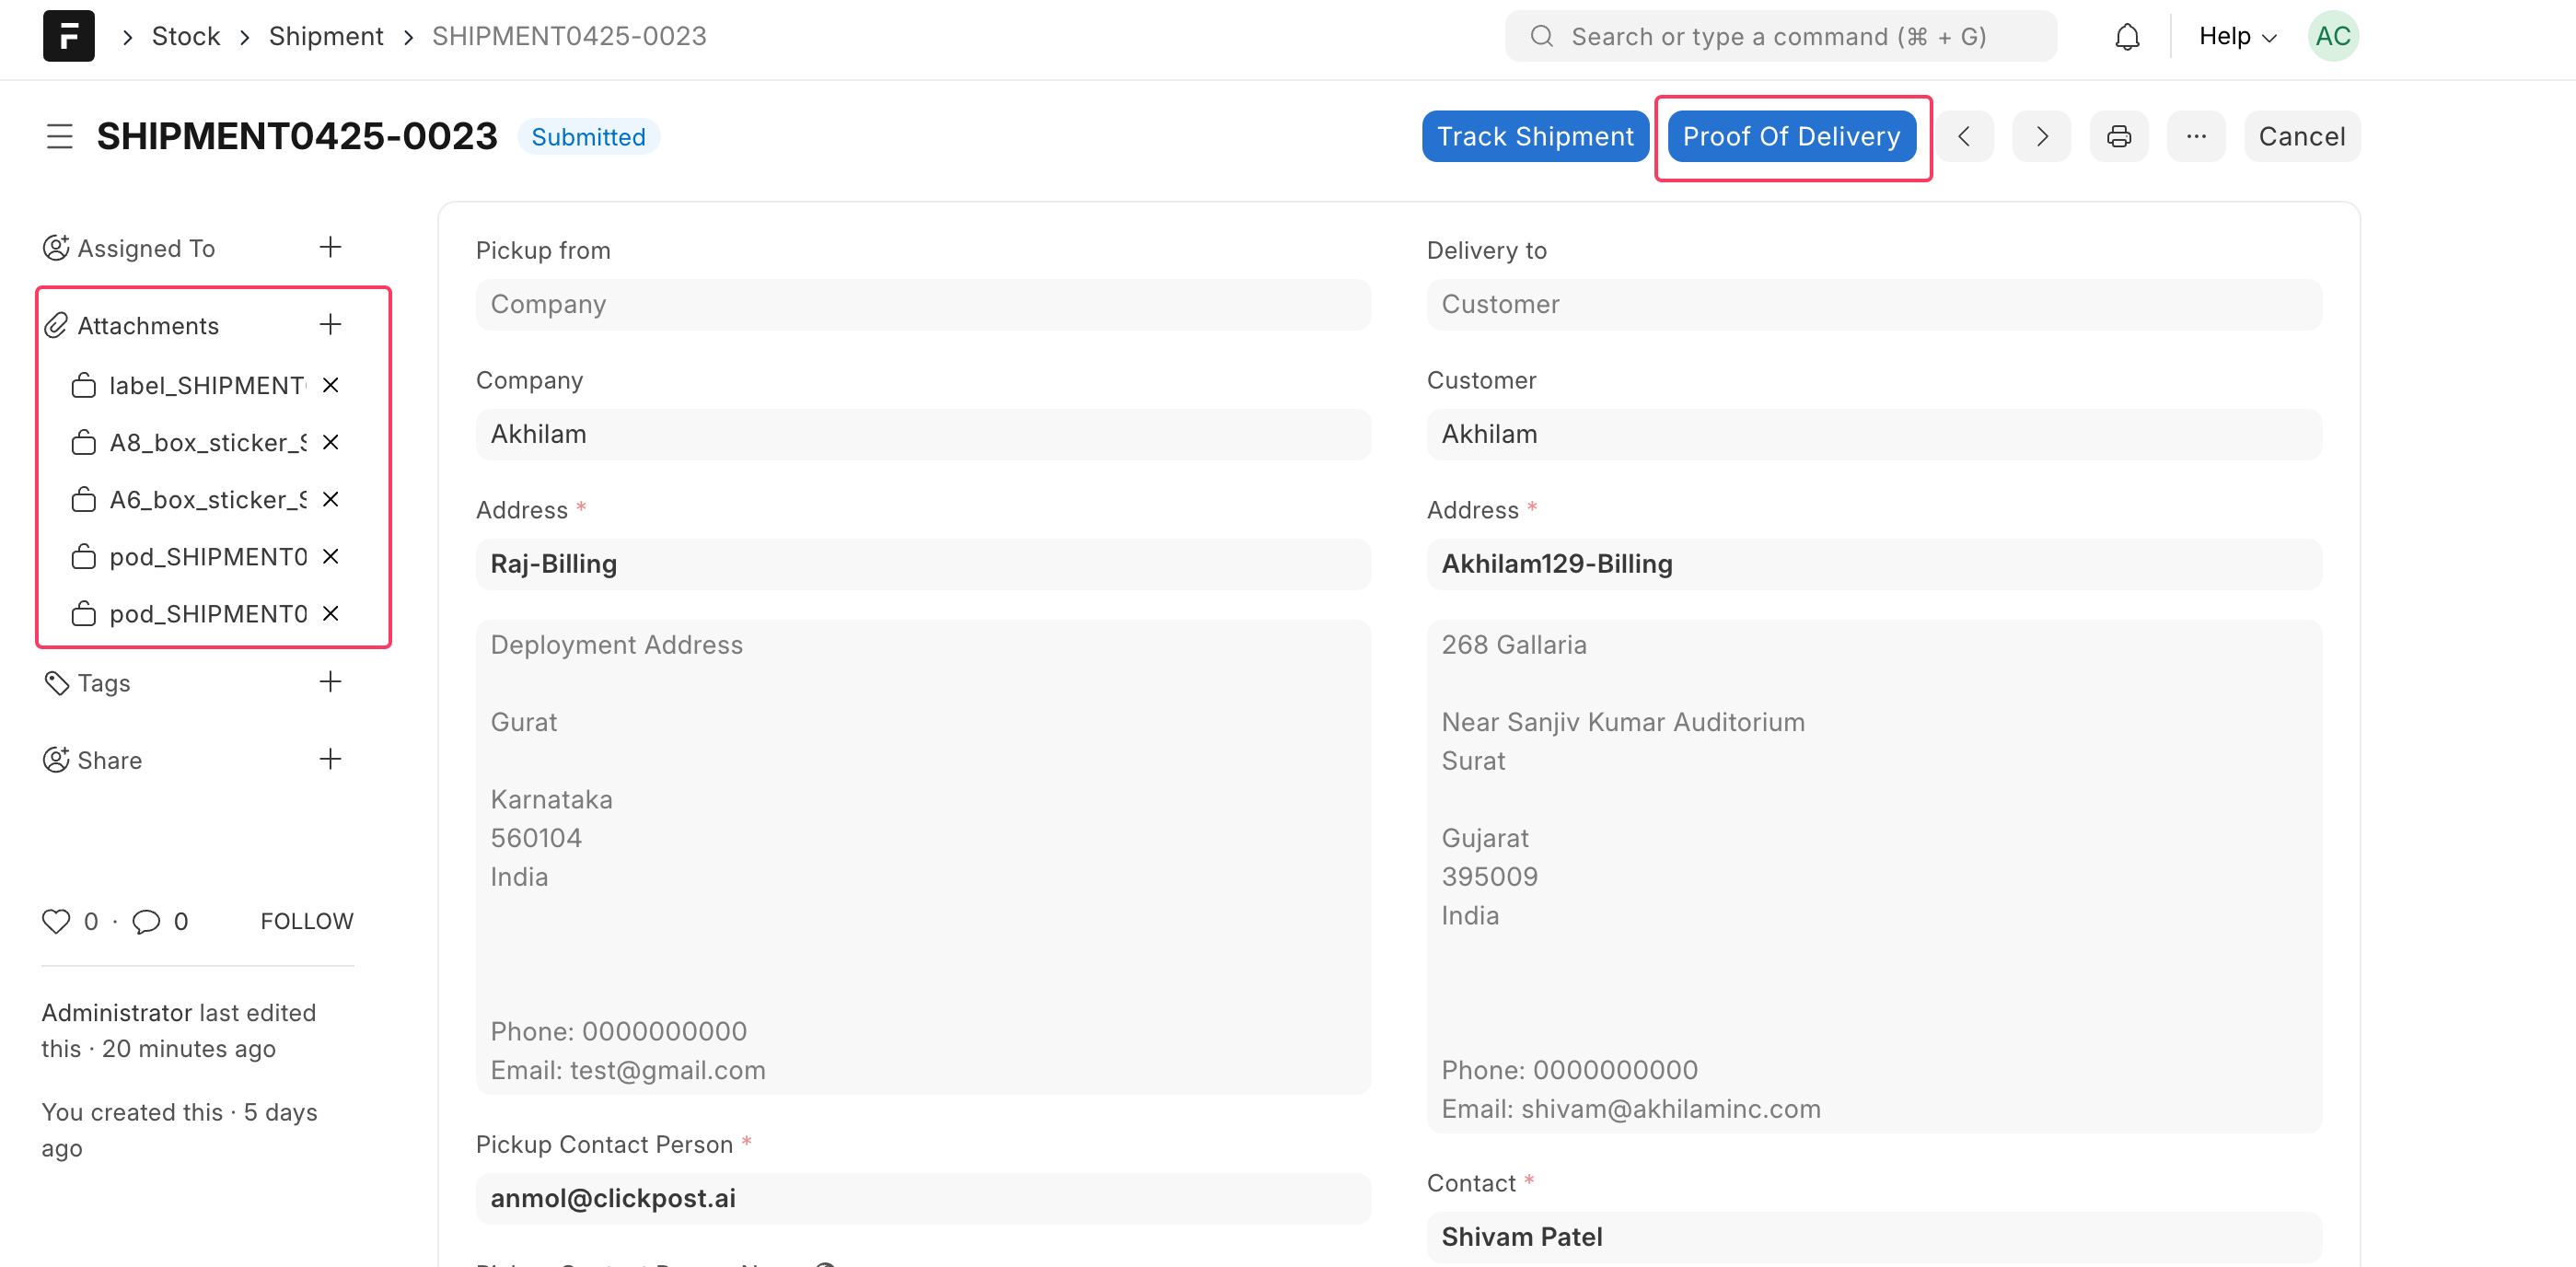
After the shipment is created click on Track Shipment button on each Shipment page to see the latest status of each shipment.
-
All the status updates will be visible under the Shipment Update table.
-

After the shipment is Delivered, you will be to fetch the POD. The fetched POD will be available under the Attachments section.
Guide to register AWB for tracking
If you are not doing shipment creation and just want to register and already created AWB for tracking, follow these steps-
- Go to awb registration under Transactions.
- Fill the AWB registration form. only 2 details are mandatory- AWB Number and Carrier partner and save the form.
- Once you have done all the changes, click on submit and then click on create AWB registration.
- The AWB will now be registered in ClickPost system and we will start tracking the shipments.
- The rest of the steps are same as the previous point.
Updated 7 months ago